Buy shovel Power and detector Luck before sprays. For most Gold farms, park on the Diamond Shovel (40 Dig Power, 50% Walk Speed). Push the Aquamarine Shovel (160 Dig Power) when hard digs or endgame rarity need raw Power. Max Luck on the Aquamarine Detector (x850). Park mid-late on the Crystal Detector (x110). Treat sprays as the last spend line.
This ranks every reported Gear Shop tool in Dig & Clean for treasure-loop value: dig speed, find quality, and clean-up only when dirt is the bottleneck. Ranks shop gear only. Not a first-hour tutorial, and not an Omega farm walkthrough. For the dig-clean-museum loop, use the Dig and Clean beginners guide. For why max Power and Luck matter on the rarest finds, use the Omega items guide.
Scope: all 48 shop tools, ranked inside each line (16 shovels, 15 detectors, 17 sprays and pressure washers). Cross-line rule stays simple: shovel + detector first; on detectors, Luck beats Range when you must choose.
Criteria (inside a line): primary role stat (Dig Power / Luck / Clean Power), secondary loop speed (Walk Speed / Range), cost efficiency and near-same-price traps, then stage fit (early free gear stays low; mid value parks can outrank raw late tools on Gold value).
Prices below are multi-guide consensus after Update 1.0. Shop tags can patch, so confirm the live Buy screen before you dump multi-million Gold.
| Line | S picks | What they win |
|---|---|---|
| Shovels | Aquamarine, Diamond | Max Power vs best farm Walk Speed |
| Detectors | Aquamarine, Malachite, Crystal | Luck ceiling plus mid-late value park |
| Sprays | Aquamarine Pressure Washer | Clean ceiling only after dig and Luck feel fine |
Best shovels in Dig and Clean (S–D)
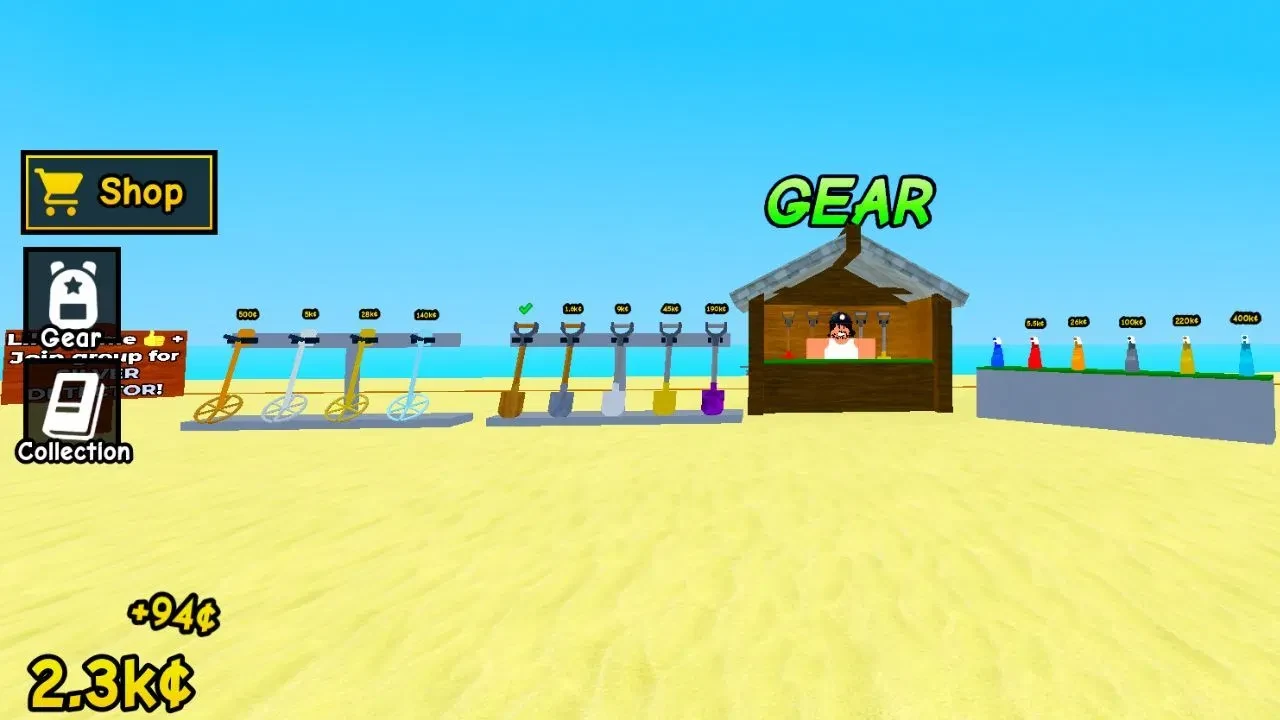
The Gear Shop sits toward the center of the map with unlimited stock. Walk up, use Buy, pay Gold. You start free on the Plastic Shovel, Rusty Detector, and Basic Spray Bottle.
Shovels set dig Power and Walk Speed. Power finishes hard digs and unlocks finds a weak blade cannot pull. Walk Speed is how fast you cover the dig area between glows. That is why Diamond and Aquamarine both sit in S for different jobs, and why Sandstone next to Diamond is a classic Gold trap.
S Tier
| Category | Gear | Cost | Key stats | Best for |
|---|---|---|---|---|
| Shovel | Aquamarine Shovel | 145,000,000 Gold | Dig Power 160, Walk 22% | Endgame Power ceiling; hard digs and Omega-gated finds |
| Shovel | Diamond Shovel | 9,200,000 Gold | Dig Power 40, Walk 50% | Best general farm shovel; highest Walk Speed in the shop |
| Detector | Aquamarine Detector | 92,000,000 Gold | Luck x850, Range 14.5 | Max Luck and Range; late rare hunting |
| Detector | Malachite Detector | 52,000,000 Gold | Luck x570, Range 14 | Last Luck bridge before Aquamarine |
| Detector | Crystal Detector | 6,400,000 Gold | Luck x110, Range 12 | Mid-late Luck park before multi-ten-million jumps |
| Spray | Aquamarine Pressure Washer | 125,000,000 Gold | Clean Power 625, Range 54 | Clean ceiling after shovel and detector are sorted |
Aquamarine Shovel is the Power king at 160. Take it when digs stall, when you are chasing the rarest pulls, or when a find simply needs more Power than Diamond offers.
Diamond Shovel is the everyday farm pick. 40 Power is enough for long stretches of the loop, and 50% Walk Speed is the top map coverage tool in the whole shop. If you only buy one serious shovel for Gold per hour, this is usually it.
Aquamarine Detector is the Luck ceiling at x850 (Range 14.5). Malachite Detector is the expensive bridge under it. Crystal Detector is the value S pick: far cheaper than the desert-themed Luck line, still a huge jump from early detectors, and a smart place to rest Gold while you save for Scarab and beyond.
Aquamarine Pressure Washer is the only spray that belongs in S. Clean Power 625 and Range 54 finish the wash step as fast as the shop allows. It still waits behind shovel and detector money unless cleaning is already your bottleneck.
A Tier
| Category | Gear | Cost | Key stats | Best for |
|---|---|---|---|---|
| Shovel | Malachite Shovel | 66,000,000 Gold | Dig Power 100, Walk 21% | Late Power bridge under Aquamarine |
| Shovel | Ruby Shovel | 2,900,000 Gold | Dig Power 26, Walk 45% | Strong mid farm before Diamond |
| Shovel | Carbon Shovel | 1,300,000 Gold | Dig Power 21, Walk 40% | Solid mid Power and Walk package |
| Detector | Scarab Detector | 23,000,000 Gold | Luck x380, Range 13.5 | High Luck step after Amber |
| Detector | Amber Detector | 12,000,000 Gold | Luck x250, Range 13 | Luck climb once Crystal is too low |
| Spray | Malachite Pressure Washer | 64,000,000 Gold | Clean Power 535, Range 52 | Near-top clean before Aquamarine |
| Spray | Scarab Pressure Washer | 36,000,000 Gold | Clean Power 459, Range 50 | Strong late clean without max cost |
A-tier is where mid and late ladders start to feel complete. Ruby and Carbon keep shovel Walk Speed high while Power climbs. Malachite Shovel is the last big Power step before Aquamarine if Diamond’s 40 Power starts failing digs.
On detectors, Amber and Scarab are the expensive Luck rungs after Crystal. Buy them when rare quality is the problem, not when you still need a stronger shovel.
Spray A-tier is late-game only. Scarab and Malachite pressure washers shave clean time once digs and Luck are already funded.
B Tier
| Category | Gear | Cost | Key stats | Best for |
|---|---|---|---|---|
| Shovel | Scarab Shovel | 30,000,000 Gold | Dig Power 78, Walk 20% | High Power, weak Walk for the price |
| Shovel | Cobalt Shovel | 650,000 Gold | Dig Power 17, Walk 35% | Mid progression milestone |
| Shovel | Amber Shovel | 15,000,000 Gold | Dig Power 62, Walk 19% | Power step on the desert line |
| Shovel | Titanium Shovel | 390,000 Gold | Dig Power 14, Walk 30% | Early-mid Power and Walk bump |
| Detector | Topaz Detector | 2,300,000 Gold | Luck x70, Range 11.5 | Pre-Crystal Luck climb |
| Detector | Sandstone Detector | 7,500,000 Gold | Luck x165, Range 12.5 | More Luck than Crystal, worse Gold efficiency for many players |
| Detector | Jade Detector | 1,000,000 Gold | Luck x44, Range 10.75 | Mid Luck before Topaz |
| Spray | Amber Pressure Washer | 23,000,000 Gold | Clean Power 394, Range 48 | Late clean step |
| Spray | Sandstone Pressure Washer | 14,500,000 Gold | Clean Power 335, Range 45 | Mid-late clean step |
| Spray | Garnet Pressure Washer | 5,200,000 Gold | Clean Power 285, Range 44 | First big pressure-washer jump |
B-tier tools work; they just ask more thought. Cobalt and Titanium are fair mid shovel stops. Scarab and Amber shovels add Power but sit near the slow Walk Speed band of the desert line, so they lose farm feel compared with Diamond’s 50% Walk.
Sandstone Detector beats Crystal on raw Luck (x165 vs x110) for a bit more Gold. Crystal still wins for many players as a parking spot because the next true Luck spikes cost tens of millions. If you already skipped Crystal and are buying straight up the late line, Sandstone is fine.
Spray B-tier is optional mid-late clean power. Skip micro hops here if you are saving for Scarab or Malachite washers, or for shovel and detector jumps that pay more per Gold.
C Tier
| Category | Gear | Cost | Key stats | Best for |
|---|---|---|---|---|
| Shovel | Gold Shovel | 45,000 Gold | Dig Power 7, Walk 20% | Early ladder only |
| Shovel | Sandstone Shovel | 9,000,000 Gold | Dig Power 50, Walk 18% | Power-only sidegrade next to Diamond |
| Shovel | Amethyst Shovel | 190,000 Gold | Dig Power 9, Walk 25% | Beginner milestone, then replace |
| Detector | Sapphire Detector | 530,000 Gold | Luck x28, Range 10 | Early-mid Luck step |
| Detector | Onyx Detector | 330,000 Gold | Luck x18, Range 9.5 | Early-mid Luck step |
| Detector | Platinum Detector | 140,000 Gold | Luck x12, Range 9 | Early Luck step |
| Spray | Opal Pressure Washer | 2,800,000 Gold | Clean Power 235, Range 42 | Mid clean when dirt piles up |
| Spray | Obsidian Pressure Washer | 1,600,000 Gold | Clean Power 196, Range 40 | Mid clean step |
| Spray | Metal Pressure Washer | 1,000,000 Gold | Clean Power 164, Range 38 | Early pressure-washer stop |
| Spray | Plastic Pressure Washer | 640,000 Gold | Clean Power 137, Range 36 | First washer after spray bottles |
Sandstone Shovel is the trap of the list. It costs about the same as Diamond (~9M Gold) for 50 Power and only 18% Walk. Diamond’s 50% Walk wins almost every general farm. Only grab Sandstone if a dig gate needs that extra Power over Diamond’s 40 and you cannot reach Amber or higher yet.
Amethyst and Gold shovels are honest early stops, not long-term holds. Same story for Platinum, Onyx, and Sapphire detectors: climb through them when Luck is starving, skip a rung when the next buy is close.
C-tier sprays help only when the Cleaning Station is the slow part of your loop. They are not a first dump for Gold.
D Tier
| Category | Gear | Cost | Key stats | Best for |
|---|---|---|---|---|
| Shovel | Metal Shovel | 9,000 Gold | Dig Power 5, Walk 15% | Very early upgrade |
| Shovel | Stone Shovel | 1,600 Gold | Dig Power 3, Walk 10% | Starter climb |
| Shovel | Wood Shovel | 500 Gold | Dig Power 2, Walk 5% | First paid shovel |
| Shovel | Plastic Shovel | Free | Dig Power 1, Walk 0% | Tutorial starter only |
| Detector | Gold Detector | 28,000 Gold | Luck x8, Range 8.5 | Early Luck |
| Detector | Silver Detector | 5,000 Gold | Luck x5, Range 8 | Early Luck |
| Detector | Copper Detector | 500 Gold | Luck x3, Range 7.5 | First paid detector |
| Detector | Rusty Detector | Free | Luck x1, Range 7 | Tutorial starter only |
| Spray | Turquoise Spray Bottle | 400,000 Gold | Clean Power 114, Range 34 | Late spray bottle only |
| Spray | Gold Spray Bottle | 220,000 Gold | Clean Power 101, Range 32 | Early spray climb |
| Spray | Steel Spray Bottle | 100,000 Gold | Clean Power 85, Range 30 | Early spray climb |
| Spray | Copper Spray Bottle | 26,000 Gold | Clean Power 71, Range 28 | Early spray climb |
| Spray | Plastic Spray Bottle | 5,500 Gold | Clean Power 57, Range 26 | Early spray climb |
| Spray | Rubber Spray Bottle | 900 Gold | Clean Power 43, Range 24 | First paid spray |
| Spray | Basic Spray Bottle | Free | Clean Power 34, Range 22 | Tutorial starter only |
D-tier is the free and early shelf. Use it to leave the starter kit, then stop over-buying tiny steps. Plastic / Rusty / Basic only exist so you can play the first loop. Spray bottles in this band are the easiest way to waste Gold while digs still fail or Luck is still x1 to x8.
When two upgrades cost similar Gold, jump to the one that fixes your real bottleneck: failed digs (shovel Power), weak glow quality (detector Luck), or a dirty backlog (spray). Skip micro-steps when the next letter jump is within reach, and re-check the Gear Shop after updates before you trust any multi-million price from memory.