NPCs and mobs are the people and creatures you meet while sailing: survivors to rescue, traders who open gear paths, and hostiles that guard islands, board your raft at night, or hunt you in open water. Cards group them by who helps you and which fight family you are walking into, not by boss-tier encounters.
View
section
Friendly NPCs
Rescue, trade, and quest characters that cannot be damaged. Free Survivors for Day Multiplier and base automation, unlock Fisherman early for fishing and boat progress, spend Doubloons at MukuMuku by day, and use Glorbus plus Ice penguins for later food and boss-path unlocks.
Captain Stephen
One of three named Survivors with the same rescue payoff. Free him on his Survivor Island for Day Multiplier and long-run base automation.
- Alignment
- Friendly
- Role
- Rescue
- Where found
- One of three Survivor Islands each run (radio-marked)
- How to interact
- Clear island pressure, walk up, and interact to rescue. He teleports to your base and starts working.
- Threat notes
- Cannot be damaged. Island guards (often Ghost Pirates) must be cleared before a safe rescue.
- Drops / rewards
- Each rescued Survivor adds +1 Day Multiplier and automates base machines and material processing.
- Related
- Survivor Islands, radio map marks, base automation
Doctor Madelaine
One of three named Survivors with the same rescue payoff. Free her on her Survivor Island for Day Multiplier and long-run base automation.
- Alignment
- Friendly
- Role
- Rescue
- Where found
- One of three Survivor Islands each run (radio-marked)
- How to interact
- Clear island pressure, walk up, and interact to rescue. She teleports to your base and starts working.
- Threat notes
- Cannot be damaged. Island guards (often Ghost Pirates) must be cleared before a safe rescue.
- Drops / rewards
- Each rescued Survivor adds +1 Day Multiplier and automates base machines and material processing.
- Related
- Survivor Islands, radio map marks, base automation
Professor Erik
One of three named Survivors with the same rescue payoff. Free him on his Survivor Island for Day Multiplier and long-run base automation.
- Alignment
- Friendly
- Role
- Rescue
- Where found
- One of three Survivor Islands each run (radio-marked)
- How to interact
- Clear island pressure, walk up, and interact to rescue. He teleports to your base and starts working.
- Threat notes
- Cannot be damaged. Island guards (often Ghost Pirates) must be cleared before a safe rescue.
- Drops / rewards
- Each rescued Survivor adds +1 Day Multiplier and automates base machines and material processing.
- Related
- Survivor Islands, radio map marks, base automation
Fisherman
Top early priority. Free him for fishing gear and the Dinghy path, then climb the fixed fish-for-loot trade ladder when you have food to spare.
- Alignment
- Friendly
- Role
- Rescue trader
- Where found
- Fisherman Island, the large landmass next to the starting raft
- How to interact
- Defeat Buku guards on the island, then interact to free him. After rescue, trade cooked fish dishes for gear in a fixed order.
- Threat notes
- Cannot be damaged. Early Buku warriors guard the island approach.
- Drops / rewards
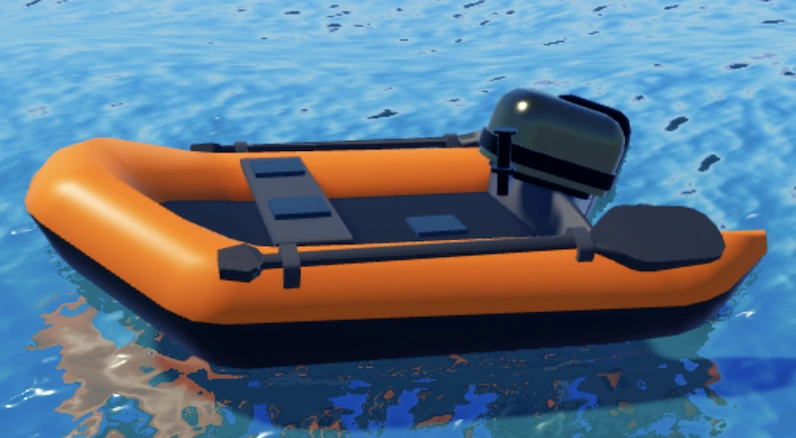
- Rescue grants a Fishing Rod for every player and unlocks a hut chest that holds a Dinghy. Trades include Crab Trap, Machete, Good Sack, Flintlock, Chowder, Flare, Doubloons, Blunderbuss, Giant Sack, and Swordfish Sword for specific fish dishes.
- Related
- Fisherman Island, fishing progression, early boat and tool unlocks
MukuMuku Merchant
Daytime Doubloons trader with one-time stock per player. Plan medkits, Pearls, and key gear buys instead of impulse spending.
- Alignment
- Friendly
- Role
- Traveling trader
- Where found
- Sails up beside your base during the day and leaves at night
- How to interact
- Spend Doubloons at his ship shop. Stock is limited per player and purchased lines do not restock on later visits.
- Threat notes
- Cannot be damaged. Missing him at night means waiting for the next daytime visit.
- Drops / rewards
- Doubloons-only shop with limited stock. High-value leads include Medkits (revive), Pearls, Rifle, Ghost Sack, plus boats, weapons, building materials, and Corrupt Shards.
- Related
- Doubloons economy, revives, Pearl spending path outside Companion Shop
Glorbus
Alien Island food NPC. Trade a large food dump for the Alien Food Machine, then decide carefully where to place it so Survivors do not auto-feed premium meals.
- Alignment
- Friendly
- Role
- Quest trader
- Where found
- One of the Alien Islands
- How to interact
- Feed him 20 food items of any kind. He then rewards the Alien Food Machine.
- Threat notes
- Cannot be damaged. Reach him only after Alien Island combat pressure is under control.
- Drops / rewards
- Alien Food Machine turns five food items into Alien Soup, which restores more hunger than regular Chowder.
- Related
- Alien Islands, food crafting. Placed machines can be auto-fed by rescued Survivors.
Lost Penguin
Ice Biome collectibles. Return all 20 to the Penguin Mother to open the Yeti route. Separate from the Companion Shop penguin pet.
- Alignment
- Friendly
- Role
- Collectible
- Where found
- Scattered across Ice Region islands when the map has an Ice Biome (20 total)
- How to interact
- Find each Lost Penguin on ice islands and return it to the Penguin Mother.
- Threat notes
- Cannot be damaged. Ice Region wildlife and travel risk are the real danger while collecting.
- Drops / rewards
- Progress toward the full Ice penguin hand-in that unlocks the Yeti boss path.
- Related
- Ice Region, Penguin Mother, Yeti boss (bosses collection). Not the Companion Shop Penguin pet.
Penguin Mother
Turn-in NPC for the Ice penguin rescue set. Finish all deliveries to unlock Yeti; do not treat her as a combat target.
- Alignment
- Friendly
- Role
- Quest turn-in
- Where found
- Ice Region when the map spawns with an Ice Biome
- How to interact
- Deliver all 20 Lost Penguins to her. Completing the set spawns the Yeti boss path.
- Threat notes
- Cannot be damaged.
- Drops / rewards
- Completing deliveries triggers the Yeti encounter path rather than a direct loot drop here.
- Related
- Ice Region penguin quest. Yeti fight details live on the bosses collection.
section
Ghost Pirates
Green transparent pirates for the first-night raid, pirate islands, strongholds, and galleon boards. Farm Essences and raid Glue. Ghost Pirate Captain is a regular dual-sword elite, not the named Greenbeard or Ghost Galleon boss entries.
Ghost Pirate
Core ghost-pirate melee unit and first-night raid filler. Farm them for Essences and Glue, and clear them before boarding harder pirate structures.
- Alignment
- Hostile
- Role
- Melee
- Where found
- Pirate islands, cauldron treasure islands, Ghost Galleon boards, pirate raids, pirate strongholds
- How to interact
- Fight with melee or ranged weapons. Collect bodies when you need ghost-pirate crafting inputs.
- Threat notes
- Transparent green sword pirates that swarm early, including the guaranteed first-night raid. Prefer range when many spawn at once.
- Drops / rewards
- Essences for potions are a common lead. Night raids also grant Glue per pirate kill for crafting table use.
- Related
- Ghost pirate night raids, strongholds, Ghost Galleon content. Not Captain Greenbeard or the Galleon boss card.
Ghost Pirate Gunner
Ranged ghost-pirate variant. Strafe their shots, then clear them before they shred raft walls or your health during raids.
- Alignment
- Hostile
- Role
- Ranged
- Where found
- Pirate islands, Ghost Galleon, pirate raids, pirate strongholds
- How to interact
- Keep moving while closing or answering with your own ranged weapons.
- Threat notes
- Transparent green rifle or gun pirates. Bullets punish standing still more than pure melee ghosts do.
- Drops / rewards
- Same pirate-group leads as other ghosts: Essences and raid Glue when killed during raids.
- Related
- Ghost pirate raids and ship boards
Ghost Bombardier
AoE ghost-pirate variant on galleon and late pirate raids. Leave the telegraphed blast circle, then finish them with ranged fire.
- Alignment
- Hostile
- Role
- AoE
- Where found
- Ghost Galleon and higher-day pirate raids
- How to interact
- Watch the ground marker, step out of the blast zone, then punish after the shot.
- Threat notes
- Transparent green boomstick pirates that telegraph an AoE impact zone before firing.
- Drops / rewards
- Pirate-group Essences and raid Glue leads.
- Related
- High-day pirate raids, Ghost Galleon boarding fights
Ghost Pirate Captain
Elite dual-sword ghost pirate on late raids and strongholds. Treat as a tough regular unit, not the named Captain Greenbeard boss entry.
- Alignment
- Hostile
- Role
- Elite melee
- Where found
- High-day pirate raids and pirate strongholds
- How to interact
- Prefer ranged weapons and extra healing. Do not confuse this regular elite with the named Greenbeard boss.
- Threat notes
- Larger dual-sword green ghost with more HP and damage than standard pirates.
- Drops / rewards
- Pirate-group Essences and raid Glue leads. Boss-grade cutlass rewards belong to the separate Greenbeard / Galleon boss path.
- Related
- Pirate raids and strongholds. Distinct from Captain Greenbeard and Ghost Galleon boss cards.
section
Buku Tribe
Early-island and light-raid humanoids with swords, bows, spears, and a shielded elite. Lower pressure than late pirates or corruption. Buku Poku is the spear variant with the Poku Poku weapon lead.
Buku Buku
Default Buku Tribe melee fighter and early-island staple. Clear them for island access and light raid value.
- Alignment
- Hostile
- Role
- Melee
- Where found
- Many early islands and Buku raids (can appear with little warning, even by day)
- How to interact
- Basic melee clear. Safe to farm early for chests and island control.
- Threat notes
- Masked humanoids in yellow-blue gear with swords. Low threat compared with pirates and later elites.
- Drops / rewards
- Early island chests and general loot pressure. Buku raids are low-damage skirmishes.
- Related
- Early island clears, Buku night or day raids, Fisherman Island guards
Buku Boku
Bow-using Buku variant. Prioritize them when they sit behind melee tribe members on early islands and raids.
- Alignment
- Hostile
- Role
- Ranged
- Where found
- Buku-held islands and Buku raids
- How to interact
- Close distance or answer with guns so archers cannot free-fire from cover.
- Threat notes
- Masked humanoids in green-blue gear with bows.
- Drops / rewards
- Tribe loot and chests. Raid sources note a possible sword drop from Boku-named fighters.
- Related
- Buku raids and early island combat
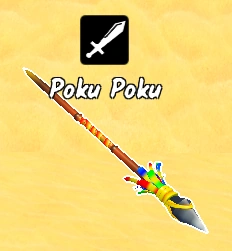
Buku Poku
Spear Buku variant with the Poku Poku weapon lead. Worth killing on sight when you are still building a mid-run melee kit.
- Alignment
- Hostile
- Role
- Spear
- Where found
- Buku-held islands and Buku raids
- How to interact
- Fight like other tribe melee units, then check the body for the rare weapon lead.
- Threat notes
- Fish-masked humanoids in red-yellow gear with spears.
- Drops / rewards
- Chance to drop the Poku Poku weapon.
- Related
- Buku Tribe loot path, weapons progression
Buku Toku
Shielded Buku elite on harder raids. Higher durability than basic Buku Buku, still lower overall pressure than late pirates or corruption packs.
- Alignment
- Hostile
- Role
- Shield spear
- Where found
- High-day Buku raids
- How to interact
- Expect a tankier tribe fighter. Break them with sustained damage rather than ignoring them for softer targets.
- Threat notes
- Fish-masked red-yellow fighters with shield and spear. Appear more often on tougher Buku waves.
- Drops / rewards
- Tribe raid loot. No unique guaranteed drop published beyond standard Buku combat rewards.
- Related
- High-day Buku raids
section
Rival Survivors
Hostile humans on Rival Rigs and Radio Towers. Melee and gun variants defend high-value platforms; clear the full structure for weapons, Doubloon chests, and armor leads.
Rival Survivor (Melee)
Melee rival defender on rigs and radio towers. Expect strong platform loot after the clear, not a free early farm.
- Alignment
- Hostile
- Role
- Melee
- Where found
- Rival Rigs and Radio Tower islands
- How to interact
- Clear aggressively but with healing ready. Loot the platform after the fight.
- Threat notes
- Hostile humans with swords or knives. Loadout can vary by location (for example ghost cutlass on larger rigs).
- Drops / rewards
- High-tier weapons, Doubloon chests, and armor leads from cleared rigs and towers.
- Related
- Rival Rigs set, Radio Towers chain
Rival Survivor (Ranged)
Gun rival defender on the same structures as melee rivals. Keep moving while you clear towers and the three-rig objective set.
- Alignment
- Hostile
- Role
- Ranged
- Where found
- Rival Rigs and Radio Tower islands
- How to interact
- Stay mobile, use cover, and answer with ranged weapons when possible.
- Threat notes
- Hostile humans with guns. Standing still on open platforms is punished hard.
- Drops / rewards
- Same high-tier weapons, Doubloon chests, and armor leads as melee rivals after a full clear.
- Related
- Rival Rigs set, Radio Towers chain
section
Corrupt Creatures
Cargo Ship and corrupted-room enemies with high HP: military humanoids, a chest mimic, and floating jellies. Bring real mid-to-late weapons and clear rooms carefully instead of rushing.
Corrupt Crewmate
Basic corruption melee unit in cargo and corrupted rooms. Expect tankier fights than Buku or early pirates.
- Alignment
- Hostile
- Role
- Melee
- Where found
- Corrupted structures such as the Cargo Ship
- How to interact
- Bring mid-to-late weapons and healing. Clear rooms carefully instead of rushing.
- Threat notes
- Purple-transparent military humanoids with axes. High HP and hard hits compared with early islands.
- Drops / rewards
- Corruption weapon leads such as Saber, Revolver, and Corrupt Minigun from the broader corrupt set.
- Related
- Corruption / Cargo Ship content
Corrupt Officer
Ranged corruption officer. Drop them early in mixed rooms so crewmates cannot pin you under gunfire.
- Alignment
- Hostile
- Role
- Ranged
- Where found
- Corrupted structures such as the Cargo Ship
- How to interact
- Prioritize while moving so gunfire does not stack with melee crewmates.
- Threat notes
- Purple-transparent military gunners mixed into corruption packs.
- Drops / rewards
- Corruption weapon leads shared with the corrupt set.
- Related
- Corruption / Cargo Ship content
Corrupt Saber Yielder
Saber-wielding corruption elite. One of the reasons cargo clears need real weapons and healing, not starter tools.
- Alignment
- Hostile
- Role
- Elite melee
- Where found
- Corrupted structures such as the Cargo Ship
- How to interact
- Keep distance if possible and do not trade hits carelessly.
- Threat notes
- Purple humanoid with a laser saber. Higher pressure melee elite inside corruption spaces.
- Drops / rewards
- Saber-class corruption loot is a soft lead from this family.
- Related
- Corruption / Cargo Ship content
Corrupt Minigunner
Heavy gun corruption elite. Treat as a priority target when clearing cargo rooms with limited cover.
- Alignment
- Hostile
- Role
- Heavy ranged
- Where found
- Corrupted structures such as the Cargo Ship
- How to interact
- Break line of sight, peek damage, and avoid long open corridors.
- Threat notes
- Purple humanoid in yellow gear with a minigun. Sustained ranged pressure.
- Drops / rewards
- Corrupt Minigun is a soft lead from the corruption enemy family.
- Related
- Corruption / Cargo Ship content
Chest Mimic
Fake chest that fights back. Open cargo loot carefully and keep a weapon ready on any odd chest model.
- Alignment
- Hostile
- Role
- Ambush
- Where found
- Corrupted structures such as the Cargo Ship
- How to interact
- Approach suspicious chests ready to fight instead of assuming free loot.
- Threat notes
- Chest body with an eye and teeth. Ambush threat mixed into corruption loot routes.
- Drops / rewards
- Corruption combat loot after the fake chest is defeated.
- Related
- Corruption / Cargo Ship content
Red Jellyfish
Red floating jelly inside corruption spaces. Clear them so they do not chip you while you handle humanoid corrupt packs.
- Alignment
- Hostile
- Role
- Ambient hostile
- Where found
- Corrupted rooms and related corruption spaces
- How to interact
- Clear with mid-range weapons. Avoid walking through packs of jellies while low on health.
- Threat notes
- Human-sized red jelly that floats slightly above ground.
- Drops / rewards
- Corruption room combat loot. No unique public drop table isolated for color variants.
- Related
- Corruption / Cargo Ship content
Blue Jellyfish
Blue floating jelly variant in the same corruption rooms as the red jelly. Same job: clear space before the humanoid elites stack damage.
- Alignment
- Hostile
- Role
- Ambient hostile
- Where found
- Corrupted rooms and related corruption spaces
- How to interact
- Clear with mid-range weapons alongside red jellies and humanoid corrupt packs.
- Threat notes
- Human-sized blue jelly that floats slightly above ground.
- Drops / rewards
- Corruption room combat loot. No unique public drop table isolated for color variants.
- Related
- Corruption / Cargo Ship content
section
Aliens
UFO raid waves and Alien Island defenders. Raid clears can grant an Alien Transponder for island marks; island packs and Alien Warriors hit much harder. Alien Warrior is the world mob, not the player class with the same name.
Alien
Base alien unit for raids and Alien Islands. Raid clears open the Transponder route; island packs are among the harder regular hostiles.
- Alignment
- Hostile
- Role
- Raid and island
- Where found
- Alien raids on your base and Alien Islands
- How to interact
- Clear raid waves for the Transponder path, then fight island aliens with strong mid-to-late gear.
- Threat notes
- Small green aliens beam down from UFOs in raids. Island packs hit harder and should not be rushed undergeared.
- Drops / rewards
- Clearing an alien raid can drop an Alien Transponder used to locate Alien Islands. Island fights can lead to Energy Sword drops.
- Related
- Alien raids, Alien Transponder, Alien Islands, Glorbus. Not a player class.
Alien Warrior
Elite alien world enemy on later raids and islands. Separate from the Alien Warrior player class with the same name.
- Alignment
- Hostile
- Role
- Elite
- Where found
- Later alien raids and Alien Islands
- How to interact
- Keep distance, use cover, and do not treat late alien raids like the weak early UFO waves.
- Threat notes
- Tougher alien fighters that mix into higher-day raids and island defenses. Damage can approach ghost-pirate pressure.
- Drops / rewards
- Alien combat loot and Energy Sword soft leads from the alien enemy family.
- Related
- Alien raids and islands. Name collides with the Alien Warrior class loadout; this card is the world mob only.
section
Sea Monsters
Open-ocean threats around boats: sharks, salamanders, and night-chasing Angler Fish. Prefer evasion and bonfire upkeep early; these are survival checks more than stable loot farms.
Shark
Open-sea predator that punishes bad boat fights. Prefer evasion early, and do not confuse this world shark with the Companion Shop pet.
- Alignment
- Hostile
- Role
- Open sea
- Where found
- Open ocean around boats and islands
- How to interact
- Avoid unnecessary water fights. Outrun when undergeared; only fight with real weapons if you must.
- Threat notes
- Can knock you off boats and deal instant-feeling water damage. Riskier than land Buku packs for early rafts.
- Drops / rewards
- No stable public per-kill table listed in primary guides. Survival is the main reward early.
- Related
- Open-sea travel. Not the Companion Shop Shark pet.
Salamander
Rarer open-sea monster alongside sharks and angler fish. Avoid casual fights while your raft is still fragile.
- Alignment
- Hostile
- Role
- Open sea
- Where found
- Open ocean
- How to interact
- Treat as a rare sea threat. Outrun unless you are geared for open-water combat.
- Threat notes
- Sea monster that can knock players off boats and punish exposed swims.
- Drops / rewards
- No stable public per-kill table listed in primary guides.
- Related
- Open-sea travel. Not the Companion Shop Salamander pet.
Angler Fish
Top open-sea chase threat, especially when night lights fail. Outrun and secure the bonfire rather than farming it for loot.
- Alignment
- Hostile
- Role
- Night sea threat
- Where found
- Open ocean, especially dangerous at night if the bonfire is out
- How to interact
- Keep the bonfire lit and avoid night chases when possible. Do not bait it without a retreat plan.
- Threat notes
- Community guides flag it as one of the most dangerous sea threats, able to chase hard when night defenses fail.
- Drops / rewards
- No stable public per-kill table listed in primary guides. Keeping the run alive is the real reward.
- Related
- Night survival, bonfire upkeep, open-sea travel
section
Biome Wildlife
Land animals on Ice and volcano routes (wolves, polar bears, magma snails). Harder than early Buku packs. Fire Golems and other named magma bosses stay on the bosses collection.
Wolf
Ice Region hostile animal. Expect harder fights than early islands while you collect penguins or push toward Yeti prep.
- Alignment
- Hostile
- Role
- Ice wildlife
- Where found
- Ice Region islands when the map has an ice biome
- How to interact
- Fight only with mid-to-late weapons and healing. Do not treat ice wildlife like early Buku packs.
- Threat notes
- Among the tougher land animals in cold regions.
- Drops / rewards
- No isolated public drop table beyond general Ice Region combat loot.
- Related
- Ice Region exploration. Distinct from the Companion Shop Arctic Wolf pet.
Polar Bear
Heavy Ice Region animal threat. Clear carefully while hunting Lost Penguins; this is not a Companion Shop pet card.
- Alignment
- Hostile
- Role
- Ice wildlife
- Where found
- Ice Region islands when the map has an ice biome
- How to interact
- Keep distance, use strong weapons, and avoid multi-bear pulls.
- Threat notes
- High-pressure ice wildlife among the toughest non-boss land fights.
- Drops / rewards
- No isolated public drop table beyond general Ice Region combat loot.
- Related
- Ice Region exploration. Distinct from the Companion Shop Polar Bear pet.
Magma Snail
Volcano-region wildlife, not the Fire Golems mini-boss trio. Clear only with real mid-run gear while traveling the magma route.
- Alignment
- Hostile
- Role
- Volcano wildlife
- Where found
- Volcano / magma biome spaces
- How to interact
- Engage only when prepared for volcano-region combat pressure.
- Threat notes
- Biome-specific magma wildlife listed among the harder non-boss land threats.
- Drops / rewards
- No isolated public drop table beyond general volcano-region combat loot.
- Related
- Volcano Region. Fire Golems and Lord of Lava stay on the bosses collection. Distinct from Companion Shop Lava Snail.
section
Passive Wildlife
One-shot Seagulls and Crows in low sky. Harpoon them for already-cooked bird meat when food is tight. Not hostile and not the Companion Shop bird pets.
Seagull
Passive sky bird you can harpoon for quick cooked food. Not hostile and not the Companion Shop seagull.
- Alignment
- Passive
- Role
- Food bird
- Where found
- Low sky around the map, reachable with harpoon or guns
- How to interact
- Harpoon or shoot for a one-shot kill. Harpooning can drag cooked bird meat back to you.
- Threat notes
- Non-hostile. Lowest combat threat in the game.
- Drops / rewards
- Cooked bird food on death (already cooked).
- Related
- Emergency food. Distinct from the Companion Shop Seagull pet.
Crow
Passive sky bird twin to the seagull for emergency cooked food. Not hostile and not the Companion Shop crow.
- Alignment
- Passive
- Role
- Food bird
- Where found
- Low sky around the map, reachable with harpoon or guns
- How to interact
- Harpoon or shoot for a one-shot kill. Harpooning can drag cooked bird meat back to you.
- Threat notes
- Non-hostile. Lowest combat threat in the game.
- Drops / rewards
- Cooked bird food on death (already cooked).
- Related
- Emergency food. Distinct from the Companion Shop Crow pet.
Start by separating helpers from threats. Friendly NPCs cannot be damaged. You free them, trade with them, or hand in quest items. Hostile groups are the everyday island and raid pressure that sits under named boss fights. Bosses (Kraken, Greenbeard, Yeti, and the rest) are separate encounters; the regular units and utility characters around those fights are the ones you meet while sailing day to day.
Who to free first
| Priority | Target | Why |
|---|---|---|
| First large island | Fisherman | Fishing Rod for the crew, Dinghy path, then a fixed fish-for-loot trade ladder |
| Radio-marked Survivor Islands | Captain Stephen, Doctor Madelaine, Professor Erik | Each rescue adds +1 Day Multiplier and automates base machines |
| Daytime ship visit | MukuMuku Merchant | Doubloons shop for medkits, Pearls, guns, and one-time stock |
| Later biomes | Glorbus, Lost Penguins + Penguin Mother | Alien Soup machine, then Ice penguin hand-in for the Yeti path |
Clear island guards before you walk up to a rescue. Survivors often sit behind Ghost Pirates. Fisherman Island opens after early Buku clears. Glorbus waits on Alien Islands after the combat is under control.
Raid and island threat families
Night and island pressure climbs by family more than by random name:
- Buku Tribe owns early islands and light raids (even by day). Low threat compared with later packs; watch for Buku Poku when you want a mid-run spear lead.
- Ghost Pirates own the guaranteed first-night raid, pirate islands, strongholds, and galleon boards. Farm Essences and raid Glue; step out of Bombardier blasts; treat Ghost Pirate Captain as a tough regular elite, not Captain Greenbeard.
- Rival Survivors defend Rival Rigs and Radio Towers. Expect real weapons and chests after a full clear, not a free early farm.
- Corrupt Creatures fill the Cargo Ship and corrupted rooms with high-HP military ghosts, a chest mimic, and ambient jellies. Bring mid-to-late weapons and clear rooms slowly.
- Aliens hit your base from UFOs and guard Alien Islands. Raid clears can drop an Alien Transponder that marks Alien Islands; island packs and Alien Warriors hit much harder than the first weak beams.
Open ocean and biomes use a different mental model. Sharks, Salamanders, and Angler Fish punish boat fights and dark water more than they fill loot tables. Ice wildlife (Wolves, Polar Bears) and Magma Snails sit on cold or volcano islands while you travel; Fire Golems and Lord of Lava stay on the bosses collection.
Name collisions and easy mistakes
Several world names also appear in the Companion Shop (Shark, Salamander, Penguin, Polar Bear, Seagull, Crow) or as class labels (Alien Warrior). The world NPCs and mobs are map creatures only. Pets are equip buffs from Pearl chests; classes are loadouts you buy. Do not skip a world shark because you own the shop pet, and do not treat the Alien Warrior world enemy as your class pick.
Common run mistakes:
- Ignoring Fisherman while island-hopping for shiny loot. Early fishing and the Dinghy unlock make every later sail safer.
- Rescuing Survivors before clearing guards. You get pinned while the rescue prompt is still out of reach.
- Spending MukuMuku stock on junk before medkits and key gear. Purchased lines do not restock for you later.
- Standing still on ghost or rival gun lines. Gunners and rival rifles punish open platforms harder than melee filler does.
- Rushing Cargo Ship or Alien Islands undergeared. Corruption and alien island packs are not early Buku clears.
- Fighting Angler Fish or sharks for "loot" when the bonfire is out. Survival and lights matter more than the kill.
- Farming Seagulls and Crows as if they were Companion Shop pets. They are one-shot food birds, nothing more.
If a named island or raid keeps wiping you, identify the family (Buku, ghost, rival, corrupt, alien, sea, or biome), fix gear and approach for that family, and leave the big named bosses for when the regular units already feel manageable.
FAQ
Who should you rescue first in 100 Days At Sea?
Prioritize the Fisherman on Fisherman Island for the Fishing Rod, Dinghy path, and fish trades. Then clear radio-marked Survivor Islands for Captain Stephen, Doctor Madelaine, and Professor Erik so each rescue adds Day Multiplier and base automation.
What do Survivors do after you free them?
They teleport to your base and work machines and material processing for you. Each rescued Survivor also adds +1 Day Multiplier. Guard clear comes first; they cannot be damaged, but island hostiles still can.
How does the Fisherman trade system work?
After you free him, trade cooked fish dishes for gear in a fixed order. Leads include tools, sacks, guns, food, flares, Doubloons, and later weapons. Rescue also grants a Fishing Rod to every player and opens the hut chest with the Dinghy.
When does MukuMuku Merchant show up?
He sails beside your base during the day and leaves at night. Spend Doubloons on limited, one-time stock per player (medkits, Pearls, weapons, materials, and more). Plan buys because purchased lines do not restock later for you.
Is Ghost Pirate Captain the same as Captain Greenbeard?
No. Ghost Pirate Captain is a dual-sword elite on high-day pirate raids and strongholds. Captain Greenbeard and the Ghost Galleon fight are separate boss encounters with their own rewards.
What do Ghost Pirates drop?
Common leads are Essences for potions and Glue from night-raid kills for crafting-table use. Bodies also matter when a recipe needs ghost-pirate crafting inputs.
How do you find Alien Islands?
Survive alien raids on your base. Clearing a raid can drop an Alien Transponder that helps locate Alien Islands. Island aliens and Alien Warriors are much tougher than the first weak UFO beams.
What is Glorbus for?
Glorbus lives on an Alien Island. Feed him 20 food items of any kind to earn the Alien Food Machine, which turns five food items into Alien Soup (stronger hunger restore than regular Chowder). Place the machine carefully so Survivors do not auto-feed premium meals.
How do Lost Penguins and Penguin Mother work?
When the map has an Ice Biome, find Lost Penguins on ice islands and return them to the Penguin Mother. Finishing the full set opens the Yeti encounter path. Yeti itself is a separate boss fight; the penguins are quest NPCs only.
Are world sharks and birds the same as Companion Shop pets?
No. Companion Shop pets are Pearl-chest buffs you equip. World Sharks, Salamanders, Polar Bears, Penguins, Seagulls, and Crows are map creatures. Same names, different systems.
How do you get food from Seagulls and Crows?
Harpoon or shoot them in the low sky for a one-shot kill. Harpooning can pull already-cooked bird meat back to you. They never fight back.
What is the Cargo Ship full of?
Corrupt Creatures: high-HP purple military humanoids (crew, officers, saber elites, minigunners), a chest mimic, and red or blue jellies. Treat it as mid-to-late content with healing ready, not an early Buku island.