Wizard Alchemy locations are the route anchors behind the whole upgrade loop. Spawn services handle brewing, selling, quests, and gear, while the forest, mine, beach, boss, and Sea of Oblivion routes decide where you farm materials, open chests, buy hidden items, enchant wands, and push into New Mainland upgrades.
section
Departure Isle spawn and services
Spawn is the reset point for crafting, selling, quests, leaderboards, and early gear. Learn these stops first because most farming loops eventually send you back here.
Spawn Village and Leaderboard Shoreline
- area
- Departure Isle
- location type
- Spawn hub
- landmark
- Spawn point, Top Potions List, three leaderboards, Lombart, and Lemin
- key NPCs
- Lombart, Lemin
- key content
- Starting village services, material selling, leaderboards, and a nearby shoreline chest
- Related Farms
- Starter chest route, inventory cleanup, early upgrade planning
Alchemy Table and Refine Machine
- area
- Departure Isle
- location type
- Crafting station
- landmark
- Alchemy table behind or near the spawn point
- key NPCs
- Not listed
- key content
- Potion brewing, material selection, spell unlocks, and potion refinement
- Related Farms
- All material routes feed back into this station
Roger's Equipment Shop
- area
- Departure Isle
- location type
- Shop
- landmark
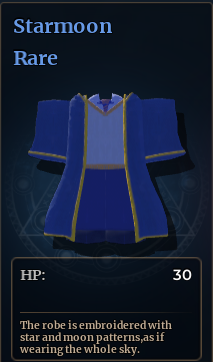
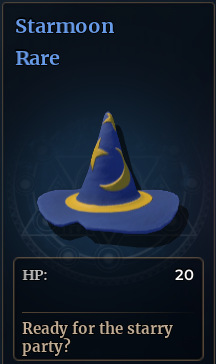
- Roger shop menu with wand, wizard hat, and robe tabs
- key NPCs
- Roger
- key content
- Wands, wizard hats, robes, early Attack upgrades, and HP gear
- Related Farms
- Gold farming, boss prep, gear upgrades
Harryint Wanted Board
- area
- Departure Isle
- location type
- Quest board
- landmark
- Wanted board on the right side of spawn
- key NPCs
- Harryint
- key content
- Repeatable quests for gold and material rewards
- Related Farms
- Beginner gold farming, monster quests, material gathering
section
Forest, river, and mine routes
These locations cover the first real material and chest loops. They also teach the hidden-route habits Wizard Alchemy uses later: check rocks, tents, caves, climbs, and off-path platforms.
First River Farming Path
- area
- Departure Isle forest
- location type
- Starter farm route
- landmark
- River, big rock, tree, and first farming stretch
- key NPCs
- Not listed
- key content
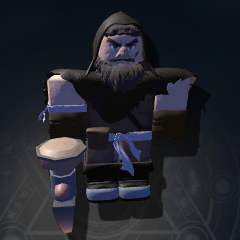
- Pickaxe Dwarfs, early gathering route, and river rocks chest
- Related Farms
- Dwarf Emblem, Golden Tooth, early Gold, chest materials
Traveler Camp and Cauldron
- area
- Bridge and forest camp
- location type
- Route landmark
- landmark
- Traveler NPC, Cauldron, tent, bridge, and nearby enemies
- key NPCs
- Traveler
- key content
- Bridge route, tent chest, route split toward beach and mine-side paths
- Related Farms
- Knife Goblins, Warhammer Dwarfs, chest materials
Mine Entrance and Optimistic Miner
- area
- Mine entrance
- location type
- Cave route
- landmark
- Optimistic Miner, wooden boards, plants, and mine entrance
- key NPCs
- Optimistic Miner
- key content
- Mine chest, miner hint, cave route, and nearby Pickaxe Dwarfs
- Related Farms
- Chest materials, early dwarf route, mine cluster sweep
Secret Mine Cave
- area
- Mine illusion wall
- location type
- Hidden cave
- landmark
- Right side of the back wall inside the mine
- key NPCs
- Not listed
- key content
- Hidden cave extension and secret chest
- Related Farms
- Chest materials, hidden-route checking
Mine Mountain Top
- area
- Mine mountain
- location type
- Climb route
- landmark
- Rocks, thorny vines, and upper mine platform
- key NPCs
- Not listed
- key content
- Top-of-mine chest and high route practice
- Related Farms
- Chest materials, movement practice
section
Beach, boss, and high routes
This side of Departure Isle connects mid enemy farming, the lighthouse, Dwarf King, treehouse, and waterfall cave. It is where route planning starts to matter more than running straight from spawn.
Departure Isle Beach and Portal
- area
- Departure Isle beach
- location type
- Beach route
- landmark
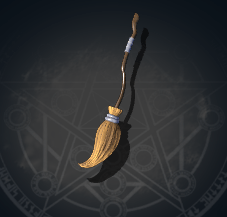
- Beach route, sea edge, portal area, and Apprentice Broom spot
- key NPCs
- Not listed
- key content
- Apprentice Broom purchase spot, Warhammer Dwarf and Archer Goblin routes, path toward lighthouse
- Related Farms
- Flame Crest, Copper Earring, Goblin Finger, Goblin Bone, Dwarf Emblem
Lighthouse Island
- area
- Lighthouse island
- location type
- Island landmark
- landmark
- Lighthouse, sea, small island, and mountain behind the island
- key NPCs
- Not listed
- key content
- Lighthouse chest, beach navigation, route anchor for Dwarf King and treehouse checks
- Related Farms
- Chest materials, Archer Goblins, Warhammer Dwarfs, boss-route travel
Dwarf King Cave and Throne
- area
- Dwarf King Cave
- location type
- Boss route
- landmark
- Dwarf King spawn, hammer wall, chained stone, and cave area
- key NPCs
- Dwarf King
- key content
- Boss farming, throne-area chest, Furnace Core route, Flame Crest and Copper Earring drops
- Related Farms
- Gold, Flame Crest, Copper Earring, Furnace Core
Treehouse Branch and Platform
- area
- Treehouse route
- location type
- High path
- landmark
- Huge tree, rope climb, treehouse door, railing, and charred branch
- key NPCs
- Not listed
- key content
- Treehouse chest and Ember Staff Wand purchase route
- Related Farms
- Chest materials, late Departure Isle wand upgrade
Starting Village Waterfall Cave
- area
- Waterfall near starting village
- location type
- Hidden shop route
- landmark
- Waterfall cave near the starting village
- key NPCs
- Hidden wand seller
- key content
- Ice Star Wand purchase spot
- Related Farms
- Gold saving, cooldown-focused wand upgrade
section
Sea of Oblivion routes
Sea of Oblivion is the New Mainland layer for enchanting, lava-island farming, broom upgrades, the volcano wand route, and lava-resistance gear. These rows focus on stable landmarks instead of every enemy or material path.
Main Sea of Oblivion Base
- area
- Sea of Oblivion
- location type
- New Mainland hub
- landmark
- Main Sea of Oblivion area, Alchemy station, and Lava Broom spot
- key NPCs
- Not listed
- key content
- New Mainland hub, Lava Broom purchase spot, Sea of Oblivion material route start
- Related Farms
- Fern, Sulphur Lumps, Volcanic Rock, orc materials, New Mainland potion targets
Enchanting Table Island
- area
- Sea of Oblivion island
- location type
- Enchanting station
- landmark
- Small island near the main Sea of Oblivion
- key NPCs
- Not listed
- key content
- Wand enchantment table and Enchanted Stone spending
- Related Farms
- Enchanted Stones, wand enchantment rolls, Sea of Oblivion power upgrades
Lava Island and Enchanted Sword Ferns
- area
- Sea of Oblivion lava island
- location type
- Material and enchantment farm
- landmark
- Lava island with Enchanted Sword Ferns
- key NPCs
- Not listed
- key content
- Enchanted Stone farming and lava-island material route
- Related Farms
- Enchanted Stones, Fern, Volcanic Rock, Sulphur Lumps
Volcano Summit
- area
- Sea of Oblivion volcano
- location type
- Late shop route
- landmark
- Top of the Volcano
- key NPCs
- Not listed
- key content
- Ember Wand purchase spot
- Related Farms
- 50,000 Gold saving, Sea of Oblivion wand progression
Lava Waterfall Base
- area
- Sea of Oblivion lava waterfall
- location type
- Gear pickup route
- landmark
- Fiery lava waterfall next to the Sea of Oblivion base
- key NPCs
- Not listed
- key content
- Lava Wizard Hat purchase or pickup route
- Related Farms
- 10,000 Gold saving, lava resistance, New Mainland survival
How to move through the map without wasting runs
Locations work best when you treat them as loops. Start at spawn, choose a goal, then move through the route that gives the material, quest, chest, shop, boss, or upgrade you actually need. Wandering without a target fills your bag with random materials and usually sends you back to Lombart or the Alchemy Table before you have brewed anything useful.
A clean route usually looks like this:
- Start at Spawn Village to brew, refine, sell extras, take a quest, or buy gear from Roger.
- Move down the river path for early Pickaxe Dwarf, chest, and starter material routes.
- Treat Traveler camp as the split point for the mine cluster, bridge-side goblin platform, or beach route.
- Clear the mine cluster together: normal mine, secret wall cave, and mine mountain top.
- Push toward the beach side when you need lighthouse, Dwarf King, treehouse, or waterfall cave routes.
- Move into Sea of Oblivion only when New Mainland materials, enchanting, lava-island farming, broom upgrades, or late gear are the goal.
Which place to learn first by goal
| Goal | Best location to learn | Why it helps |
|---|---|---|
| Brew or refine spells | Alchemy Table and Refine Machine | Every material loop becomes useful only after you turn drops into potions or upgrades. |
| Sell extras safely | Spawn Village and Leaderboard Shoreline | Lombart is the cleanup point when inventory pressure starts slowing your route. |
| Start gold and material farming | First River Farming Path | It is close to spawn and teaches the early enemy spacing without a long run back. |
| Run hidden chest routes | Mine Entrance, Secret Mine Cave, Mine Mountain Top | These three stops are close together and teach the cave, illusion wall, and climb pattern. |
| Prepare for boss farming | Dwarf King Cave and Throne | The boss route is worth learning after your wand, HP gear, movement, and spells are stable. |
| Chase hidden wand upgrades | Treehouse Branch, Waterfall Cave, Volcano Summit | These locations hold the stronger wand route once normal shop upgrades stop being enough. |
| Roll wand enchantments | Enchanting Table Island | The table spends Enchanted Stones, so it matters after you can farm stones consistently. |
What not to over-assume from the map
The stable landmarks are the useful part: spawn services, chest clusters, hidden caves, boss routes, shops, and New Mainland upgrade stops. Some exact Sea of Oblivion enemy spawns and material node paths are better treated as broad routes, so read New Mainland rows as anchors rather than exact coordinates.
That caution matters most when farming. If you need a material, start from the location or enemy route tied to that drop, then adjust after you see how fast your build clears the area. A weaker route you can repeat cleanly often beats a late route that causes deaths, long resets, or wasted potion attempts.
FAQ
How many locations are tracked in Wizard Alchemy?
There are 20 tracked route and service landmarks in the current list. They cover spawn services, forest and mine routes, beach and boss landmarks, hidden upgrade spots, and Sea of Oblivion stops.
Which Wizard Alchemy locations should beginners learn first?
Learn Spawn Village, the Alchemy Table, Roger's Equipment Shop, Harryint's Wanted Board, the First River Farming Path, Traveler Camp, and the Mine Entrance first. Those locations cover early quests, brewing, selling, gear, enemies, and chests.
Where is the Alchemy Table in Wizard Alchemy?
The Alchemy Table is at the spawn area. Turn around from the spawn point to find it, then use gathered materials to brew potions. The Refine machine sits next to the Alchemy Table for upgrading duplicate potions.
Where is Dwarf King in Wizard Alchemy?
Dwarf King is tied to the Dwarf King Cave route on Departure Isle. Start from the lighthouse side as a route anchor, then look for the mountain area with the hammer wall and chained stone landmark.
Where do you enchant wands in Wizard Alchemy?
Wand enchanting happens at the Enchanting Table Island, a small island near the main Sea of Oblivion area. Bring Enchanted Stones before you roll because each enchantment attempt consumes one stone.
Are the Sea of Oblivion locations fully mapped?
The Sea of Oblivion rows cover stable landmarks such as the main base, enchanting island, lava island, volcano, and lava waterfall. Treat them as route anchors rather than a full coordinate map for every enemy and material path.