Command An Army asks you to do two jobs at once: fight as your own class and direct an AI troop squad. The first hurdle is not finding the rarest unit. You need a legal squad under the Star Limit, a group that reaches the fight together, and an order that matches what is happening on the map.
The official Roblox listing describes team-vs-team matches with Attack and Defend roles, capture points, formations, troop recruitment, and upgrades. This guide takes you from your first class and starter loadout through the PC controls, the A-to-B attack route, defensive positioning, and the early habits that keep your commander and army useful.
What Is Command An Army? First-Match Loop and Win Condition
In Command An Army, your avatar is part of the battle instead of sitting behind a menu while troops fight. You choose a personal class, spawn a squad of AI troops, move with them, and give orders while your team works toward an objective.
The first match is easiest to understand as three connected states:
- Follow moves the squad and brings stragglers back into one group.
- Attack commits the army to an intentional target.
- Hold turns a capture point or defensive position into something your team can keep.
Rush is the aggressive fourth option. It can help finish an opening, but it is a poor substitute for gathering the squad or reading the enemy line. On Attack, your team progresses through marked capture objectives. On Defend, your job is to hold the approaches and keep the objective covered while the enemy tries to advance.
Before queueing, think about both sides of the loop: keep your own avatar alive, and make sure the troops you recruited can actually be equipped within the Star Limit. A rare-looking unit is not useful if the loadout cannot field it or if it reaches the fight after the rest of the squad has already been defeated.
Which Class Should Beginners Choose in Command An Army?
The class menu lists Assassin, Sword & Shield, and Hammer. This choice changes your avatar's fighting style, not the troops you can recruit or the way your squad's orders work.
For a first match, Sword & Shield is a forgiving choice because it can block attacks. That gives you a safer way to stay near the front line while you learn when to reposition the squad. Assassin and Hammer are still valid choices if you prefer them, but they do not replace the need to build a balanced troop group.
Switching your class later costs 50 Gems. Pick the style you want to practice, then spend your early attention on learning the command rhythm rather than treating the class menu as a troop upgrade.
Command An Army Starter Troops and Star Limit
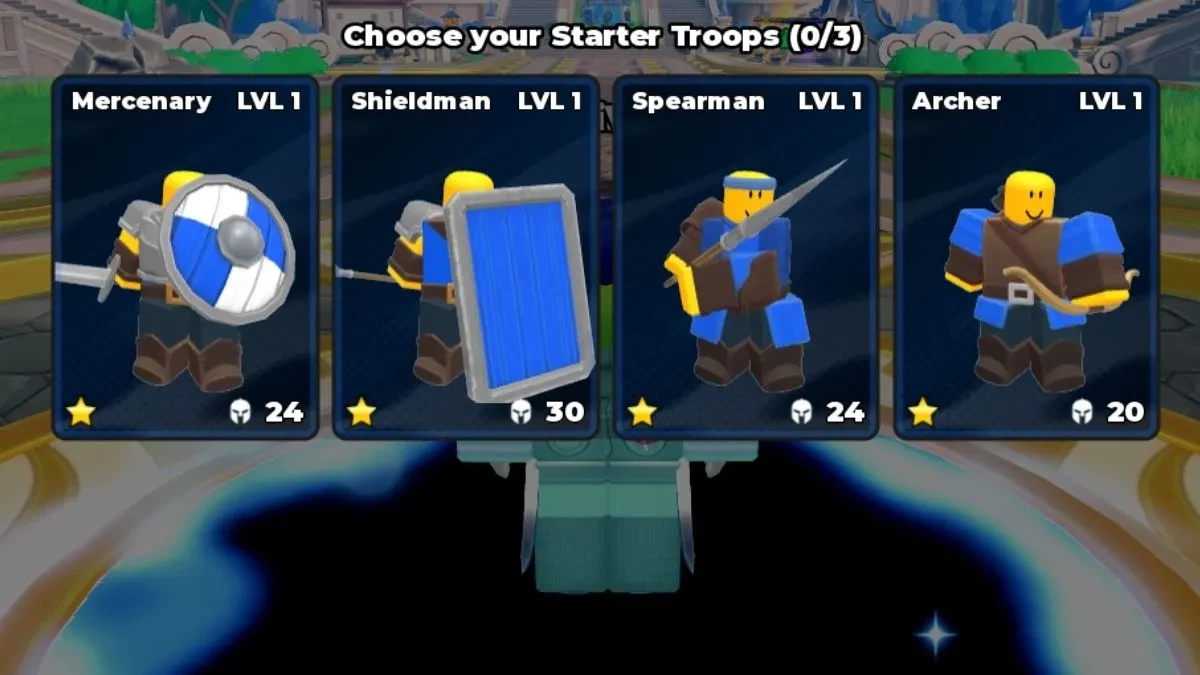
After the tutorial, the named starter choices are Mercenary, Shieldman, Spearman, and Archer. Each covers a different job, so the best beginner loadout is built around roles rather than a claim that one starter is universally strongest.
| Starter troop | Main role | Why it matters in a first squad |
|---|---|---|
| Mercenary | Frontline body | Gives the army a basic unit to meet the enemy line and fill space near an objective. |
| Shieldman | Ground-holding shield unit | Works at the front of a formation or on a point, with ranged troops positioned behind it. |
| Spearman | Reach and anti-cavalry option | Covers lanes where mounted units may approach instead of being treated as a generic charger. |
| Archer | Ranged support | Adds pressure from behind the frontline, but needs shields or other bodies between it and the fight. |
Why your starter loadout may not equip
The loadout system supports up to four units, but the combined star value of the squad must stay within your account's Star Limit. That limit rises with level, so a unit that does not fit early can become usable later without the unit itself being broken.
Your early loadout may show a Star Limit of 6, three equipped slots, and a fourth slot at level 15. These starting values can vary, so use the numbers shown by your own loadout screen as the final check. The loadout can hold up to four units, and its cap grows with level.
If a unit will not equip, remove another unit or wait for more capacity instead of forcing the lineup. A practical early build is one frontline or shield unit plus an Archer when the cap permits it. Add the Spearman when you have room and expect its reach or anti-cavalry role to matter. The point is to field a group that can stand in the same fight, not to fill every slot at any cost.
Command An Army Controls and Keybinds
On PC, the troop commands and your avatar's actions use different controls. Learn the left table first because it determines where the AI squad is and what it is trying to do.
Troop commands
| Troop order | PC key | What it does |
|---|---|---|
| Hold | X | Keeps troops at a chosen spot and can open formation choices. |
| Follow | C | Makes the squad trail your commander as you move, which is the main regrouping order. |
| Attack | V | Sends troops to engage a designated target. |
| Rush | B | Orders an aggressive charge when you want to commit quickly. |
Personal controls
| Personal action | PC key | Practical use |
|---|---|---|
| Attack | Left click | Attack with your own avatar while the squad supports the fight. |
| Block | F | Block incoming pressure, especially when you need to stay near the frontline. |
| Roll | Q | Roll away when an enemy closes the distance or your position becomes unsafe. |
| Heal | H | Heal after creating enough distance that the action is not interrupted by the fight. |
| Mount | Use the on-screen prompt | Published keybind lists disagree, with one giving G and another giving R, so the in-game prompt is the safer authority. |
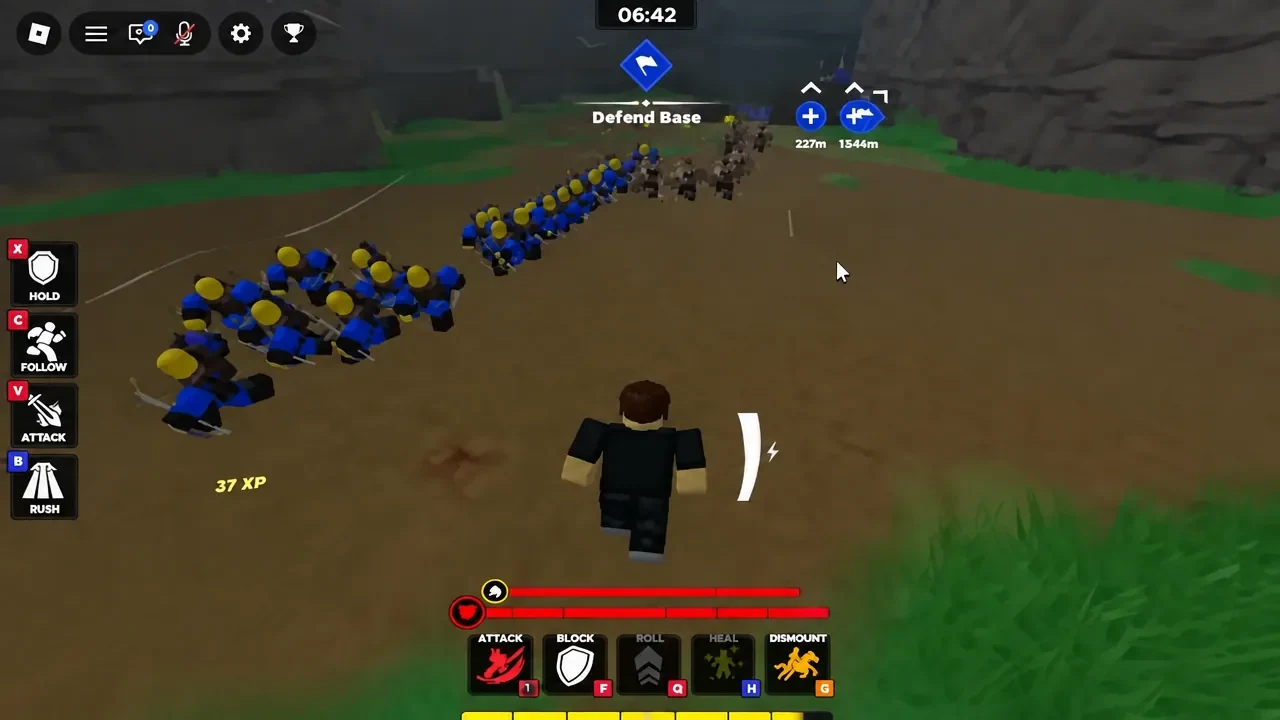
Mounting also gives you an extra health bar, so use it as a survival option when the situation allows. Do not memorize a Mount letter that conflicts with the prompt in your own HUD. Watch your stamina too: running out while separated from the army makes it harder to retreat or regroup before the next fight.
How to Use Follow, Hold, Attack, and Rush in Command An Army
These orders are not a rotation you press on a timer. They describe what you want the squad to do next.
Follow for movement and regrouping
Press C before leaving spawn, after a fight, or whenever the army has spread out. Move only after the troops have had time to trail back toward you. If you sprint to the next objective while part of the squad is still behind, the enemy gets to fight a smaller group one piece at a time.
Follow is also the safest reset after a bad engagement. Pull the commander away, let the squad reform, and choose the next target once the army is together.
Hold for an objective or defensive line
Press X when troops need to stay on a capture point, protect an approach, or anchor the front while another group rotates. Hold can bring up formation choices, and the available behavior depends on the troops you deploy. Shield Wall is described as a defensive example, while Triangle is described as an offensive charge example. Use those as situational options, not as a universal best formation.
The important consequence is persistence: a unit left on Hold keeps doing the job you assigned instead of following you away from the point.
Attack for a deliberate engagement
Press V when you have an intended target and the squad is close enough to support the fight. Attack is the order for engaging that target, so it belongs after you have read the enemy's front line and decided where the group should make contact.
If the enemy is waiting behind prepared shields, sending a scattered squad straight in wastes the command. Gather with Follow, position the army, then use Attack when the engagement is actually ready.
Rush for a committed charge
Press B when an aggressive charge makes sense, such as finishing a broken line or taking advantage of an opening. Rush is not the default movement button and should not be the first response to every enemy you see. A prepared defense can punish a blind charge, so use Attack for controlled contact and reserve Rush for the moment that benefits from speed.
Command An Army Attack Strategy for Beginners
The attacking side is easiest when you treat every capture as a staging point for the next one.
- Gather at spawn with Follow. Press C and let the available troops close around you before moving toward the first objective. If the group is still stretched out, wait or repeat the regrouping order.
- Read the defense before committing. Look at the enemy's front line and the space around the objective. Do not send Rush into a prepared shield line simply because the point is visible.
- Use Attack on the intended target. Press V once the army is positioned to support the engagement. Your avatar can fight alongside the troops, but avoid turning the push into a solo duel ahead of them.
- Bring the army onto Capture Point A. The squad must reach the objective with you for the push to succeed. Stay close enough for the squad to continue contesting the area while the fight is decided.
- Leave a guard on Hold. Once A is secure, press X for part of the force so the point is not abandoned during the rotation. Keep Shieldman or another frontline body in front of your ranged support when possible.
- Rotate to B, then the Capture Base. Move the group that is advancing with Follow, read the next defense, and repeat the same pattern before moving from B to the final base. Rush is most useful when the enemy line has already opened and a fast finish is safer than a long approach.
This rhythm prevents the most common attacking mistake: reaching the next marker quickly but arriving with too few troops to hold it. Capture first, leave enough behind to protect the gain, and only then ask the rest of the army to move forward.
Command An Army Defense Strategy for Beginners
Defense is not won by chasing every attacker away from the objective. Hold the approach, force the enemy to fight into a prepared line, and keep enough of your army available to respond when the first clash changes.
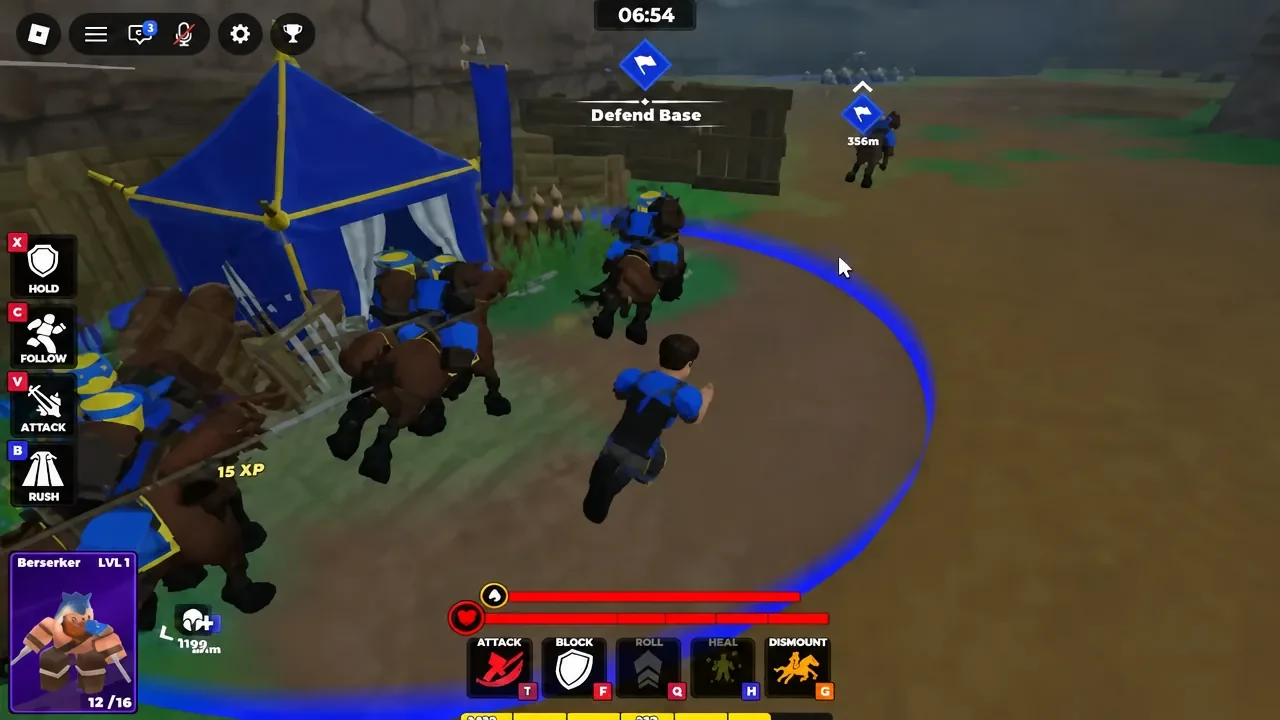
Use Hold around the marked objective or the approach you expect the enemy to use. Put Shieldman and other frontline bodies in front of Archer so the ranged unit can support the fight without being exposed immediately. Keep Spearman covering a likely lane for mounted units, since its reach and anti-cavalry role are more useful there than in a random charge.
Do not commit every troop at once. A reserve can answer a flank, reinforce the point, or punish an enemy push after it breaks. When the opposing line collapses, use Attack on a clear target and counterattack with the reserve. If the enemy retreats, return to the objective instead of following so far that the point is left open.
For your own survival, stay close enough to the army to keep issuing orders, block pressure with F, roll with Q when you are being surrounded, and use H only after you have reached a safe distance. A living commander with a grouped squad is worth more than an early chase that leaves both you and the objective exposed.
Ascension and Early Resource Priorities in Command An Army
The Ascension Tree is near the initial spawn, giving you a progression option before or between matches. Ascension improves a troop's damage and HP, and mastery can potentially lead to Evolution. Its practical value is simple: improve units that you can actually field and keep using.
Duplicate copies are part of a troop's Ascension path. That makes your first investment decision easier. Start with the frontline, shield, or ranged unit that already fits your squad instead of spending every resource chasing a unit that exceeds the Star Limit or has no place in the formation.
Gem summons can give you stronger units, but check a new unit's stars and role before adding it to your squad. Strengthen a compatible frontline, shield, or ranged unit first; a small group that fits the Star Limit is more useful than a collection of units that cannot stand together on the point.
Command An Army Beginner Mistakes to Avoid
| Mistake | What goes wrong | Better habit |
|---|---|---|
| Equipping over the Star Limit | A unit or full lineup will not fit before the match. | Check the combined stars against the value shown in the loadout screen. |
| Moving before the squad regroups | The enemy meets your troops in fragments. | Press C and wait for the army to gather before the push. |
| Charging a prepared front line | Rush sends part of the force into a defense built to receive it. | Read the formation, position the group, and use V on a deliberate target. |
| Leaving a captured point empty | The team advances while the opponent can retake the ground behind you. | Put part of the force on X Hold before rotating. |
| Chasing a retreat too far | The objective loses its guard while your army is pulled away. | Return to the point once the immediate threat is gone. |
| Using every defender in the first clash | There is no reserve to reinforce a break or answer a flank. | Keep part of the force uncommitted until the fight develops. |
| Fighting alone | Your avatar becomes separated and the squad cannot support the decision. | Stay near the army, watch stamina, and use Block, Roll, or Heal when the situation allows. |
First-match checklist
Before your next queue, make sure you can answer yes to these points:
- I chose a personal class and know that it does not change my troop roster.
- My starter squad fits the Star Limit shown in the loadout screen.
- I use Follow to gather before moving.
- I use Attack for a chosen engagement, not as a panic button.
- I use Hold to secure a captured or defended point.
- I save Rush for a real opening or finish.
- I stay close enough to my army to survive and keep issuing orders.
Start by practicing the three core states: Follow to move, Attack to engage, and Hold to secure. Once that rhythm feels natural, add Rush when you can recognize a retreat or an open line. That is enough structure to make the first match manageable while you learn which starter roles and formations fit your own play style.