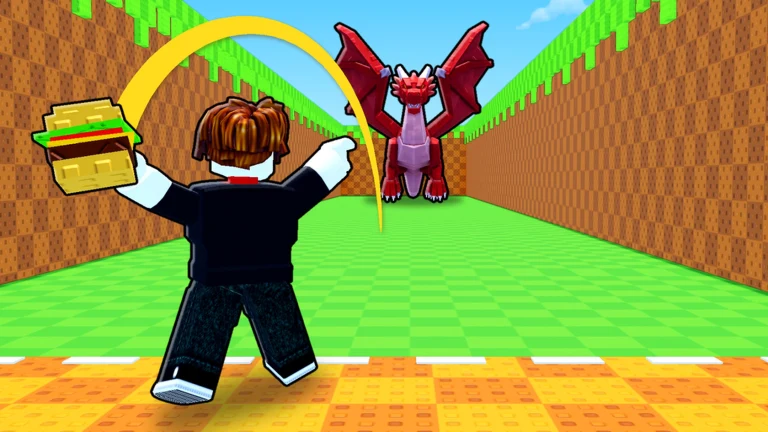
Throw Food For Animals is a Roblox game where you throw food to attract animals from different areas, collect them, and earn money from them. Waste Harvester is the highest fixed earner, making 410Dd per second from the Nuclear Wasteland. The eight SS animals are the exception, since each one earns a multiple of your best animal rather than a set amount.
| Tier | Animal | Cash per second | Area |
|---|---|---|---|
| SS | Pumpkin Monster | 9x your best animal | Egg or shop |
| SS | Reaper | 5x your best animal | Egg or shop |
| SS | Reaper Steed | 3x your best animal | Egg or shop |
| SS | Giant Squid | 3x your best animal | Egg or shop |
| SS | Demon | 2x your best animal | Egg or shop |
| SS | Woolly Mammoth | 1.5x your best animal | Egg or shop |
| SS | Skeleton Horse | 1.5x your best animal | Egg or shop |
| SS | Skeleton | 1x your best animal | Egg or shop |
| S | Waste Harvester | 410Dd/s | Nuclear Wasteland (Back) |
| S | Meltdown Idol | 205Dd/s | Nuclear Wasteland (Back) |
| S | Rad Scarecrow | 102Dd/s | Nuclear Wasteland (Back) |
| S | Ferro Wyrm | 51.2Dd/s | Nuclear Wasteland (Back) |
| S | Isotope Angel | 25.6Dd/s | Nuclear Wasteland (Back) |
| S | Glassback Colossus | 12.8Dd/s | Nuclear Wasteland (Back) |
| S | Siren Spire | 6.4Dd/s | Nuclear Wasteland (Middle) |
| S | Reactor Golem | 3.2Dd/s | Nuclear Wasteland (Middle) |
| S | Sludge Mimic | 1.6Dd/s | Nuclear Wasteland (Front) |
| S | Barrel Brute | 800Ud/s | Nuclear Wasteland (Front) |
| S | Uranium Stag | 400Ud/s | Nuclear Wasteland (Front) |
| S | Reactor Hound | 200Ud/s | Nuclear Wasteland (Front) |
| S | Ghost Pirate | 256Dc/s | Phantom Harbor (Back) |
| S | Lich | 128Dc/s | Phantom Harbor (Back) |
| S | Ghostly Horse | 64Dc/s | Phantom Harbor (Middle) |
| S | Banshee | 32Dc/s | Phantom Harbor (Back) |
| S | Specter | 16Dc/s | Phantom Harbor (Front) |
| S | Wraith | 8Dc/s | Phantom Harbor (Front) |
| S | Poltergeist | 4Dc/s | Phantom Harbor (Front) |
| S | Ghost | 2Dc/s | Phantom Harbor (Front) |
| A | Headless Horseman | 3.2No/s | Harvest Fields (Back) |
| A | Pumpkin Golem | 1.6No/s | Harvest Fields (Back) |
| A | Witch | 800Oc/s | Harvest Fields (Middle) |
| A | Jack-o'-Lantern | 400Oc/s | Harvest Fields (Middle) |
| A | Witch's Cat | 200Oc/s | Harvest Fields (Front) |
| A | Scarecrow | 100Oc/s | Harvest Fields (Middle) |
| A | Zombie Crow | 50Oc/s | Harvest Fields (Front) |
| A | Raven | 25Oc/s | Harvest Fields (Front) |
| A | Nightmare | 32Sp/s | Shadow Realm (Back) |
| A | Shadow Demon | 16Sp/s | Shadow Realm (Back) |
| A | Hellhound | 8Sp/s | Shadow Realm (Middle) |
| A | Phantom Dog | 4Sp/s | Shadow Realm (Middle) |
| A | Shadow Wolf | 2Sp/s | Shadow Realm (Front) |
| A | Cursed Owl | 1Sp/s | Shadow Realm (Front) |
| A | Cursed Raven | 500Sx/s | Shadow Realm (Front) |
| A | Black Cat | 250Sx/s | Shadow Realm (Front) |
| B | Phoenix | 380Qi/s | Mythical Paradise (Back) |
| B | Dragon | 270Qi/s | Mythical Paradise (Back) |
| B | Wyvern | 180Qi/s | Mythical Paradise (Middle) |
| B | Amphiptere | 120Qi/s | Mythical Paradise (Back) |
| B | Simurgh | 75Qi/s | Mythical Paradise (Front) |
| B | Pegasus | 45Qi/s | Mythical Paradise (Middle) |
| B | Unicorn | 30Qi/s | Mythical Paradise (Front) |
| B | Raiju | 15Qi/s | Mythical Paradise (Front) |
| B | Hydra | 10Qi/s | Ancient Ruins (Back) |
| B | Minotaur | 7.2Qi/s | Ancient Ruins (Back) |
| B | Sphinx | 4.8Qi/s | Ancient Ruins (Middle) |
| B | Qilin | 3.2Qi/s | Ancient Ruins (Middle) |
| B | Archaeopteryx | 2Qi/s | Ancient Ruins (Front) |
| B | Microraptor | 1.2Qi/s | Ancient Ruins (Middle) |
| B | Leviathan | 800Qa/s | Ancient Ruins (Front) |
| B | Triple Cobra | 400Qa/s | Ancient Ruins (Front) |
| B | Cerberus | 250Qa/s | Hell (Back) |
| B | Dullahan | 180Qa/s | Hell (Back) |
| B | Chupacabra | 120Qa/s | Hell (Middle) |
| B | Manticore | 80Qa/s | Hell (Middle) |
| B | Winged Imp | 50Qa/s | Hell (Front) |
| B | Gargoyle Bat | 30Qa/s | Hell (Middle) |
| B | Bunyip | 20Qa/s | Hell (Front) |
| B | Mothman | 10Qa/s | Hell (Front) |
| B | Plesiosaur | 6.2Qa/s | Deep Waters (Back) |
| B | Kraken | 4.5Qa/s | Deep Waters (Back) |
| B | Mosasaurus | 3Qa/s | Deep Waters (Middle) |
| B | Megalodon | 2Qa/s | Deep Waters (Middle) |
| B | Whale | 1.2Qa/s | Deep Waters (Front) |
| C | Shark | 750T/s | Deep Waters (Middle) |
| C | Swordfish | 500T/s | Deep Waters (Front) |
| C | Anglerfish | 250T/s | Deep Waters (Front) |
| C | Velociraptor | 150T/s | Prehistoric Forest (Back) |
| C | T-Rex | 110T/s | Prehistoric Forest (Back) |
| C | Spinosaurus | 72T/s | Prehistoric Forest (Middle) |
| C | Brachiosaurus | 48T/s | Prehistoric Forest (Back) |
| C | Gallimimus | 30T/s | Prehistoric Forest (Front) |
| C | Dimetrodon | 18T/s | Prehistoric Forest (Front) |
| C | Triceratops | 12T/s | Prehistoric Forest (Front) |
| C | Pterodactyl | 6T/s | Prehistoric Forest (Front) |
| C | Sabertooth Tiger | 3.8T/s | Winter (Back) |
| C | Lindworm | 2.7T/s | Winter (Back) |
| C | Mammoth | 1.8T/s | Winter (Middle) |
| C | Polar Bear | 1.2T/s | Winter (Middle) |
| D | Caladrius | 750B/s | Winter (Front) |
| D | Tanuki | 450B/s | Winter (Front) |
| D | Goat | 300B/s | Winter (Front) |
| D | Husky | 150B/s | Winter (Front) |
| D | Fenrir | 100B/s | Taiga (Back) |
| D | Kitsune | 72B/s | Taiga (Back) |
| D | Bear | 48B/s | Taiga (Middle) |
| D | Jackalope | 32B/s | Taiga (Middle) |
| D | Wolf | 20B/s | Taiga (Front) |
| D | Caracal | 12B/s | Taiga (Middle) |
| D | Cockatrice | 8B/s | Taiga (Front) |
| D | Honey Badger | 4B/s | Taiga (Front) |
| D | Griffin | 2.5B/s | Mountains (Back) |
| D | Yak | 1.8B/s | Mountains (Back) |
| D | Bull | 1.2B/s | Mountains (Middle) |
| E | Thunderbird | 800M/s | Mountains (Back) |
| E | Capybara | 500M/s | Mountains (Front) |
| E | Roc | 300M/s | Mountains (Middle) |
| E | Guinea Pig | 200M/s | Mountains (Front) |
| E | Llama | 100M/s | Mountains (Front) |
| E | Seal | 62M/s | Ocean (Back) |
| E | Leafy Sea Dragon | 45M/s | Ocean (Back) |
| E | Mantis Shrimp | 30M/s | Ocean (Middle) |
| E | Seahorse | 20M/s | Ocean (Back) |
| E | Goblin Shark | 12M/s | Ocean (Front) |
| E | Jellyfish | 7.5M/s | Ocean (Middle) |
| E | Turtle | 5M/s | Ocean (Front) |
| E | Crab | 2.5M/s | Ocean (Front) |
| E | Gorilla | 1.5M/s | Jungle (Back) |
| E | Tiger | 1.1M/s | Jungle (Back) |
| F | Crocodile | 720K/s | Jungle (Middle) |
| F | Cobra | 480K/s | Jungle (Middle) |
| F | Koala | 300K/s | Jungle (Front) |
| F | Parrot | 180K/s | Jungle (Middle) |
| F | Bat | 120K/s | Jungle (Front) |
| F | Lizard | 60K/s | Jungle (Front) |
| F | Kangaroo | 38K/s | Desert (Back) |
| F | Horse | 27K/s | Desert (Back) |
| F | Jackal | 18K/s | Desert (Middle) |
| F | Dingo | 12K/s | Desert (Back) |
| F | Snake | 7.5K/s | Desert (Front) |
| F | Emu | 4.5K/s | Desert (Middle) |
| F | Vulture | 3K/s | Desert (Front) |
| F | Hamster | 1.5K/s | Desert (Front) |
| F | Lion | 1K/s | Savanna (Back) |
| F | Elephant | 720/s | Savanna (Back) |
| F | Aardvark | 480/s | Savanna (Middle) |
| F | Zebra | 320/s | Savanna (Back) |
| F | Hyena | 200/s | Savanna (Front) |
| F | Giraffe | 120/s | Savanna (Middle) |
| F | Quokka | 80/s | Savanna (Front) |
| F | Ostrich | 40/s | Savanna (Front) |
| F | Pony | 25/s | Forest (Back) |
| F | Cow | 18/s | Forest (Back) |
| F | Badger | 12/s | Forest (Middle) |
| F | Kookaburra | 8/s | Forest (Back) |
| F | Owl | 5/s | Forest (Front) |
| F | Bunny | 3/s | Forest (Front) |
| F | Frog | 2/s | Forest (Front) |
| F | Snail | 1/s | Forest (Front) |
How the Throw Food For Animals Tiers Are Ranked
Every animal has a base cash per second, which is what it earns before any mutation or size boost is added. The tiers sort animals by that number, so the strongest earners sit at the top and the weakest sit at the bottom of F.
The numbers get large quickly, so the suffixes matter. 410Dd per second means 410 duodecillion cash every second, and 3.2No means 3.2 nonillion. Among the 140 animals that earn a fixed amount from their area, each tier's weakest animal still earns more than the strongest animal in the tier below it, so the gaps between tiers are real.
SS Tier: Egg and Shop Animals Tied to Your Best Animal
The SS tier doesn't use a fixed number. Each of its eight animals earns a set multiple of your highest-earning animal, so its income rises whenever your top earner gets stronger. The multiples run from 1x for Skeleton up to 9x for Pumpkin Monster, with the rest falling in between.
Take Waste Harvester as an example. If it's your best animal, Pumpkin Monster would earn nine times the 410Dd per second that Waste Harvester makes, while Skeleton would earn the same amount. That's why these eight can't be lined up directly against the fixed rates in the other tiers. Judge them against your own top earner, and recheck the comparison whenever that top earner changes.
S and A Tiers: The Highest Fixed Earners
The S tier holds the strongest fixed earners. All 20 of its animals come from Nuclear Wasteland and Phantom Harbor, and their rates run from 2Dc per second up to 410Dd per second. Every Nuclear Wasteland animal in the group earns more than every Phantom Harbor animal, so reaching the right area matters as much as which animal you catch.
The A tier is the end-game group. Its 16 animals come from Harvest Fields and Shadow Realm, and they run from 250Sx per second up to 3.2No per second. The strongest is Headless Horseman, and these are the animals to build your collection toward once you can reach their areas.
B and C Tiers: Mid-Game Earners
B-tier animals are the mid-game group, earning from 1.2Qa per second up to 380Qi. Phoenix is the strongest at 380Qi per second, and the group spans Mythical Paradise, Ancient Ruins, Hell and Deep Waters.
C-tier animals earn in the trillions, from 1.2T up to 750T per second. Shark leads at 750T per second from Deep Waters, with other C-tier animals from Deep Waters, Prehistoric Forest and Winter.
D, E and F Tiers: Lower Earners and How to Compare Them
D-tier animals earn in the billions, from 750B per second down to 1.2B, with Caladrius leading. E-tier animals earn in the millions, from 800M per second down to 1.1M. F-tier animals run from 720K per second down to 1 per second. The main reason to own an E-tier animal is to complete the animal index.
These lower groups are where comparing actual income matters most. Until you can reach the higher areas, the animals you already have are the ones earning for you, so a lower-tier animal can still be the right one to keep. Before you replace an animal with one from a higher tier, compare what each one actually earns from areas you can reach. Selling an animal frees up a spot in your plot, so run that comparison before you sell.
How Mutations and Sizes Change Animal Income
The base numbers in the tiers don't include mutations or sizes. Mutations and sizes both raise an animal's sale value and its per-second earning rate, so two copies of the same animal can earn very different amounts. Mutations also come with their own cosmetic look, so a boosted animal is easy to spot in your plot.
That makes the base number a starting point rather than the final answer. To decide whether an animal is worth keeping, work through these steps:
- Find the animal's base cash per second in its tier.
- Check whether your copy has a mutation or size, and how much that raises its earnings.
- Compare the boosted income with what the animals you can reach would earn.
The boost is what can change the answer. A mutated or sized animal from a lower tier can earn much more than its base number suggests, so a tier label on its own doesn't settle which animal to keep.