In Phasmophobia, you take on contracts at haunted locations, work out which ghost is behind the activity, and earn experience (XP) when you finish them. The fastest way to level up is to complete contracts you can finish reliably: identify the ghost correctly, complete the quick objectives, collect the bone, capture Unique media and get out alive. Raise the difficulty only as far as your identification and survival rate can support.
| Reward | XP earned | Multiplied by difficulty? |
|---|---|---|
| Correct ghost identification | 100 (small map), 150 (medium map), 200 (large map) | Yes |
| Each optional objective | 25 to 30 | Yes |
| Media | Up to 231 in total | Yes |
| Investigation bonus (correct ghost and escape alive) | Ghost identification reward plus completed objectives | Yes |
| Perfect Investigation bonus | 50 | Yes |
| Bone | 25 (small map), 35 (medium map), 50 (large map) | No |
Money and XP are tied at a one-to-one rate, so every $1 you earn also gives you 1 XP. That means the habits that raise your payout are the same ones that move you up levels, and there's no separate XP-only activity to chase.
Pick a Phasmophobia Map You Can Search Quickly
Your map is the first decision, and it sets how much of each contract goes to walking around. Smaller maps usually take less time to search, so you can find the ghost room, check for the bone and reach the exit sooner. Bigger maps pay more for a correct identification, but they take longer to cover, and that extra time has to be worth it.
Familiarity matters more than size. A map you know well lets you find the ghost room, the bone and the exit without wandering, which often saves more time than a smaller map you're still learning. No single map is the fastest for every player, so judge your choice by how long your searches take and how often you make it out alive.
Identify the Ghost Before You Take Any Risks
Identifying the ghost is the foundation of every contract. A correct guess earns the identification reward, and the investigation bonus and Perfect Investigation bonus depend on it too. A wrong guess loses all three, so it's worth working the evidence properly instead of guessing early.
Work the evidence in full before you commit. If you're not sure, use the safe evidence you still have rather than guessing. As you learn a ghost's behavior, you can start identifying it with fewer clues, but only once your guesses are consistently right. When you're confident, mark the ghost in your Journal.
Finish Objectives and Check for the Bone on the Same Route
Optional objectives are worth taking when they fit the route you're already on. Pick the ones you can finish while gathering evidence, such as interactions you can trigger without going back into danger. Skip any objective that needs long waits or a risky event, because time spent waiting is time you could have used to finish another clean contract.
Check for the bone before you leave. Build a bone sweep into your exit route so you're not relying on luck in the final seconds. The bone's reward doesn't change with difficulty, so on lower settings it makes up a bigger share of your payout, and it's a dependable addition to any contract you're already completing.
Capture Unique Media Instead of Repeats
Under the Chronicle system, media covers photos, videos and sound recordings, and each contract allows up to five photos, five videos and three sound recordings. The first capture of a subject is marked Unique. Capturing the same subject again is marked Duplicate, and it pays less money and XP. Duplicates still earn something, but a Unique entry is the better use of a slot.
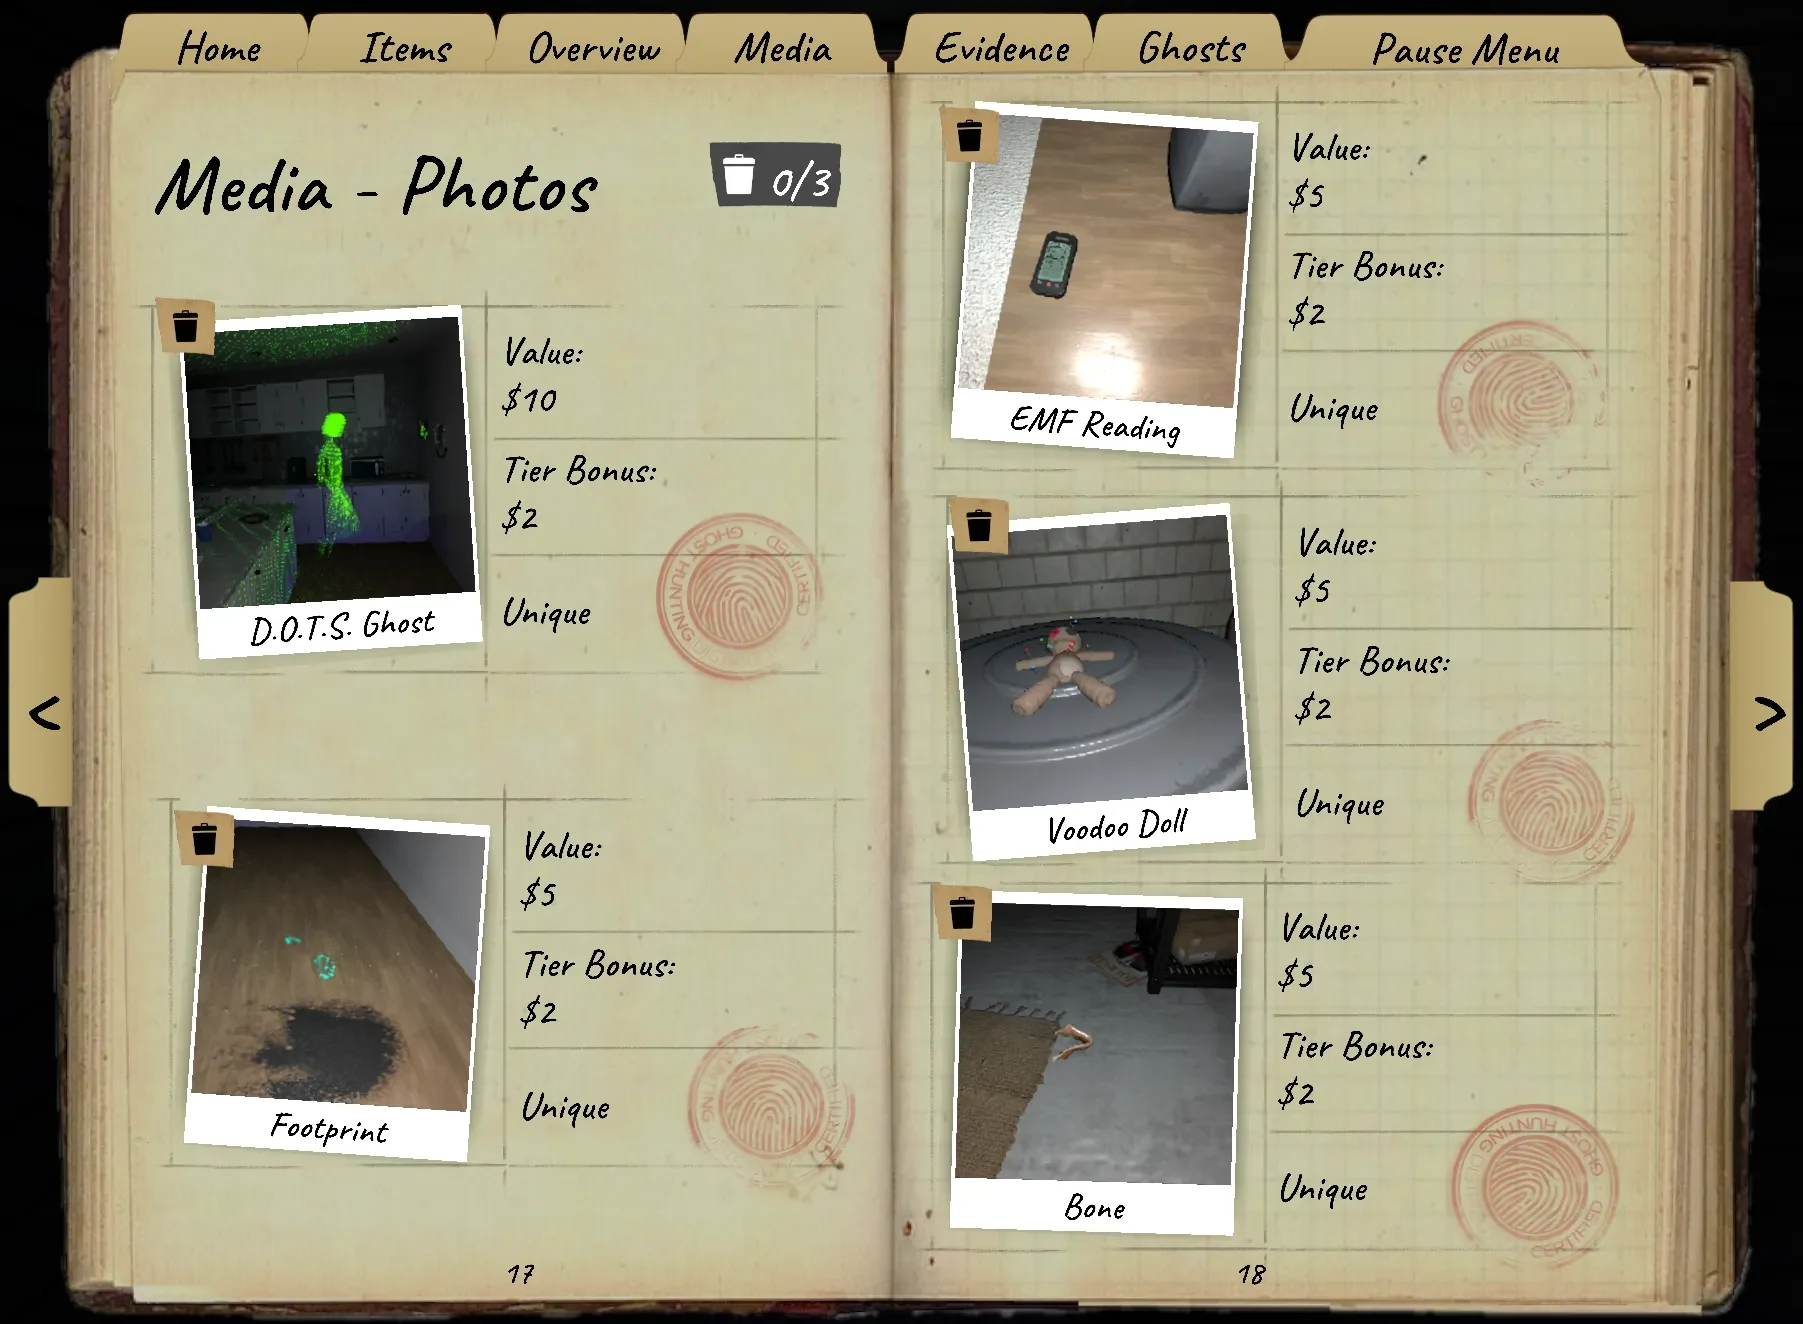
Your cameras and sound recorders show when a capture would be a Duplicate, so check before you record. Spend your slots on new subjects, such as a new interaction, object or sound. Good places to look include:
- Photos: an EMF reading on an EMF reader, or one of the three ghost forms (Physical, D.O.T.S or Shadow).
- Videos: a ghost triggering a Crucifix, ghost orbs, doors being moved or thrown objects.
- Sounds: paranormal sounds, a hunting ghost or a Spirit Box response.
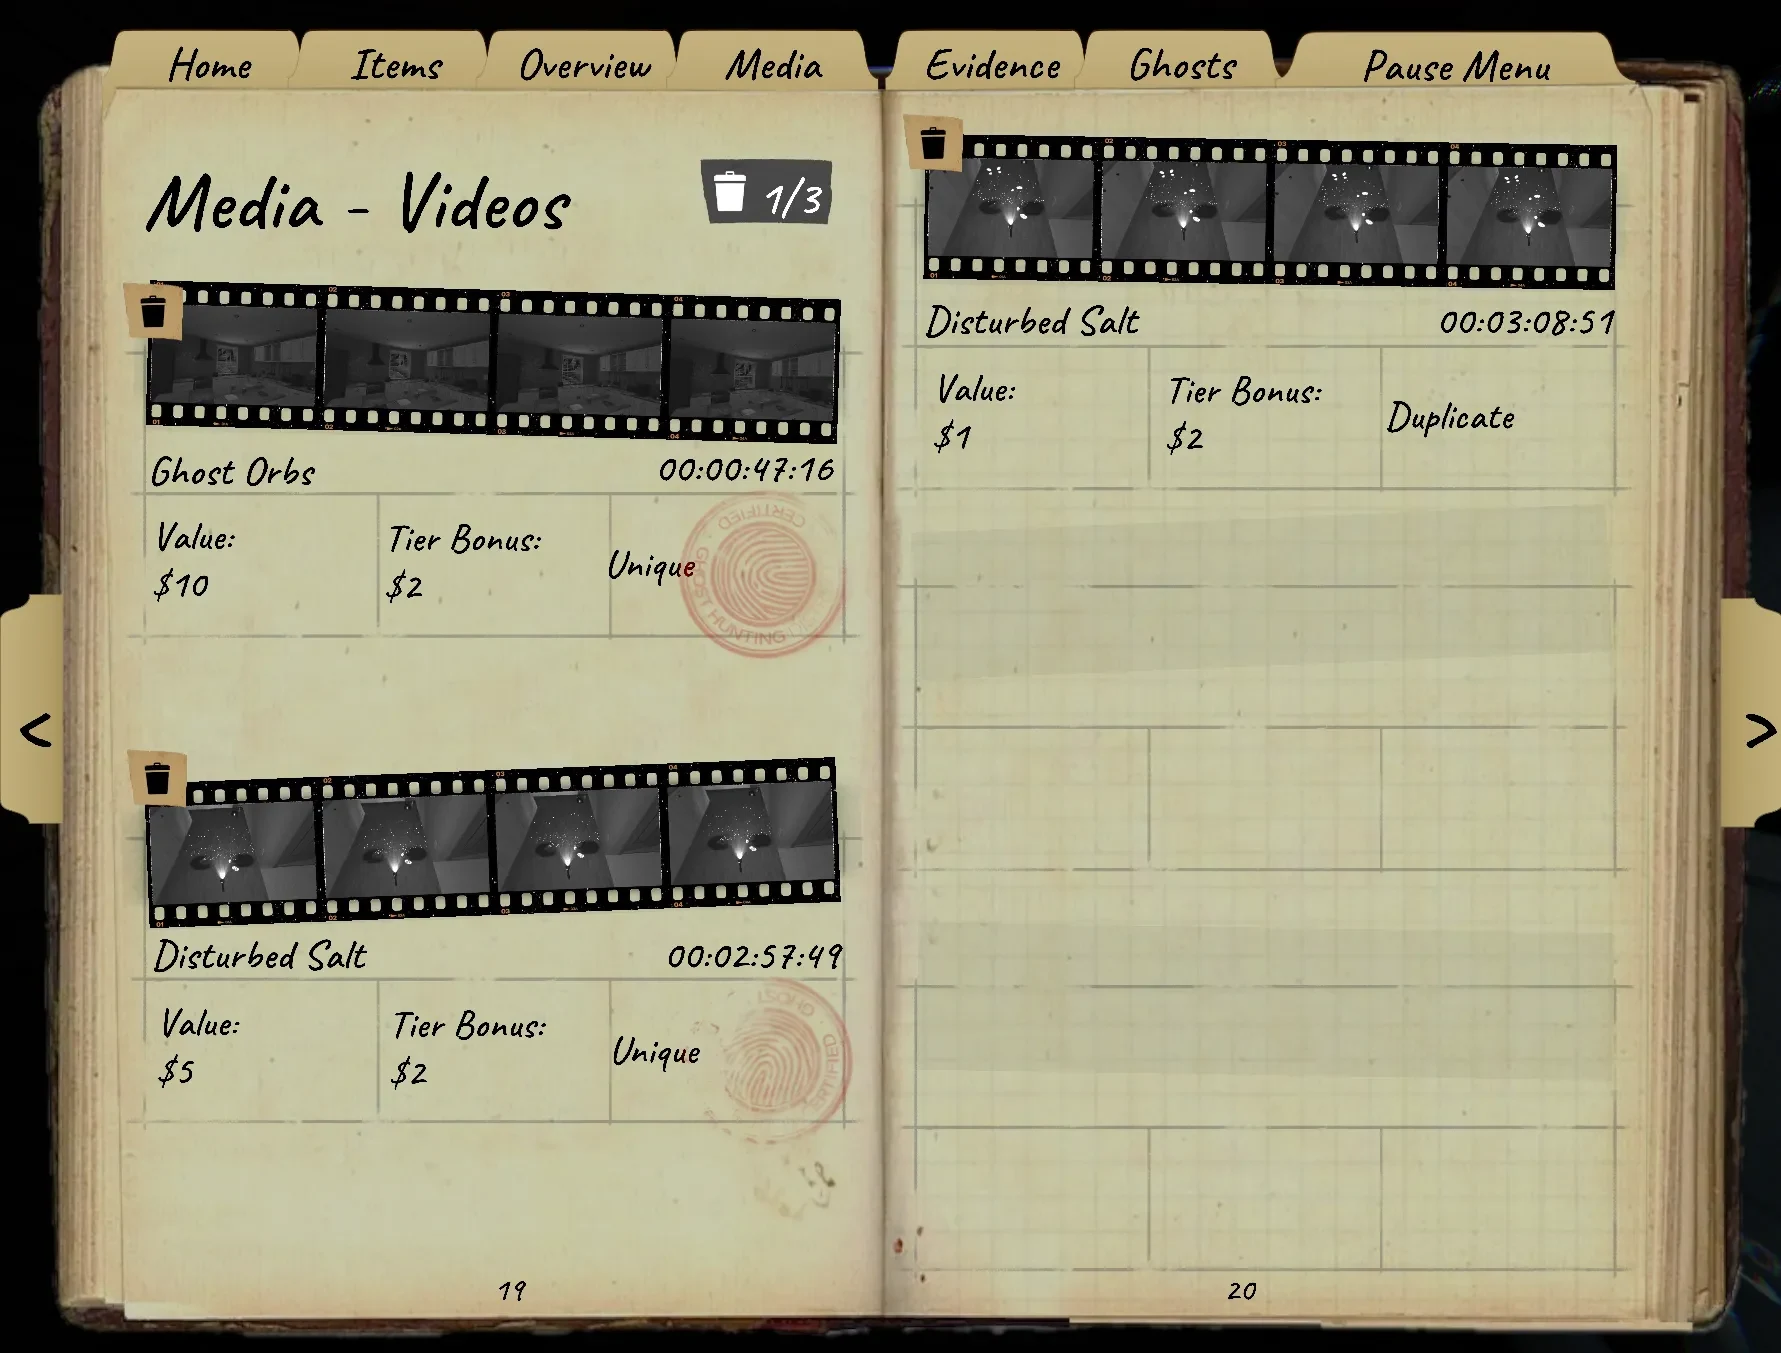
Higher-tier cameras and recorders add a bonus for each piece of media: $1 for Tier 2 and $2 for Tier 3. Use them when it's safe to do so. Stop capturing once media hunting turns dangerous, since a Duplicate taken during a risky hunt is a poor trade for a finished contract.
Go for a Perfect Investigation When Your Route Already Covers It
A Perfect Investigation adds 50 XP on top of the investigation bonus. To earn it, you need the correct ghost, all three optional objectives, the bone and a Journal filled only with Unique media. That's a lot to line up in one contract, so treat it as a bonus you aim for rather than the plan for every run.
Work toward it when your usual route already covers the objectives and the bone, and your media slots are open for new subjects. Don't add a dangerous hunt or a long wait just to chase it. The bonus is smaller than the identification it depends on, so it's not worth risking a wrong guess.
Choose a Phasmophobia Difficulty Your Results Can Support
Your difficulty sets the multiplier for most of your rewards, and higher difficulties unlock as you level up.
| Difficulty | Multiplier | Unlocks at level |
|---|---|---|
| Amateur | 1x | Starting difficulty |
| Intermediate | 2x | 10 |
| Professional | 3x | 20 |
| Nightmare | 4x | 30 |
| Insanity | 6x | 40 |
| Custom | 0x to 15x, depending on settings | 50 |
A failed run at a high setting is where the risk shows up. If you die before the contract ends, the multiplier isn't applied when it's above 1x, and your earned XP is halved. A high-multiplier run that goes wrong can pay less than a clean run at a lower setting, so the highest setting you can unlock isn't automatically the fastest.
Custom difficulty runs from 0x to 15x, depending on how you set it up. If you identify the wrong ghost on a custom setting, the multiplier rounds down to the nearest standard step, so 7x becomes 6x. Custom setups suit experienced players who know ghost behavior well, not players who are still learning.
Start on Amateur or Intermediate while you learn the evidence, ghost behavior and map layouts. Their lower multipliers come with steadier survival and fewer wrong guesses. A string of clean lower-setting contracts can produce more progress over a session than repeated failures at a setting you can't yet control.
Use these checks before you move up or down:
- Move up when you identify common ghosts accurately at your setting.
- Raise the multiplier only when your completion rate stays high enough to avoid frequent deaths and resets.
- Drop back a tier if you're spending more time recovering equipment or retrying failed contracts than investigating.
To see whether a setting is paying off, track these over several contracts:
- Average minutes from loading into a contract to returning to the lobby.
- How often your ghost identification is correct.
- How often you survive.
- Your average payout, including objectives, bone and media.
- How much equipment you replace after failures.
Then compare completed payout per minute, not the multiplier on the setup screen. The setting that pays the most per minute is the right one for you, even if it isn't the highest one available.
Leave Alive Once the Next Task Isn't Worth the Risk
Staying alive keeps your rewards intact, and the investigation bonus only counts if you escape. That makes the end of a contract as important as the start. Before you start an extra task, ask yourself three questions:
- Can I finish it during this safe window?
- Will it need another trip into a dangerous area or a deliberate hunt trigger?
- Would a death or reset cost more time and equipment than the task can return?
If the answer to the third question is yes, bank the rewards you've already completed and leave. A higher multiplier only helps once the run reaches the debriefing screen. Keep enough money to replace lost equipment as well, so one bad run doesn't stop the next one.
Use Weekly Challenges as a Bonus, Not a Plan
Weekly challenges can add a reward on top of a contract you're already running. They rotate, though, and the map, loadout and completion conditions can change, so check the rules in the game before you start. Don't build your session around a fixed reward from a challenge.
Take a challenge when your usual contract already meets its conditions. If it asks you to switch maps, change your loadout or stay in a dangerous area longer, the extra time may cost more than the bonus returns, so skip it.
Decide Whether to Prestige at Level 100
Once you reach level 100, you can choose to Prestige. It's optional, and it isn't a faster way to level up. Prestige resets your level, money and equipment, and in return you get a new badge and title for your ID Card. You keep your map and difficulty unlocks, and Prestige doesn't change how much XP each level needs.
Choose Prestige when you want the badge and title and you're comfortable rebuilding your kit without slowing your routine. Wait if you still need money for expensive upgrades, or if your equipment is what keeps you alive while you're still learning. Either way, expect to earn money again from the start.