Your first trip in Open Sea For Animals is not successful just because you reached an egg. You need to open a route from the base, secure one reachable egg, get back before the waves close, and finish the hatch or Animal step at base.
This beginner's guide covers that complete first-session loop, then shows how to choose an upgrade based on the part of the run that failed. The exact prices, timers, Staff lists, and Rebirth requirements can change, so use the values shown in the live game panels when you spend your Cash.
How to Play Open Sea For Animals: Complete Your First Egg Run
The safest way to learn the game is to treat your first trip as a round trip, not a race to the farthest egg. Your starter Staff and Power determine how much of the sea you can open, while your route and Speed determine whether you can return with the egg.
- Start at the base and enter the Safe Zone. The Staff interaction is available from the sea-facing starting area.
- Charge the starter Staff. On PC, hold the left mouse button and release when the charge bar reaches its highest point. That gives you the best available opening window from the Staff. If your platform shows a different prompt, follow the control shown by the live interface.
- Choose one reachable egg. Pick a target that you can reach and bring back, rather than planning a one-way trip toward the edge of the opened path.
- Confirm the pickup state. Before you turn around, make sure the game shows that you are carrying or have registered the egg. Do not spend the opening window searching for a second target.
- Run directly back to the Safe Zone. The waves close the route, and a failed encounter can end the run and cost you the egg you were carrying. A short, direct return is more valuable than a risky detour.
- Finish the base-side interaction. Once the egg is back at base, select it in the available hatch or placement interface so it can become part of your Animal progression.
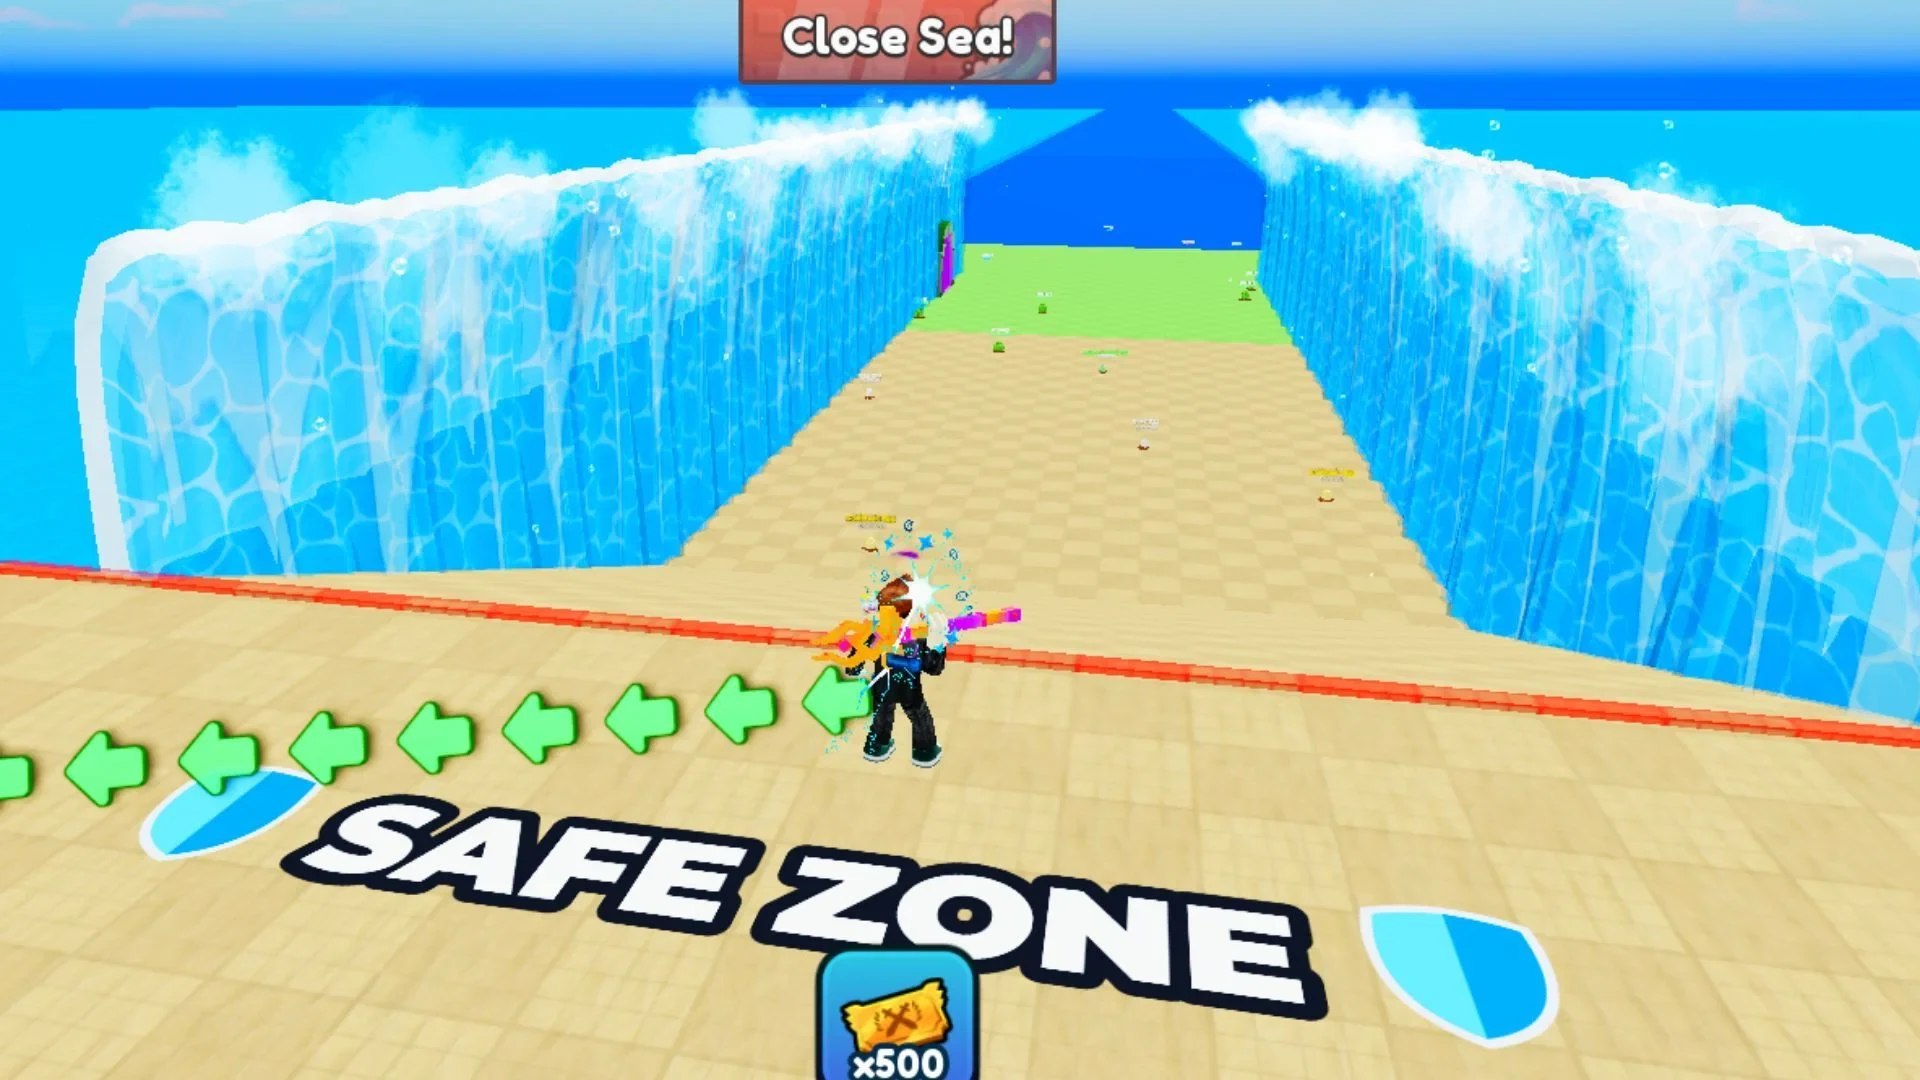
The key checkpoint is the return. If the sea does not open far enough to reach even a nearby egg, improve Power or the Staff's Open Time before attempting a longer route. If you can reach an egg but keep losing it on the way back, shorten the route first and then look at Speed.
How to Hatch Eggs and Earn Cash with Animals
Bringing the egg home is only the middle of the loop. At the base, select the recovered egg and complete the hatch or placement interaction shown by the game. You do not need to search for a separate NPC; the base-side interface handles the next step.
After the interaction, check the Animal roster or base display. The new Animal should be visible there and contribute to the Cash loop. If the interface gives you multiple Animals to manage, use the one with the better displayed earning rate in the available slot rather than leaving a lower earner active by habit.
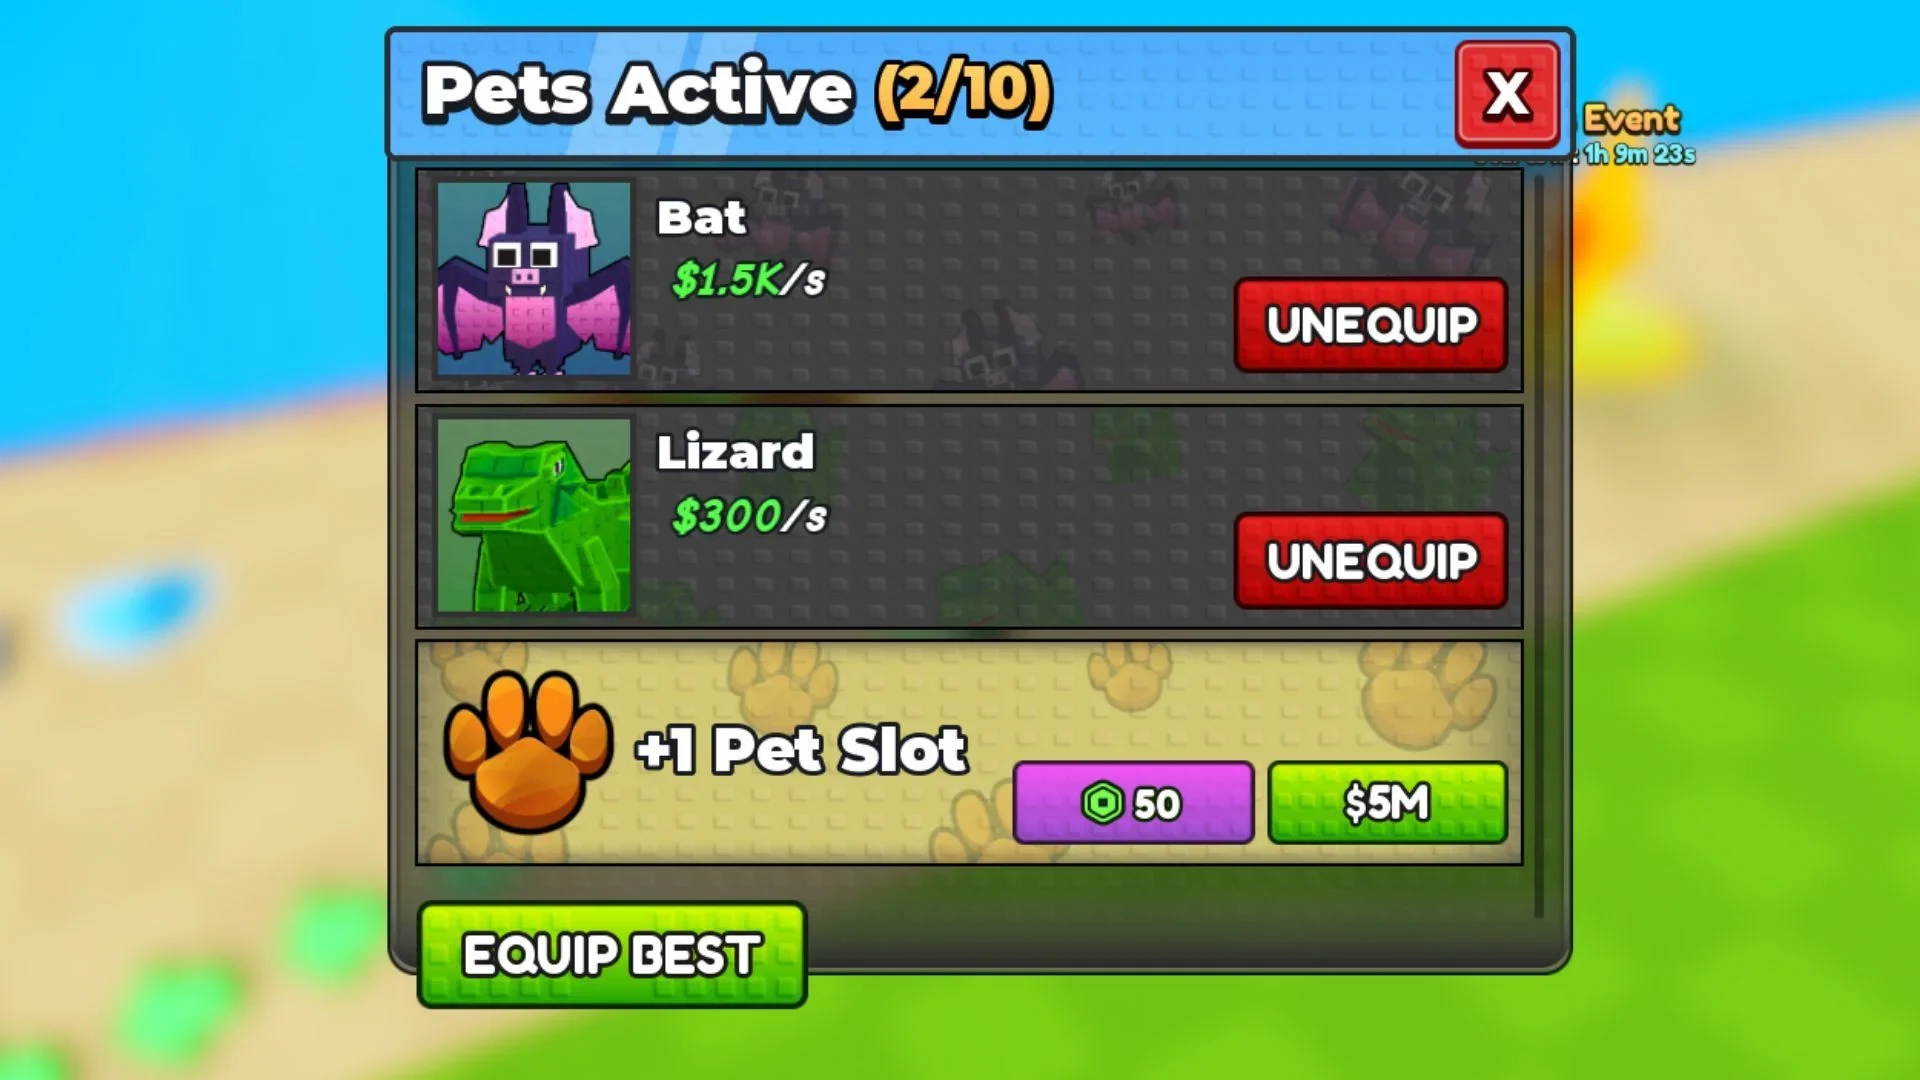
Animals earn Cash while you play and can continue earning while you're offline. That makes the base more than a place to deposit eggs: it is where you turn successful sea runs into the currency used for training, movement, carrying capacity, and Staff progression.
Before leaving the base, check three things:
- The recovered egg has been selected in the base-side hatch or placement interface.
- The hatch or placement interaction finished and the Animal appears in the roster or base.
- The Animal you want earning Cash is equipped or placed according to the controls the game currently shows.
Do not build your first route around a specific rare egg, mutation, or fixed earning number. You can learn the core loop without relying on a complete roster or a guarantee that a named egg will appear.
Open Sea For Animals Upgrade Guide: Power, Speed, Carry, and Staff
There is no safe universal order for your first purchases. Spend the next bit of Cash on the system connected to the failure you just saw, then repeat the same short route so you can tell whether the change helped.
| If this stopped you | Check or buy | What to test next |
|---|---|---|
| The sea closed before you could reach a reachable egg | Train Power with a weight from the Weights Shop, or look at a Staff with more Open Time | Open the same target again and check whether you now have enough margin to reach it and return |
| You reached the egg but lost it on the way back | Use Speed in the Upgrades menu, or choose a shorter egg route | Repeat the same route without a detour, and focus on the return rather than going farther |
| You can already complete one egg run safely and want more per trip | Buy Carry in the Upgrades menu | Add only one nearby pickup to a route you have already completed safely; do not plan around an assumed maximum |
| Your runs succeed but Cash production feels slow | Review the Animals in the base or Pets interface and use the better displayed earner where the game allows it | Let the improved Animal contribute to Cash before judging the next purchase |
| You want better egg rarity rather than a longer opening window | Check the Staff Shop for Luck | Test the Staff's effect on later runs; Luck is not a substitute for enough opening time or a safe return |
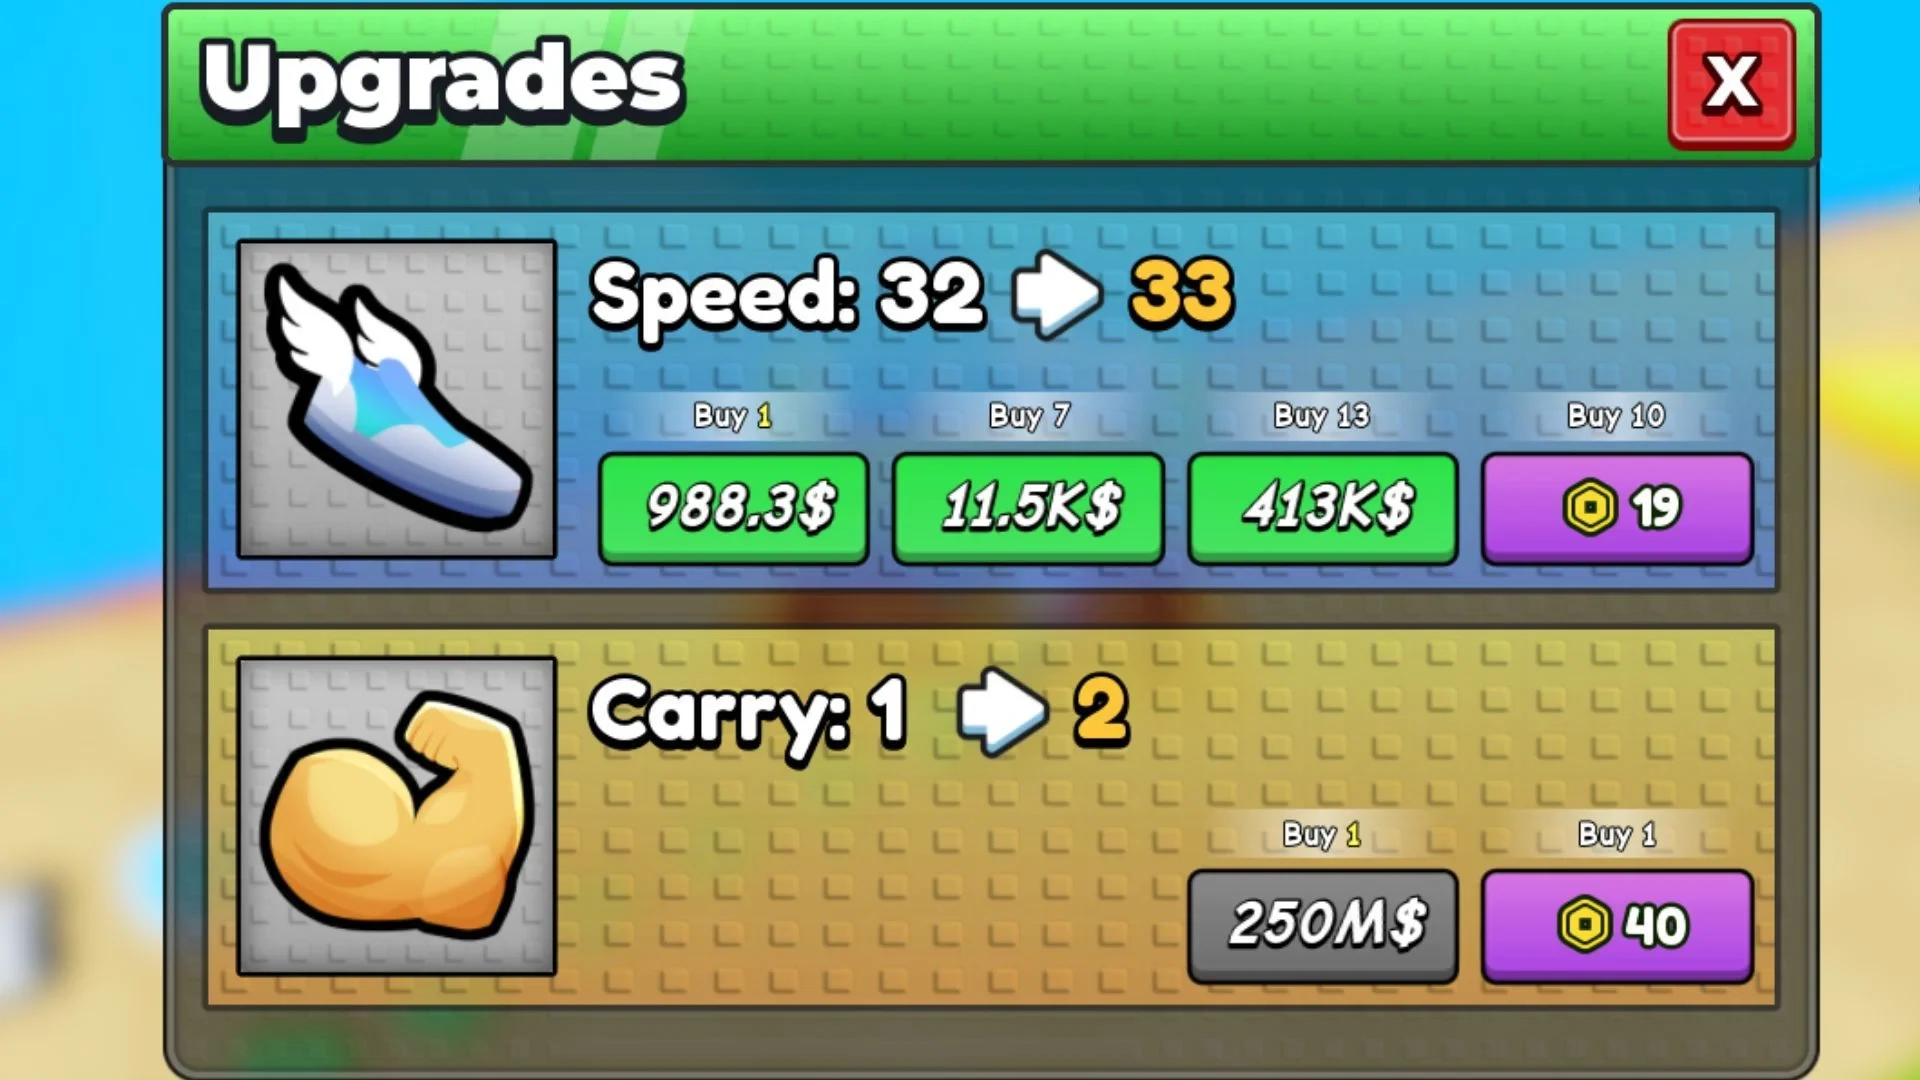
Power comes from training with a weight, and better weights provide more Power per repetition. More Power helps the sea stay open longer after you use the Staff. Staffs also affect the run, but their two useful early stats solve different problems: Open Time extends the available sea-opening window, while Luck affects the rarity of eggs you can find. Staffs may be offered for Cash or Robux, so read the purchase panel instead of relying on an old price list.
Speed is the better diagnosis when the target is reachable but your return is late. Carry is a capacity upgrade, not a rescue button: buy it after you can finish a route safely and only when the extra pickup would fit a route you already understand.
How Rebirth Fits Into Open Sea For Animals Progression
Rebirth is a later Cash decision, not a requirement for the first egg. The Rebirth panel asks for a displayed Cash amount and offers a higher Cash multiplier in exchange for reducing your Cash.
Before confirming, read the live panel all the way through. Check the required amount, the multiplier change, and exactly which progress the confirmation says will be affected or retained. Do not borrow a threshold or a universal reset rule from an older guide, because those details are not needed to understand the basic loop and can change with the game.
A practical time to consider Rebirth is after your route is stable and you can rebuild Cash with a short, reliable egg run. If your next Staff, Power, or Speed purchase is the thing preventing you from completing a route, that purchase may solve the immediate bottleneck more directly. Rebirth should make a working Cash loop faster, not replace the work of making the loop reliable.
Open Sea For Animals Beginner Mistakes to Avoid
Planning a one-way trip. The farthest egg you can see is not necessarily the best target. Start with the egg you can reach and return from before the waves close.
Leaving before the pickup is confirmed. If the game has not shown that the egg is being carried or registered, turn around too early and the return will not complete the goal.
Detouring after the pickup. Once you have an egg, take the direct route home. More distance only matters after you can consistently survive the basic run.
Buying several upgrades at once. Change one variable and repeat the same route. That tells you whether you needed Power, Open Time, Speed, Carry, or better Animal management.
Treating old numbers as permanent. Prices, opening timers, Staff rosters, Carry limits, and Rebirth requirements belong to the panels you see in the game. Use those panels when deciding what to buy.
For your next attempt, make one small change: train Power or improve Open Time if the sea closes too soon, use Speed or a shorter route if the return fails, buy Carry only after a safe run, or improve your active Animal if Cash is the slow part. Then run the same short route again.