Named locations in DOORS are where a run asks you to do something specific: solve a lock, cross a chase room, buy supplies, or find the next route. Learn what each stop is for before you spend health, keys, or time exploring it.
Route section
The Hotel
The Hotel moves from the starting lobby to the Library, late garden rooms, and the Door 100 Electrical Room. Use the named stops to plan keys, light, hiding space, and short searches without treating every side room as a separate landmark.
The Reception
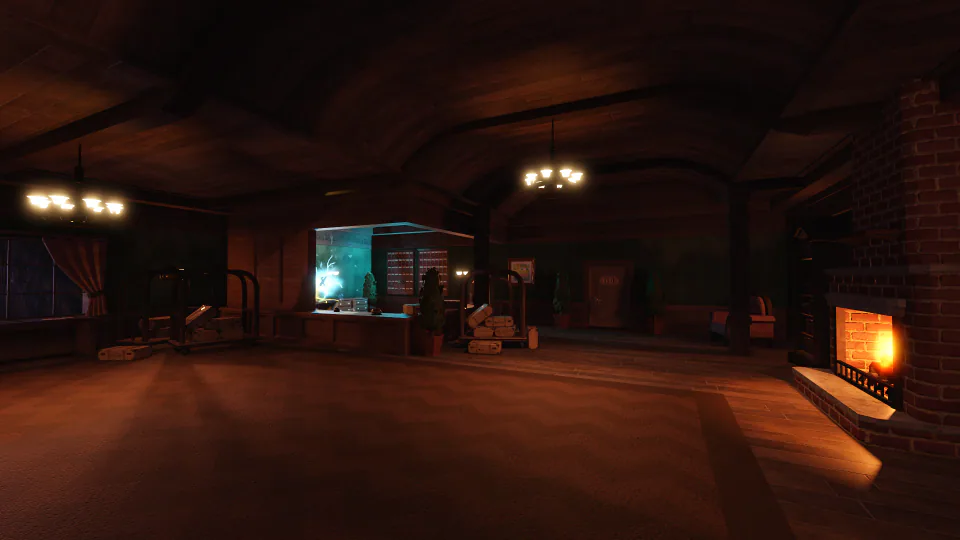
The Hotel starting room. Grab early supplies here, then open Door 1 and begin the main route.
- Type
- Starting room
- Route
- Door 0
- Floor
- The Hotel
- Access
- The starting room of a Hotel run.
- Purpose
- Gives the run its first safe-looking stop before the numbered doors begin.
- Puzzle or loot
- Search the room's drawers and furniture for ordinary early-run supplies.
- Hazards or entities
- No named set-piece encounter is tied to the starting room.
- Survival tip
- Collect the first useful supplies, then move on instead of spending too long in the lobby.
- Related items
- Drawers and ordinary run items
The Library
The first major Hotel puzzle. Find the books, stay quiet around Figure, and use the symbols to open the lock.
- Type
- Puzzle room
- Route
- Doors 50 and 51
- Floor
- The Hotel
- Access
- Reach the middle of the Hotel route and open the Library entrance.
- Purpose
- Solve the book puzzle and unlock the next door while Figure patrols the room.
- Puzzle or loot
- Find the books and solution information, then use their symbols to solve the lock.
- Hazards or entities
- Figure is the main threat. Rush, Ambush, Dread, and other encounters can add pressure depending on the run.
- Survival tip
- Crouch and keep your movement quiet. Use the room's furniture to route around Figure while you finish the code.
- Related items
- Library books, solution paper, hiding spots, Crucifix
Jeff Shop (The Hotel)
The Hotel's mid-run supply stop. Spend Gold on the one utility item your run is missing most.
- Type
- Shop
- Route
- Shortly after The Library, commonly around Doors 53-59
- Floor
- The Hotel
- Access
- Continue past The Library during a Hotel run.
- Purpose
- A mid-run shop where Jeff sells utility items and accepts tips.
- Puzzle or loot
- Spend Gold on useful healing, light, and survival items before the late Hotel rooms.
- Hazards or entities
- Jeff, El Goblino, and Bob are friendly shop residents. Normal run threats can still matter before or after the stop.
- Survival tip
- Use the shop to cover the weakness in your current loadout instead of buying duplicates you already have.
- Related items
- Gold, Flashlight, Lighter, Vitamins, Lockpick, Skeleton Key, Crucifix
The Rooms Entrance
The hidden Door 60 route into The Rooms. Bring the keys first, then search the Basement for the lever.
- Type
- Secret route
- Route
- Door 60 side route
- Floor
- The Hotel
- Access
- Find the Basement lever, then unlock the chained A-000 entrance with two Lockpicks and a Skeleton Key.
- Purpose
- Connects the Hotel to The Rooms subfloor.
- Puzzle or loot
- The Basement lever opens the gate, while Lockpicks and a Skeleton Key open the final entrance.
- Hazards or entities
- The route passes through a dark Basement where time and navigation can become the real problem.
- Survival tip
- Only commit when you have the required keys and enough light to search the Basement for its lever.
- Related items
- Lockpick, Skeleton Key, Basement lever
The Infirmary
A useful Hotel checkpoint for healing and the skull-lock side route. Search quickly, then keep the run moving.
- Type
- Healing room
- Route
- Around Doors 65-70
- Floor
- The Hotel
- Access
- Reach the mid-to-late Hotel route, or return from a Rooms exit.
- Purpose
- Provides a named medical stop and an optional Skeleton Key side route.
- Puzzle or loot
- Check the room for healing supplies and the skull-locked route connected to the Herb of Viridis.
- Hazards or entities
- The room is part of the active Hotel route, so passing entities can still make a slow search dangerous.
- Survival tip
- Search with a purpose, then leave. Do not burn a Skeleton Key here unless the side-room reward fits the run.
- Related items
- Skeleton Key, Herb of Viridis, healing items
The Courtyard
The Hotel's outdoor transition. Check the toolshed for Shears before the route pushes you toward the Greenhouse.
- Type
- Route transition
- Route
- Late Hotel route before The Greenhouse
- Floor
- The Hotel
- Access
- Reach the late Hotel rooms and follow the route toward the garden section.
- Purpose
- Moves the run through an outdoor Hotel area and provides the useful Shears route.
- Puzzle or loot
- A small toolshed can provide Shears, which are useful for vine-covered chests and passages.
- Hazards or entities
- Rain and the open layout make it easier to lose time while searching for the next entrance.
- Survival tip
- If you plan to enter The Outdoors, check the Courtyard toolshed for Shears before moving on.
- Related items
- Shears, Skeleton Key, Multitool
The Greenhouse
The Hotel's dark garden stretch. Keep a light ready and listen for Rush when the usual warning flicker disappears.
- Type
- Dark route section
- Route
- Doors 90-99
- Floor
- The Hotel
- Access
- Reach the final Hotel section through the Courtyard route.
- Purpose
- Carries the run through a dark garden section before the Electrical Room and the late-game routes.
- Puzzle or loot
- Advance through the numbered rooms while checking the dark garden for supplies and vine-covered paths.
- Hazards or entities
- Rush, Snare, Eyes, Screech, Hide, and other threats are harder to read when the lights are out. Lightning can also mask audio cues.
- Survival tip
- Carry a light source and listen carefully. In the dark rooms, Rush's approach sound matters more than a light flicker.
- Related items
- Flashlight, Shears, Multitool, Crucifix
The Electrical Room
The Hotel finale. Find the switches, finish the breaker puzzle, and escape Figure before taking the elevator.
- Type
- Final puzzle room
- Route
- Door 100
- Floor
- The Hotel
- Access
- Reach the end of The Hotel and open the gated room with its lever and Electrical Room Key route.
- Purpose
- Solve the breaker puzzle, survive Figure's chase, and finish the Hotel.
- Puzzle or loot
- Find the breaker switches, restore power, and use the lower-floor Rift before taking the elevator out.
- Hazards or entities
- Figure patrols the tall room while the gates and multiple levels make navigation slow.
- Survival tip
- Search every level for switches and the Electrical Room Key, then leave as soon as the breaker puzzle is complete.
- Related items
- Electrical Room Key, Rift, Lockpick, Crucifix
Route section
The Mines
The Mines strings together cave set pieces, The Nest, Sewers, and the Dam. The Railway Station can appear as a named minecart puzzle in the Sewers, but it is not a guaranteed stop, so keep your route plan flexible.
The Adit
The first named stop in The Mines. Use it to reset your bearings and prepare for the darker route ahead.
- Type
- Starting transition
- Route
- Immediately after the Hotel elevator crash, around Door 100.5
- Floor
- The Mines
- Access
- Enter The Mines from the Hotel elevator route.
- Purpose
- Introduces the Mines route and sends the run into its minecart and cave sections.
- Puzzle or loot
- Follow the entry path and collect early Mines supplies before the route opens into larger rooms.
- Hazards or entities
- The Mines introduce darker rooms, water, minecart routes, and new encounter patterns.
- Survival tip
- Treat the Adit as a resupply point. Keep a light source ready before the Mines rooms become harder to read.
- Related items
- Flashlight, Bulklight, Batteries, Minecart lever
The Bridges
A three-part bridge puzzle in The Mines. Keep a light on and check the drawers beside the safe path.
- Type
- Halt set piece
- Route
- Mines mid-route, before The Caverns
- Floor
- The Mines
- Access
- Progress through the ordinary Mines rooms until the bridge encounter appears.
- Purpose
- Cross three bridge sections while Halt and the broken paths pressure the player.
- Puzzle or loot
- Choose the one usable bridge in each section and reach the staircase at the far end.
- Hazards or entities
- Halt, broken bridges, darkness, and falls into the lower area.
- Survival tip
- Bring a light source. The correct bridge has a set of drawers on the right side of the walkway.
- Related items
- Flashlight, Bulklight, item lockers
The Caverns
The first Mines Seek chase. Follow the blue route, clear the jumps, and steer the minecart into The Nest.
- Type
- Seek chase
- Route
- Doors 142-149
- Floor
- The Mines
- Access
- Reach the first Mines Seek chase after the earlier cave rooms.
- Purpose
- Runs the player through broken bridges and a minecart chase into The Nest.
- Puzzle or loot
- Jump the broken bridges, then steer the minecart through the correct tracks and obstacles.
- Hazards or entities
- Seek, falling boulders, Stalagmite pits, minecart barriers, and wrong-track dead ends.
- Survival tip
- Follow Guiding Light's path. Steer only when the tracks split and crouch for low barriers.
- Related items
- Guiding Light and the minecart route
The Nest
The Mines' nest puzzle and chase. Find the Anchors quickly, then escape the Grumbles through the correct route.
- Type
- Boss puzzle room
- Route
- Doors 150 and 151
- Floor
- The Mines
- Access
- Complete The Caverns and enter the Grumble nest.
- Purpose
- Power the Anchors and escape the nest while Grumbles patrol the tunnels.
- Puzzle or loot
- Find the Anchors, enter their number sequences, and open the exit before the room closes in.
- Hazards or entities
- Grumble, Queen Grumble, darkness, and narrow routes around the nest.
- Survival tip
- Learn the layout, keep a light ready, and use tight corners or hiding spots when a Grumble gets close.
- Related items
- Anchors, Flashlight, Bulklight, Batteries
Jeff Shop (The Mines)
The Mines' supply stop. Its route placement differs from the Hotel shop, so use the Mine-specific stock to prepare for the Sewers.
- Type
- Shop
- Route
- After The Nest, in the Sewers around the 152-162 range
- Floor
- The Mines
- Access
- Continue through the early Sewers after escaping The Nest.
- Purpose
- Provides a second floor-specific shop stop for light, healing, and Mines utility items.
- Puzzle or loot
- Spend Gold on items that help with the dark Sewers, minecart puzzles, and later boss rooms.
- Hazards or entities
- Jeff, El Goblino, and Bob are friendly. The surrounding Sewers still contain ordinary Mines hazards.
- Survival tip
- Treat this as a loadout check. Buy light or healing support before committing to the long Sewer stretch.
- Related items
- Gold, Bulklight, Bandage Pack, Battery Pack, Shears, Multitool, Crucifix
The Railway Station
A high-chance but non-guaranteed Sewer puzzle room. Move the minecarts carefully and use the barred exit as your landmark.
- Type
- Minecart puzzle room
- Route
- The Sewers, commonly somewhere in the 153-199 range, but not guaranteed
- Floor
- The Mines
- Access
- Encounter the named station room during the Sewer route.
- Purpose
- Uses minecarts and tracks to open the blocked exit from a two-level station.
- Puzzle or loot
- Move the carts, pull the distant lever, and use the cart to break the wooden barrier at the exit.
- Hazards or entities
- Minecart timing, floods, and a possible Dupe door on the wrong platform.
- Survival tip
- The real exit is behind the wooden barrier. Check the door number before entering a platform door.
- Related items
- Minecarts, lever, item lockers
The Sewage Pipes
The second Mines Seek chase. Follow the blue current, break the grates, and do not stop in the flooded tunnels.
- Type
- Seek chase
- Route
- Around Doors 170-180
- Floor
- The Mines
- Access
- Reach the second Mines Seek chase in the Sewers.
- Purpose
- Carries the run through flooded corridors, split paths, and grate tunnels toward The Dam.
- Puzzle or loot
- Follow Guiding Light and break through the grate doors to stay ahead of the chase.
- Hazards or entities
- Seek, Queen Grumble, floods, boulders, and blocked sewer grates.
- Survival tip
- Stay with the blue current and interact repeatedly at grate doors so the chase does not catch you.
- Related items
- Guiding Light and light sources
The Dam
The Mines finale. Lower the reservoir in phases, avoid the Seek attacks, and open the gate to The Woods.
- Type
- Final boss room
- Route
- Door 200
- Floor
- The Mines
- Access
- Reach the end of the Mines after the Sewer route.
- Purpose
- Defeat Dam Seek and open the route into The Woods.
- Puzzle or loot
- Turn the valves through three phases, lower the liquid, and activate the generator gate.
- Hazards or entities
- Dam Seek, Seek Hands, Seek Sludge, Seek Worm, rising liquid, and exposed platforms.
- Survival tip
- Stay on solid ground, turn valves between attacks, and never treat the black liquid as a shortcut.
- Related items
- Valves, generator, Crucifix
The Woods
The released endpoint after The Dam. Walk the forest transition, then stop at the current route boundary.
- Type
- Ending transition
- Route
- After The Dam, around Door 200.5
- Floor
- The Mines
- Access
- Complete The Dam and climb into the outdoor transition.
- Purpose
- Closes the current Mines run and leads to the castle door beyond the released route.
- Puzzle or loot
- Follow the path to the ending door and use the Rifts found along the transition when available.
- Hazards or entities
- The ending sequence features Queen Grumble and Seek. The castle door beyond the woods is outside this collection.
- Survival tip
- Keep moving along the path and treat the castle door as the current endpoint rather than a playable route in this collection.
- Related items
- Moonlight Rift, Starlight Rift
Route section
The Backdoor
The Backdoor turns route knowledge into a timer race. Room -51 starts the search for keys and Timer Levers, while Room -01 is the final pressure point before the exit.
The Rear Entryway
The Backdoor starting room. Find the key behind the fence before the timer pressure begins.
- Type
- Starting room
- Route
- Room -51
- Floor
- The Backdoor
- Access
- Enter The Backdoor through its current Lobby route.
- Purpose
- Starts the Backdoor run and gives the player time to find the first key.
- Puzzle or loot
- Crouch behind the fenced corner and collect the Room Key that opens the path to Room -50.
- Hazards or entities
- The timer does not start until the door to Room -50 opens, making this the calmest Backdoor search room.
- Survival tip
- Search carefully before opening the next door. Use the free time to find the key and orient yourself.
- Related items
- Room Key, drawers, closets
The Vestibule
The Backdoor finish line. Check the timer lever, collect what you need, and leave through the final door.
- Type
- Final room
- Route
- Room -01
- Floor
- The Backdoor
- Access
- Reach the final Backdoor room before the exit.
- Purpose
- Provides the final timer lever, Starlight purchase, and exit route.
- Puzzle or loot
- Pull the Timer Lever when needed and use Gold to buy the Bottle of Starlight on its pedestal.
- Hazards or entities
- The Backdoor timer and its Haste/Blitz pressure make the route outside the room time-sensitive.
- Survival tip
- Handle the lever and exit without wandering. Buy Starlight only when it helps the next run or escape.
- Related items
- Bottle of Starlight, Gold, Timer Lever
Route section
The Rooms
The Rooms begins at A-000, includes optional Exit Rooms after A-200, and leads toward A-1000. Save enough light and key support for the long route instead of treating the entrance as a quick detour.
The Waiting Room (A-000)
The Rooms entry room. Spend a little Gold on a Shakelight before the long dark run begins.
- Type
- Starting room
- Route
- A-000
- Floor
- The Rooms
- Access
- Unlock the A-000 entrance from The Hotel's Rooms Entrance.
- Purpose
- Begins the Rooms run and gives the player a light-source purchase before the dark office rooms.
- Puzzle or loot
- Buy a Shakelight from the dispenser for Gold, then enter the first numbered room.
- Hazards or entities
- The main threat begins deeper in The Rooms, where visibility falls and the specialist entities appear.
- Survival tip
- Buy the backup light before leaving. The Rooms becomes much less forgiving once the office rooms turn dark.
- Related items
- Shakelight, Gold, Lockpick, Skeleton Key
Exit Rooms
The Rooms' optional escape hatch. It can save a run after A-200, but A-60 and A-120 may still pressure the exit.
- Type
- Optional exit room
- Route
- Begins appearing after A-200 at intervals through The Rooms
- Floor
- The Rooms
- Access
- Continue deep enough into The Rooms for an exit room to generate.
- Purpose
- Offers an optional return to The Hotel before A-1000.
- Puzzle or loot
- Find the EXIT door inside the room and hold it open to return to the Hotel Infirmary.
- Hazards or entities
- A-60 and A-120 can appear even though an Exit Room may not have a locker.
- Survival tip
- Use hiding spots in the previous room or a speed boost when an A-entity arrives. Leave if the run has already done its job.
- Related items
- Vitamins, Starlight items, EXIT door
A-1000
The true end of The Rooms. Cross the Void Bridge, take the Starlight Jug, and return to the Hotel.
- Type
- Final room
- Route
- A-1000
- Floor
- The Rooms
- Access
- Reach the end of The Rooms instead of taking an earlier Exit Room.
- Purpose
- Completes the long Rooms route and returns the group to The Hotel with the Starlight Jug.
- Puzzle or loot
- Cross the Void Bridge, collect the Starlight Jug, and open the unlabelled exit door.
- Hazards or entities
- A-90 and the darkness of the final Rooms route can make the bridge approach dangerous.
- Survival tip
- Bring a reliable light and keep your inputs controlled when A-90 appears near the final stretch.
- Related items
- Starlight Jug, exit door
Route section
The Outdoors
The Outdoors is read through meters, signs, terrain, and named landmarks. Move from the courtyards through the Clearing and Mill, then slow down for the Hedge Maze and its route puzzle.
The Small Courtyard
The Outdoors starting area. Grab the toolshed's Shears and use the signs to find the first gate.
- Type
- Starting area
- Route
- Outdoors start, tracked by meters and signs rather than numbered doors
- Floor
- The Outdoors
- Access
- Enter The Outdoors through the released Hotel route and its locked, vine-covered entrance.
- Purpose
- Starts the Outdoors run and supplies the tools needed for the first gates and vines.
- Puzzle or loot
- Open the gate, check the toolshed for Shears, and search the fountain area for the route forward.
- Hazards or entities
- Caws are associated with the fountain. Grass, vines, and open paths can expose the player to Outdoors hazards.
- Survival tip
- Take the Shears if they appear and use the signs to track progress instead of looking for fake door numbers.
- Related items
- Shears, Multitool, Lantern, Skeleton Key
The Clearing
The Outdoors chase trigger. Once Eyestalk forms, follow the route and keep moving through the trees and bridges.
- Type
- Chase start
- Route
- Around the middle of The Outdoors, tracked by meters and signs
- Floor
- The Outdoors
- Access
- Follow the gates and paths from The Small Courtyard.
- Purpose
- Starts the Eyestalk chase and changes the route from open garden exploration to a forced escape.
- Puzzle or loot
- Open the gate, follow the correct path through the clearing, and cross the outdoor obstacles.
- Hazards or entities
- Eyestalk, Groundskeeper, Snare, rivers, bridges, and blocked paths.
- Survival tip
- Keep a light ready and move decisively once Eyestalk forms. Use the route markers instead of stopping in open ground.
- Related items
- Flashlight, Vitamins, Lantern, Compass
The Mill
The Outdoors' late service stop. Visit Grampy for a Lotus and stock up before the final maze.
- Type
- Service stop
- Route
- Late Outdoors route, before The Hedge Maze
- Floor
- The Outdoors
- Access
- Reach the late garden path after The Clearing and its chase sequence.
- Purpose
- Provides Grampy's Lotus service and another chance to collect tools before the final maze.
- Puzzle or loot
- Give Grampy eight Lotus Petals to create a Lotus, and check the mill and toolshed for useful supplies.
- Hazards or entities
- The late Outdoors route can still include Monument, Surge, Snare, and other terrain hazards.
- Survival tip
- Search the mill before leaving, but do not linger if the route is active. Keep enough light for the maze ahead.
- Related items
- Lotus Petals, Lotus, Shears, Lantern, Compass
The Hedge Maze
The Outdoors finale. Find three guillotines, avoid Bramble, and cut through the World Lotus roots.
- Type
- Final puzzle area
- Route
- Last 250m of The Outdoors, tracked by meters and signs
- Floor
- The Outdoors
- Access
- Reach the final Outdoors gate after The Mill.
- Purpose
- Ends The Outdoors with a maze, Bramble chase, and World Lotus root puzzle.
- Puzzle or loot
- Find and activate three guillotines to cut the roots blocking the exit.
- Hazards or entities
- Bramble, World Lotus roots, Snare, and the maze's limited sightlines.
- Survival tip
- Use the lamps and closets as landmarks. Stop moving when Bramble's light is on and keep a route back to safety.
- Related items
- Compass, Lantern, Shears, guillotines
Read the route before the room
A named location can be a shop, puzzle, chase, transition, or exit. Check its access condition and route first, then decide whether to search, sprint, hide, or save your supplies for the next room. The useful question is usually not "What is this place?" but "What does this place want from me?"
The Hotel starts simply, then adds the Library code, the hidden Rooms entrance, the Greenhouse, and the Door 100 Electrical Room. The Reception is a quick supply stop, while The Infirmary and The Courtyard reward a focused search instead of a full furniture inspection.
Hotel and Mines landmarks
The two Jeff Shops are separate stops. The Hotel shop comes after The Library and is a mid-run loadout check. The Mines shop comes after The Nest in the Sewers, so its light and healing choices need to cover the longer cave route ahead. Treating them as one generic shop makes both route positions less useful.
The Mines moves from The Adit into bridges, caves, The Nest, Sewers, and the Dam. The Railway Station is a named minecart puzzle room that can appear in the Sewers, but it is not guaranteed. If it does appear, check the platform doors and use the carts to open the real exit instead of trusting the first number you see.
The Woods is the released transition after The Dam and marks the end of the Mines route covered here. It is a route landmark, not a reason to invent extra rooms beyond the released path.
Alternate routes and meter signs
The Backdoor begins at Room -51 and ends at Room -01. Timer Levers are the whole argument: find the next one quickly, keep the key route in mind, and do not turn a short search into a sightseeing tour.
The Rooms starts at A-000, offers optional Exit Rooms after A-200, and ends at A-1000. Bring the keys and light needed for the entrance, then treat every exit as a route choice rather than a surprise shortcut.
The Outdoors does not use ordinary numbered doors. Follow its distance meters, signs, and landmarks from The Small Courtyard through The Clearing and The Mill to The Hedge Maze. Shears, a Compass, and a clear mental map help more than trying to force hallway habits onto a forest.
Common route mistakes
- Searching a shop without checking what the next floor section demands.
- Treating The Railway Station as a guaranteed stop.
- Using Hotel or Mines door numbers to describe The Outdoors.
- Entering the Rooms route without the keys or light needed to find its entrance.
- Treating every dark room as a place to stop and loot when the route is asking you to move.
Named rooms give you landmarks, not permission to relax. Learn the purpose, make the needed move, and leave before the room gets a second opinion.
FAQ
Where does Jeff Shop appear in DOORS?
The Hotel Jeff Shop appears shortly after The Library. The Mines Jeff Shop appears after The Nest in the Sewers. They are separate floor-specific stops, so use the route and stock for the floor you are actually running.
Is The Railway Station guaranteed to appear?
No. It is a named minecart puzzle room with a high chance of appearing in the Sewers, but the route can continue without it. When it appears, move the carts and check the platform doors before committing to one.
How do I enter The Rooms from The Hotel?
Find the Basement lever near the Door 60 side route, then use two Lockpicks and a Skeleton Key on the chained A-000 entrance. Only make the detour when you have the keys and enough light to search safely.
How do I follow The Outdoors route?
Use the distance meters, signs, and named landmarks instead of looking for numbered doors. Move from The Small Courtyard to The Clearing, then The Mill and The Hedge Maze, checking toolsheds and safe landmarks as you go.
What is The Woods in the Mines route?
The Woods is the released transition after The Dam. It marks the end of the Mines route covered here, so use it as your final route landmark rather than searching for another numbered Mines set piece.
What should I do when I reach a named puzzle room?
Identify the room's job before looting. Check the route, find the required lever, code, cart, valve, or guillotine, and keep an exit path open while the room's entity or timer is active.