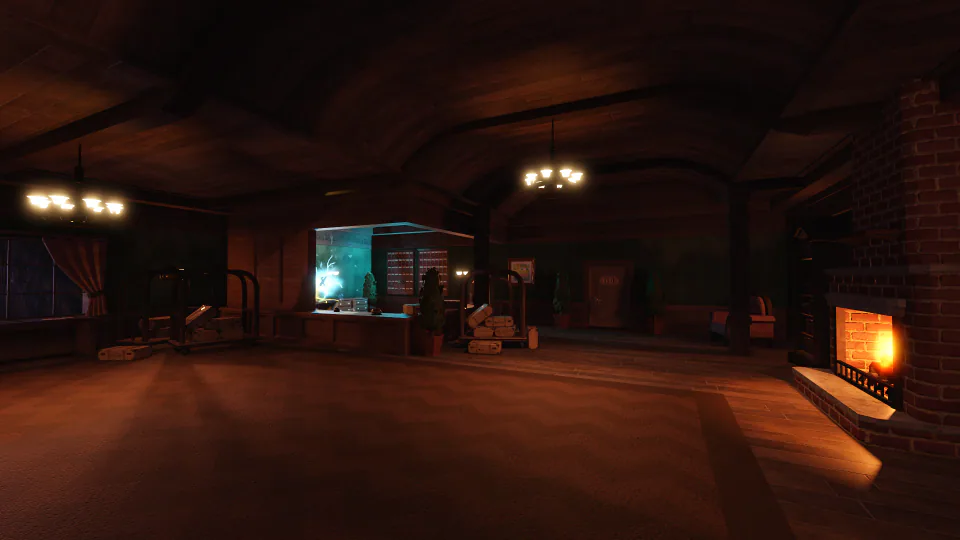
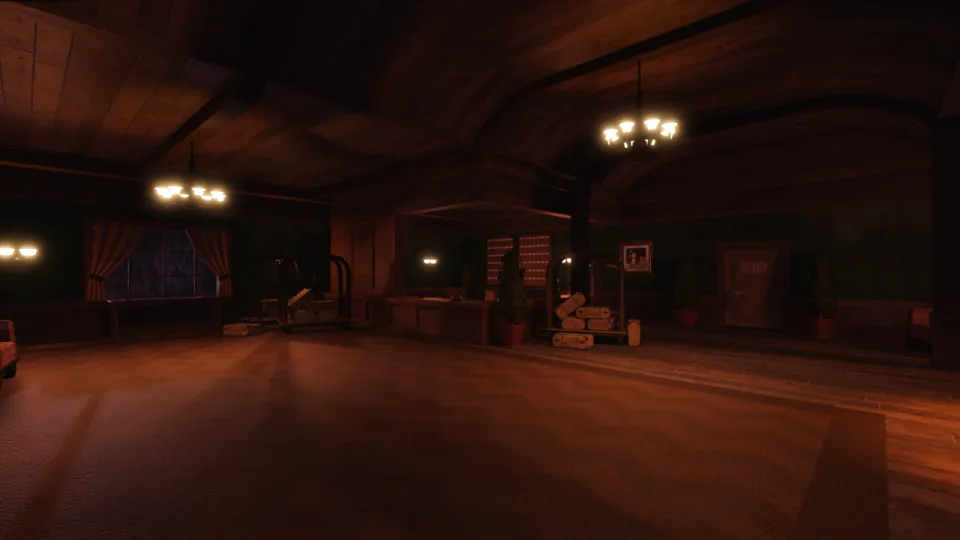
DOORS entities turn every room into a recognition test. A flicker, a soft "pst," a wall of eyes, or a falling timer can tell you what is coming, and the right response is usually simple: hide, look away, stay quiet, or keep moving.
Encounter area
The Hotel
The Hotel teaches the core rhythm: watch the lights, listen for a tell, and decide whether to hide, look away, or keep moving. Greenhouse hazards and puzzle rooms punish tunnel vision, so check the room before committing to a route.
Figure
A blind hunter that makes noise dangerous in the Library, the Electrical Room, and its Mines rooms.
- Role
- Hostile
- Areas
- The Hotel; The Mines
- Encounter
- The Library at Door 50 and the Electrical Room at Door 100 in The Hotel; Figure rooms in The Mines.
- Warning tell
- Heavy footsteps and floor vibrations. Figure is blind.
- Behavior
- Patrols key rooms and follows sound.
- Damage or consequence
- Instant death on contact.
- Best counter
- Crouch and move quietly. Hide if it gets close, then finish the room puzzle without making noise.
- Related item
- Crucifix
Seek
A set-piece chase entity. The route matters more than fighting it, especially when the Mines change the chase.
- Role
- Hostile
- Areas
- The Hotel; The Mines
- Encounter
- Guaranteed chase sequences in The Hotel, plus an altered chase and Dam encounter in The Mines.
- Warning tell
- Eyes appear on walls and black slime shows before the chase.
- Behavior
- Chases through marked rooms and changes form in The Mines.
- Damage or consequence
- Instant death if caught; chase obstacles can also hurt.
- Best counter
- Follow the blue path, keep running, and crouch or slide under obstacles.
- Related item
- Vitamins
Rush
The classic lights-flicker warning. Find a hiding spot before the roar reaches the room.
- Role
- Hostile
- Areas
- The Hotel; The Mines
- Encounter
- A random room event during normal progression.
- Warning tell
- Lights flicker, then a roar grows louder. Earthquakes can warn you in The Mines.
- Behavior
- Speeds through rooms and breaks the lights as it passes.
- Damage or consequence
- Instant death if it reaches you outside a hiding spot.
- Best counter
- Hide in a closet, bed, or locker and wait until the sound has passed.
- Related item
- Crucifix
Ambush
Rush with extra passes. A closet is useful, but staying inside for every pass can trigger Hide.
- Role
- Hostile
- Areas
- The Hotel; The Mines
- Encounter
- A random room event during normal progression.
- Warning tell
- The lights flicker and a loud warning sound approaches.
- Behavior
- Rushes through the rooms several times instead of making one pass.
- Damage or consequence
- Instant death if it reaches you outside a hiding spot.
- Best counter
- Hide, leave the hiding spot after it passes, and re-enter when it comes back.
- Related item
- Crucifix
Screech
A dark-room check. Listen for the small “pst” and look around before the bite lands.
- Role
- Hostile
- Areas
- The Hotel; The Mines
- Encounter
- Dark rooms, especially when the room has little or no light.
- Warning tell
- A quiet “pst” comes from nearby.
- Behavior
- Latches onto the player and attacks if it is not found quickly.
- Damage or consequence
- Repeated damage if you fail to find it in time.
- Best counter
- Turn toward the sound and find Screech before it bites.
- Related item
- Flashlight or lighter
Eyes
The answer is counterintuitive: the glowing eyes are safe when you refuse to stare at them.
- Role
- Hostile
- Areas
- The Hotel; The Mines
- Encounter
- A random appearance in a room or hallway.
- Warning tell
- A purple glow and a cluster of eyes appear ahead.
- Behavior
- Damages players who look directly at it.
- Damage or consequence
- 10 damage when you look at it.
- Best counter
- Look away and keep your view on the floor or the route ahead.
Halt
A hallway puzzle with one instruction worth obeying: turn around when the game tells you to.
- Role
- Hostile
- Areas
- The Hotel; The Mines
- Encounter
- A dark hallway after a flicker event.
- Warning tell
- A blue-lit hallway and the “Turn Around” prompt signal the encounter.
- Behavior
- Forces a forward-and-back path while Halt appears behind you.
- Damage or consequence
- 60 damage on contact.
- Best counter
- Follow the Turn Around prompt and switch direction whenever it appears.
- Related item
- Vitamins
Dupe
A number-check trap. Slow down at a duplicate door instead of trusting the first label you see.
- Role
- Hostile
- Areas
- The Hotel; The Mines
- Encounter
- A room with a duplicate numbered door.
- Warning tell
- Two doors show different numbers, and the sequence no longer feels right.
- Behavior
- Attacks when the player opens the wrong numbered door.
- Damage or consequence
- Health damage varies by run settings.
- Best counter
- Check the last correct number and open only the next door in sequence.
Hide
Hiding is useful until it is not. Watch for the warning and do not let a closet become its own trap.
- Role
- Hostile
- Areas
- The Hotel; The Mines
- Encounter
- After staying in a hiding spot too long.
- Warning tell
- A red screen, a “GET OUT” warning, and a heartbeat appear.
- Behavior
- Ejects the player and blocks the hiding spot for a short time.
- Damage or consequence
- The Hotel: 40 damage after staying too long. The Mines: failed heart checks can eject you and deal damage.
- Best counter
- Leave and re-enter the hiding spot when the warning appears. In The Mines, follow the heart-check rhythm.
Dread
A punishment for dawdling. If the room starts feeling like a waiting room, it is time to leave.
- Role
- Hostile
- Areas
- The Hotel; The Mines
- Encounter
- A room that has taken too long to clear.
- Warning tell
- A clock or time-pressure cue warns that the room is no longer safe.
- Behavior
- Closes in while the player delays in the room.
- Damage or consequence
- Instant death if it catches you.
- Best counter
- Keep the route moving and leave the room before the time pressure expires.
Snare
A floor hazard with a name. Scan the grass before sprinting, especially in the Greenhouse.
- Role
- Hostile
- Areas
- The Hotel; The Outdoors
- Encounter
- Greenhouse grass in The Hotel and grassy paths in The Outdoors.
- Warning tell
- Small holes or plant spots blend into the ground.
- Behavior
- Roots the player in place and interrupts movement.
- Damage or consequence
- Damage and a brief stun.
- Best counter
- Watch the ground and use a light source to spot the holes before stepping on them.
- Related item
- Flashlight
Sally
The window visitor formerly called Window. Keep a spare item ready if you do not want to lose something important.
- Role
- Hostile
- Areas
- Lobby; The Hotel
- Encounter
- A random appearance through Hotel windows.
- Warning tell
- A window breaks and a heartbeat warns that Sally is close.
- Behavior
- Chases the player and can steal an item before leaving.
- Damage or consequence
- Non-lethal health damage and a maximum-health reduction.
- Best counter
- Give or drop an item when Sally demands one, or use a Crucifix if the chase becomes unsafe.
- Related item
- Crucifix
- Also known as
- Window
Jack
A rare red face that wants your attention, not your health bar.
- Role
- Neutral
- Areas
- The Hotel
- Encounter
- Rarely appears in closets or behind numberless doors.
- Warning tell
- A sudden face fills the hiding spot or doorway.
- Behavior
- Creates a jumpscare but does not attack the player.
- Best counter
- Recover from the scare and continue the room.
Timothy
The drawer spider. It is more startling than dangerous, but the bite still costs a little health.
- Role
- Neutral
- Areas
- Lobby; The Hotel; The Mines
- Encounter
- A rare drawer encounter.
- Warning tell
- A spider jumps out when a drawer is opened.
- Behavior
- Bites once, then disappears.
- Damage or consequence
- 5 damage.
- Best counter
- Close the drawer and keep searching.
Shadow
A blink-and-you-miss-it scare. Shadow is dramatic, but not a threat to your run.
- Role
- Neutral
- Areas
- The Hotel; The Mines
- Encounter
- A rare appearance after a door or flicker event.
- Warning tell
- A dark shape and a sharp shriek appear for a moment.
- Behavior
- Shows up briefly and disappears without attacking.
- Best counter
- Let the jumpscare pass and keep moving.
Jeff
Your friendly shopkeeper in two released areas. Jeff turns spare Gold into a little more breathing room.
- Role
- Friendly
- Areas
- The Hotel; The Mines
- Encounter
- Jeff Shop in The Hotel after the Library and the Jeff Shop in The Mines.
- Warning tell
- Glowing eyes and a stocked shop mark Jeff's counter.
- Behavior
- Sells supplies for Gold.
- Best counter
- Save Gold for the tool that fits the next section instead of spending it all at once.
El Goblino
The shop's chatty goblin. El Goblino is a lore stop, not another thing to hide from.
- Role
- Friendly
- Areas
- The Hotel; The Mines
- Encounter
- At Jeff Shop in The Hotel and The Mines.
- Warning tell
- El Goblino sits near the shop and starts a conversation.
- Behavior
- Provides friendly dialogue and harmless reactions.
- Best counter
- Interact if you want the dialogue, then return to the route.
Bob
A quiet shop regular. Bob looks spooky, but this skeleton is on your side.
- Role
- Friendly
- Areas
- The Hotel; The Mines
- Encounter
- At Jeff Shop in The Hotel and The Mines.
- Warning tell
- Bob is seated near the shop.
- Behavior
- Stays friendly and does not harm players.
- Best counter
- Interact if you want the dialogue, then continue shopping or exploring.
Encounter area
The Mines
The Mines add cave lighting, narrow routes, and boss-room pressure. Keep a light ready for Giggle, Gloombats, and Grumble, and expect Figure, Seek, and Hide to use different rules from their Hotel versions.
Grumble
The Mines' large patrol threat. Keep the route tight and use light or cover to buy space.
- Role
- Hostile
- Areas
- The Mines
- Encounter
- The Nest around Door 150 and nearby Mines routes.
- Warning tell
- A giant Giggle-like creature patrols the area and makes the route feel unsafe.
- Behavior
- Patrols, chases, and pressures players through narrow tunnels.
- Damage or consequence
- Lethal after repeated hits.
- Best counter
- Use narrow tunnels, lockers, and a light-based distraction to break its route when needed.
- Related item
- Glowstick or Bulklight
Queen Grumble
The late-run Grumble chase. Treat it like a route test: movement and clean turns matter most.
- Role
- Hostile
- Areas
- The Mines
- Encounter
- A late Mines chase through the Caverns, Nest, or Sewage Cells.
- Warning tell
- The larger Grumble appears as the chase route opens through the tunnels.
- Behavior
- Chases players through the late Mines route.
- Damage or consequence
- Instant death if caught during the chase.
- Best counter
- Keep moving, use narrow safe routes, and do not stop to search during the chase.
Giggle
The ceiling check in The Mines. A quick glance upward can save a long chunk of health.
- Role
- Hostile
- Areas
- The Mines
- Encounter
- Ceilings and tunnels in The Mines.
- Warning tell
- A quiet laugh and a face cling to the ceiling above the route.
- Behavior
- Drops onto the player's face and bites until it is removed.
- Damage or consequence
- Damage continues while it clings.
- Best counter
- Look up before walking under a ceiling with Giggle and dislodge it quickly if it lands.
- Related item
- Glowstick
Gloombats
A lighting problem with wings. Put away the wrong light and keep moving through the dark.
- Role
- Hostile
- Areas
- The Mines
- Encounter
- Dark rooms and nests in The Mines.
- Warning tell
- A moth-like swarm gathers around a carried light.
- Behavior
- Attacks lights and repeatedly bites players who stay near the swarm.
- Damage or consequence
- 10 damage per attack.
- Best counter
- Turn off ordinary lights, use a Gloomstick or Laser Pointer, and move away from the swarm.
- Related item
- Gloomstick or Laser Pointer
Louie
A Mines barter encounter. Louie can help, but only if you are comfortable giving up the item you drop.
- Role
- Friendly
- Areas
- The Mines
- Encounter
- Holes in the walls of The Mines.
- Warning tell
- A rat-like face or hand appears in a wall hole.
- Behavior
- Barters a dropped item for another item of similar value.
- Best counter
- Drop only an item you are willing to trade, then check what Louie gives back.
Encounter area
The Backdoor
The Backdoor is a timer-and-lever test. Pull the next Timer Lever before Haste catches up, while Blitz calls for a hiding spot and Lookman punishes eye contact.
Blitz
The Backdoor's fast pass threat. Find a closet early and do not assume one pass means the room is safe.
- Role
- Hostile
- Areas
- The Backdoor
- Encounter
- Random rooms in The Backdoor.
- Warning tell
- A warning sound signals a fast approach.
- Behavior
- Rushes through the rooms and can make more than one pass.
- Damage or consequence
- Instant death on contact.
- Best counter
- Hide in a closet before it arrives and stay hidden until the attack is over.
- Related item
- Crucifix
Lookman
The Backdoor version of the eye-contact test. Look at the floor and let it teleport away.
- Role
- Hostile
- Areas
- The Backdoor
- Encounter
- Random rooms in The Backdoor.
- Warning tell
- A low rumble and glowing eyes signal its presence.
- Behavior
- Attacks when the player looks at its eyes, then teleports away after the hit.
- Damage or consequence
- 20 damage.
- Best counter
- Keep your view down and avoid eye contact while moving through the room.
Haste
The Backdoor's timer enforcer. The safest Haste counter is routine: find the next lever before the clock wins.
- Role
- Hostile
- Areas
- The Backdoor
- Encounter
- The Backdoor timer when the player fails to keep it running.
- Warning tell
- The timer expires, a red haze appears, and Haste can be seen approaching through walls.
- Behavior
- Approaches from behind when the timer runs out.
- Damage or consequence
- Instant death when Haste catches the player.
- Best counter
- Pull the Timer Lever before the timer expires and keep moving between levers.
- Related item
- Timer Lever
Encounter area
The Rooms
The Rooms reward clean audio reactions and strict stop inputs. A-60 and A-120 want a locker, while A-90 wants you to freeze every movement until its warning clears.
A-60
A-60 is the Rooms sprint check. When the static starts, the locker matters more than one extra room.
- Role
- Hostile
- Areas
- The Rooms
- Encounter
- After room A-060 in The Rooms.
- Warning tell
- Static, crackling, or a fast approaching sound warns of the attack.
- Behavior
- Charges through the rooms at high speed.
- Damage or consequence
- 125 damage.
- Best counter
- Get into a locker as soon as the warning starts and wait for the sound to pass.
A-90
The Rooms' stop-input test. Do absolutely nothing until A-90 is finished doing it for you.
- Role
- Hostile
- Areas
- The Rooms
- Encounter
- After room A-090, sometimes alongside other Rooms entities.
- Warning tell
- A face or stop-sign-like warning appears on screen.
- Behavior
- Freezes active entities and punishes player movement during the stop window.
- Damage or consequence
- 90 damage.
- Best counter
- Stop all movement and input until the warning clears.
A-120
A fast Rooms entity with a rebound trick. Wait for the sound to finish before leaving cover.
- Role
- Hostile
- Areas
- The Rooms
- Encounter
- After room A-120 in The Rooms.
- Warning tell
- Static and a deep drumming sound approach from the route ahead.
- Behavior
- Charges through the room and can rebound from the far side.
- Damage or consequence
- Instant death if caught.
- Best counter
- Hide in a locker after the cue and wait until the drumming ends.
Encounter area
The Outdoors
Outdoors encounters tie danger to terrain, weather, and line of sight. Step off unsafe grass, read Bramble's light, take shelter from Surge, and keep the route in view during Eyestalk and Monument encounters.
Bramble
A light-and-movement puzzle in the Hedge Maze. Let Bramble's lamp decide when your feet move.
- Role
- Hostile
- Areas
- The Outdoors
- Encounter
- The Hedge Maze in The Outdoors.
- Warning tell
- Its lamp turns on and off as it patrols the maze.
- Behavior
- Attacks players who move while its light is on and stops when the light is off.
- Damage or consequence
- Damage depends on the attack state.
- Best counter
- Stop moving while Bramble's light is on and use a Lantern to read the maze when it is safe.
- Related item
- Lantern
Eyestalk
An Outdoors chase with tree eyes and familiar Seek-style pressure. Keep the route clean and keep running.
- Role
- Hostile
- Areas
- The Outdoors
- Encounter
- The main chase route in The Outdoors.
- Warning tell
- Eyes appear on trees and a chase cutscene starts.
- Behavior
- Chases the player through an Outdoors route like a Seek sequence.
- Damage or consequence
- Instant death if caught.
- Best counter
- Run the marked route, avoid Snares, and use a speed boost only when a turn or obstacle needs it.
- Related item
- Vitamins
Groundskeeper
The garden's rule-enforcer. The grass is not a shortcut when the Groundskeeper tells you to leave it.
- Role
- Neutral
- Areas
- The Outdoors
- Encounter
- Garden sheds and grass areas in The Outdoors.
- Warning tell
- A grass warning, grunt, and the Groundskeeper's tools signal danger.
- Behavior
- Protects the grass, attacks trespassers, and can kill hostile entities.
- Damage or consequence
- Fatal if you remain on the grass after the warning.
- Best counter
- Step off the grass and use buildings or clear paths when the warning begins.
Mandrake
A useful plant with an unpleasant voice. Replant Mandrake before the scream becomes the whole run.
- Role
- Hostile
- Areas
- The Outdoors
- Encounter
- Holes and grass in The Outdoors.
- Warning tell
- A mandrake can be pulled from the ground, then screams and darkens the player's view.
- Behavior
- Keeps screaming near the player until it is replanted or carried away from danger.
- Damage or consequence
- Can kill you if you stay near it too long.
- Best counter
- Replant it quickly or let the Groundskeeper deal with it, then move away from the scream.
Monument
The statue that walks when you stop looking. Line of sight is the safest lock on Monument.
- Role
- Hostile
- Areas
- The Outdoors
- Encounter
- Gardens and paths in The Outdoors.
- Warning tell
- A cracked, vine-covered monument is followed by footsteps when it moves.
- Behavior
- Moves when it is not being watched and closes in behind the player.
- Damage or consequence
- Instant death if it catches you.
- Best counter
- Keep Monument in sight and look back before taking long turns away from it.
Surge
An outdoor weather check. Green skies mean the route is over for now; find a roof.
- Role
- Hostile
- Areas
- The Outdoors
- Encounter
- Open Outdoors areas during green lightning.
- Warning tell
- The sky turns green and lightning or a loud scream warns of the storm.
- Behavior
- Damages players who stay outside shelter during the storm.
- Damage or consequence
- Damage over time while exposed.
- Best counter
- Get inside a closet, building, or other shelter before the storm reaches you.
Caws
The forest warning system. When the crows scatter, take the hint and check your surroundings.
- Role
- Neutral
- Areas
- The Outdoors
- Encounter
- Forest areas in The Outdoors.
- Warning tell
- Crows take off and call from nearby trees.
- Behavior
- Warns the player that another Outdoors threat is close.
- Best counter
- Watch where the flock moves and prepare for the threat it is pointing out.
Grampy
The Mill's friendly trader. Count your petals before making the trip.
- Role
- Friendly
- Areas
- The Outdoors
- Encounter
- The Mill in The Outdoors.
- Warning tell
- Grampy waits with a basket for a petal trade.
- Behavior
- Trades eight Lotus Petals for a Lotus.
- Best counter
- Bring eight Lotus Petals before visiting The Mill.
- Related item
- Lotus Petals
Encounter area
Cross-floor & support
Guiding Light and Curious Light point out routes and clues, while Glitch and Void help recover a bad teleport or a separated group. World Lotus follows the rules of the area, so treat it as a context clue rather than safe decoration.
Guiding Light
The blue helper for the main floors. If a key or route is easy to miss, Guiding Light usually points it out.
- Role
- Support
- Areas
- The Hotel; The Mines
- Encounter
- Dark rooms, puzzles, chases, and death screens in the main floors.
- Warning tell
- A blue glow highlights useful doors, keys, paths, and puzzle objects.
- Behavior
- Guides the player and adds short tips to difficult moments.
- Best counter
- Follow the blue marks and check highlighted objects before guessing.
Curious Light
The wider guide across released floors and subfloors. Curious Light helps explain what just went wrong.
- Role
- Support
- Areas
- The Hotel; The Mines; The Backdoor; The Rooms; The Outdoors
- Encounter
- Death screens, subfloor guidance, and rift-related moments.
- Warning tell
- A yellow star-like glow or rift appears during the explanation.
- Behavior
- Explains deaths, guides exits, and offers less direct help than Guiding Light.
- Best counter
- Use the highlighted exit or key and read the short guidance before trying the section again.
Glitch
The emergency reset button of DOORS. Glitch usually means the level needs help, not that you should fight.
- Role
- Failsafe
- Areas
- The Hotel; The Mines; The Backdoor; The Rooms; The Outdoors
- Encounter
- A room fails to load, the player goes out of bounds, or the player falls too far behind.
- Warning tell
- Screen glitches and purple cubes appear around the player.
- Behavior
- Teleports the player to a safe loaded room or back to the group.
- Best counter
- Stay on the loaded route and let the teleport finish if Glitch appears.
Void
The team-distance failsafe for the main floors. Keep up and Void stays mostly theoretical.
- Role
- Support
- Areas
- The Hotel; The Mines
- Encounter
- A multiplayer run when one player falls too far behind the group.
- Warning tell
- The straggling player is pulled away as the group gets far ahead.
- Behavior
- Teleports the player back toward the rest of the team.
- Best counter
- Stay near the group so the teleport is not needed.
World Lotus
The strange lotus behind several entity rules. Its danger depends on the area and what it is controlling.
- Role
- Neutral
- Areas
- The Hotel; The Mines; The Rooms; The Outdoors
- Encounter
- The Courtyard, Jeff Shop, Rooms rebirth moments, and the main Outdoors encounter.
- Warning tell
- A giant lotus and vine-covered form marks the encounter.
- Behavior
- Controls or mimics entities. It is passive in some areas and hostile in The Outdoors.
- Damage or consequence
- Does not directly damage players; controlled entities can.
- Best counter
- Use the rules for the controlled entity and follow the area's route instead of approaching the lotus.
Encounter area
Glitch Fragment variants
These rare variants echo Rush, Ambush, and Screech, but their routes or target checks are less forgiving. Copy the matching response and stay ready for an extra pass or cue.
RNIUSHCg==
The coded Rush variant. A Glitch Fragment is the trigger, so treat the first charge like Rush.
- Role
- Glitched variant
- Areas
- The Hotel; The Mines; The Backdoor; The Rooms; The Outdoors
- Encounter
- After activating a Glitch Fragment.
- Warning tell
- The screen glitches and a familiar Rush-style cue begins.
- Behavior
- Uses a Rush-like charge with a possible rebound through the route.
- Damage or consequence
- 100 damage.
- Best counter
- Hide like you would for Rush and wait until the route is clear.
- Related item
- Glitch Fragment
- Also known as
- Glitched Rush
AR0xMBUSH
The coded Ambush variant. Give it the same respect as Ambush, with extra caution around repeated passes.
- Role
- Glitched variant
- Areas
- The Hotel; The Mines; The Backdoor; The Rooms; The Outdoors
- Encounter
- After activating a Glitch Fragment.
- Warning tell
- The screen glitches and an Ambush-style warning begins.
- Behavior
- Uses a harder Ambush-like attack with repeated passes.
- Best counter
- Hide and re-enter your hiding spot like you would for Ambush, then wait for every pass.
- Related item
- Glitch Fragment
- Also known as
- Glitched Ambush
SCJVEREECH
The coded Screech variant. Scan every “pst” instead of assuming the first one was the only target.
- Role
- Glitched variant
- Areas
- The Hotel; The Mines; The Backdoor; The Rooms; The Outdoors
- Encounter
- After activating a Glitch Fragment.
- Warning tell
- The screen glitches and multiple Screech-like cues can appear.
- Behavior
- Uses a Screech-like swarm with more targets to check.
- Best counter
- Turn toward each Screech cue and react quickly before the next bite.
- Related item
- Glitch Fragment
- Also known as
- Glitched Screech
Recognize the cue before you react
Most danger starts with a small change: lights flicker, a roar grows louder, a timer drops, a blue route appears, or a sound lands right beside you. Take a short pause to identify the kind of threat before moving. The wrong reflex can turn a safe room into a very short visit.
Use the cue to choose the response:
- An approaching room sound usually means find a hiding spot and wait for the attack to pass.
- A sound attached to your position means turn and search instead of sprinting away blindly.
- A visual threat may require looking away, keeping it in sight, or stopping all movement.
- A route or timer warning means keep progressing rather than waiting for danger to solve itself.
Keep hiding on a timer
Closets, beds, and lockers are tools for surviving a chase, not permanent safe rooms. Ambush returns after passing, while Hide pushes you out when you stay too long. Leave between passes when the route is clear, re-enter for the next pass, and react to a GET OUT warning or a Mines heart check instead of treating every hiding spot the same.
The Rooms makes this timing stricter. A-60 and A-120 call for a locker and patience, while A-90 demands that you stop every movement and input until its warning clears. The response is different even when the sound feels similar, so listen for the exact cue.
Manage light and audio
Light helps you read dark rooms, grass, and cave paths, but it can also create trouble. Switch off ordinary lights near Gloombats, keep a usable light ready for ground hazards, and lower your view when an eye-based entity appears. In Figure rooms, noisy movement can be more dangerous than a slow route, while dark rooms reward a clear audio cue for Screech.
Floor changes matter. The Hotel teaches the basic hide, listen, and look-away rhythm; The Mines adds narrow routes and altered behavior; The Backdoor makes timer levers part of survival; and The Outdoors ties danger to grass, shelter, weather, and line of sight. A familiar name does not always mean a familiar answer.
Common mistakes that cost runs
- Opening a duplicate door without checking the number sequence.
- Staying inside a closet for every Ambush pass and triggering Hide.
- Looking directly at Eyes or Lookman, or turning away from Monument at the wrong time.
- Sprinting through grass, moving during Bramble's light, or remaining outside when a storm reaches the route.
- Spending all your attention on the main threat and missing a ceiling, floor, or timer cue.
Build the habit of checking the room, listening for the tell, and then choosing the counter. DOORS gives you clues generously; it just does not pause to explain them twice.
FAQ
What should I do when the lights flicker?
Find a closet, bed, or locker for an incoming room attack. If the entity returns, leave the hiding spot between passes and re-enter when it comes back.
Why does hiding sometimes make things worse?
Hide punishes staying in a hiding spot too long. Leave when the warning appears, and follow the Mines heart-check rhythm instead of waiting through it.
How should I use light in DOORS?
Use light to read dark rooms, grass, and cave routes, but turn off ordinary lights near Gloombats. Light does not replace listening: Figure follows sound, Screech needs a quick search, and eye-based entities punish staring.
What changes outside The Hotel?
The Mines add narrow cave routes and altered entity behavior, The Backdoor adds timer levers, The Rooms adds strict audio and stop-input rules, and The Outdoors adds grass, storms, shelter, and line-of-sight threats.
What are the strange Glitch Fragment entity names?
They are rare variants tied to Rush, Ambush, and Screech. Use the matching survival response, but expect a less forgiving route, extra pass, or wider target check.