
Gold in Sandustry comes from one chain: dig Sand out of Dirt, let it touch Water so it turns into Wet Sand, and drop that Wet Sand onto a Shaker. Gold falls through the Shaker into Collectors, while the leftover Residue stays on top and gets pushed off the line. Gold is the currency you spend on research, and it only counts once it's stored in a Collector, so a working Shaker line is the first thing worth building.
| Gold route | Unlock | Research cost | Gold it pays out |
|---|---|---|---|
| Shaker line | Shaker research | 20 Gold | 1 Gold on a 25% chance per Wet Sand pixel |
| Kinetic Press | Tier 2 research | 500 Gold | 1 Gold and 1 Seed per Burnt Residue dropped from 25+ blocks |
| Planter Box Flowers | Tier 3 research | 2,000 Gold | 1 Gold per Flower |
| Florin Condenser | Tier 4 Drying & Condensing research | 2,500 Gold | About 2 Gold per Florinol (approximate) |
Start with the Shaker line. The other routes make more sense once it's running.
Dig Sand and Wet It With Water
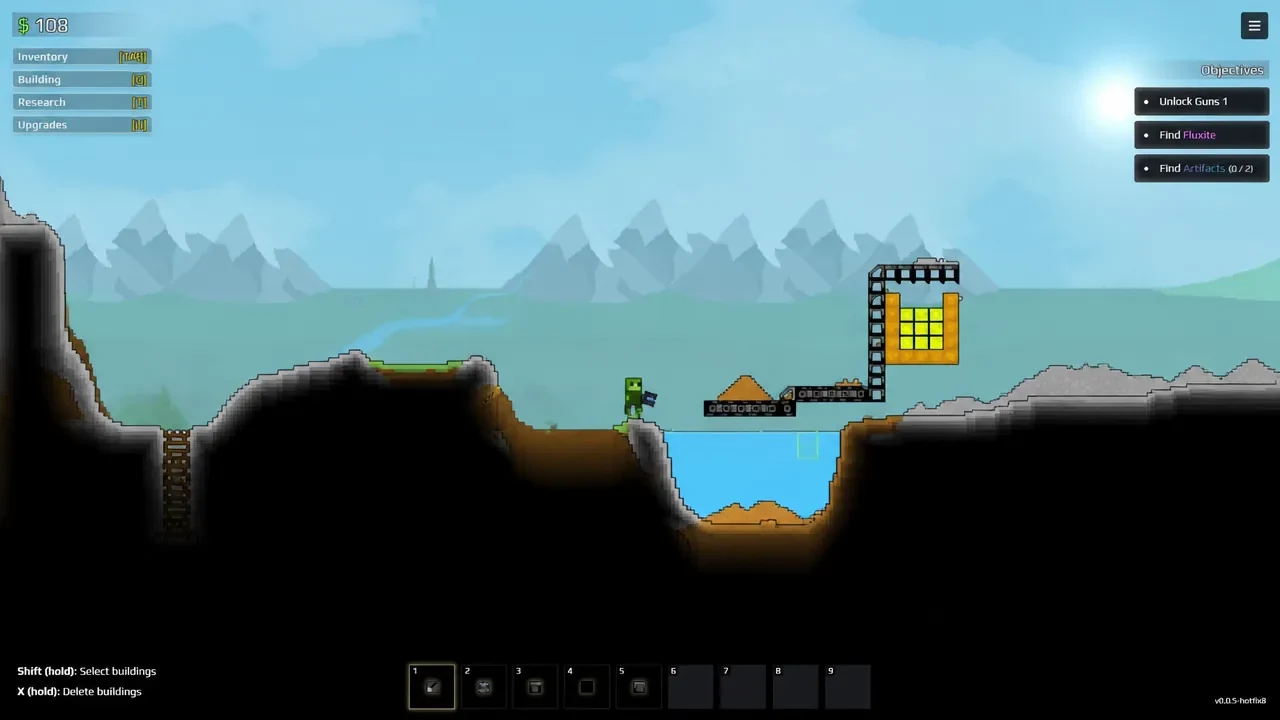
Sandustry runs on pixels. Sand, Water, and Gold are all made of tiny pieces that react when they touch, and the opening is built on that. Start beside a surface pool or another easy Water source, pick up the Shovel, and dig Sand out of Dirt.
Then let the Sand touch the Water. When they meet, both are replaced by 2 Wet Sand, so one Sand and one Water become two Wet Sand. That's why a small pool goes further than you'd expect. Dry Sand won't produce Gold on a Shaker, so this step can't be skipped.
Water settles into low spots and stays put, which makes a natural pool a good anchor for the whole setup. Keep the line close to it. Hauling Water across the map adds work that doesn't make any Gold.
Unlock the Shaker and Logistics Research
The Shaker is the first building that makes Gold, so its research is your first real purchase. The Collector that stores your Gold is one of the buildings you start with, so you don't need to research a place to put it.
Logistics comes next, once you want the line to run without hand feeding. It unlocks Conveyor Belts and Launchers for 30 Gold, and neither needs power. Once they're placed, they keep carrying material for as long as there's something on them to move.
Build the Shaker in a Descending Diagonal
Place the Shaker over a Collector so the Gold has somewhere to land. Gold falls straight through the Shaker, and the other material stays on top until something pushes it off. Keep the path between the Shaker and the Collector clear so the falling Gold has nothing in its way.
Don't set Shakers in a flat row. Wet Sand is denser than Residue, so each new Wet Sand pixel pushes the Residue in front of it along the surface. Stepping the Shakers down in a descending diagonal gives that Residue a slope to slide off. Residue moves slowly across a Shaker, so a flat row will clog. Every Wet Sand pixel leaves one Residue behind, so the slope keeps working for as long as the line runs.
Feed Wet Sand Onto the Shaker With Belts and Launchers
At first, drop Wet Sand onto the top of the Shaker by hand. That shows you how the line behaves before you automate anything. Once it runs steadily, bring in belts. A Conveyor Belt moves solids horizontally in whatever direction you place it, so it's best for flat runs. A Launcher moves solids vertically or diagonally and can lift material from a lower area, which is handy for pulling Sand up out of a pit.
Water ignores the direction of a belt and spreads like ordinary ground. Keep your Water in its own contained area so it doesn't drift onto the line.
Check That Gold Is Counting
A healthy line shows Gold climbing in your Collector while you're away, and Residue sliding off the top of the Shakers instead of building up. Gold that never reaches a Collector doesn't add to your balance, so check the Collector rather than the ground around the line.
Most early problems fall into a few groups:
- No Gold at all: The line is getting dry Sand. Drop Sand into Water first, then feed the Wet Sand.
- Residue covering the Shaker: The slope is too flat or the feed is too heavy. Steepen the diagonal and check the path is clear.
- Wet Sand backing up: You're digging faster than the Shakers can process it. Slow the feed or add more Shakers.
- Gold filling the Collector: Add Collector room before the Gold reaches the top.
Gold from a Shaker arrives in an uneven stream because each Wet Sand pixel is a random chance. That's normal, so don't respond by piling on more Sand.
What Gold Pays For in Sandustry
Gold is spent on research, and research unlocks new tools and buildings. Research is also gated by your Factory Level, so a cost you can afford may stay locked until you level up. Later research can use other currencies, so check the cost before you plan around Gold.
Upgrades to your inventory are a different story. They're paid in Fluxite, not Gold. Gold and Fluxite are the two main materials for early and mid-game progress, so don't expect Gold alone to cover everything.
Gold can be smelted into Liquid Gold, which takes up less room and still counts when stored in a Collector. The Smelter converts Gold at a 50% rate, and each Liquid Gold pixel is worth two units. Think of it as compact storage for a full Collector, not a way to make more Gold.
Keep Water Flowing With Lumlings and the Corraller
Water comes from a few places: surface lakes and underground deposits, melting Ice, rain from Steam that reaches the sky, and Lumlings. A natural pool is enough for your first batch. For a supply that keeps going, Lumlings are the dependable option.
Lumlings live in underground caverns and make Water, up to 12 every 6 to 10 seconds, as long as they have room to work. Production pauses when Water fills the 4x4 area around them, and they stop entirely while submerged in liquid or surrounded by gas. More Lumlings means more Water, so keep the space around each one open and clear away the Water they make before it builds up nearby.
The Corraller captures Critters and releases the ones you pick where you aim. It's a Tier 4 unlock at 1,250 Gold, and it's how you move Lumlings into a clear, contained space. If your Water is far from the factory, Fluids research at Tier 3 costs 1,250 Gold and unlocks the Pump, Pipe, and Liquid Vent to carry it over.
The Steam route is the advanced option. A Cryoblaster can turn Snow into Steam, which rises and comes back as rain, so it can keep a Water supply going. Its output and the layout it needs aren't something to plan around, so save it for later.
Add a Kinetic Press for Burnt Residue Gold
Residue can be burned into Burnt Residue, though the conversion is slow. Roughly four Residue make one Burnt Residue, and the rest is consumed without output. You'll need fire for this, and it can come from a Flamethrower (Tier 2, 400 Gold), burning material, Lava, a Burner Belt or Thermal Buffer, or a Pyro Dispenser, depending on what you've unlocked.
The Kinetic Press is where Burnt Residue turns into Gold. Drop Burnt Residue into it from at least 25 blocks up, and it returns 1 Gold and 1 Seed. A shorter drop, or the wrong material, lands on top of the press and can block it.
Keep your first Shaker line separate from this chain until that line runs reliably. The burn-and-drop setup is a second project, not part of the opening.
Grow Gold From Flowers on a Planter Box
Planter Box research unlocks the Planter Box for growing Flowers. Seeds turn into Wet Seeds when they touch Water, using 1 Water each. Put Wet Seeds on a Planter Box and they grow into Flowers.
Each Flower has a Vine stem and a head holding 4 Amethelis and 1 Gold. Destroy the Flower with a weapon or Fire to release the head's materials, then collect the Gold. Since each Flower pays one Gold, treat this route as an add-on to the Shaker line rather than the main source.
Advanced Gold Routes: Florin and the Gold Well
Florin is for later in the game. Burning Dry Amethelis releases Florin gas, and a Condenser turns Florin into Florinol or Gold. The Condenser needs cold to work, and the output ratio is approximate rather than a fixed recipe, so measure your own results before you plan around them.
The Gold Well drains an Aura buffer and emits Gold underneath it at a fixed rate. Build it just outside the Aura Extractor's disk, since it only produces when there's room underneath. Its output is capped by how much Aura the extractor pulls, and its research cost and exact rate aren't clear enough to plan around, so treat it as a later experiment.
Scale the Gold Line Without Clogging It
When the first line runs steadily, grow it one piece at a time. Add Shakers side by side rather than pushing more Wet Sand through a single one, and keep the Residue path open as you do. Add Collector room before Gold starts reaching the top of its storage.
The next big upgrade is Logistics Mk.2 at Tier 4 for 2,500 Gold, which unlocks Mk.2 Conveyor Belts and Launchers. They raise the throughput of your material routes, so a busy line is less likely to stall while material waits to move.
Only add pieces when you see a real bottleneck. A compact line you can read at a glance is much easier to fix than a sprawling one, and it will keep paying out while you explore the rest of the game.