

A zombie villager is a villager that has turned into an undead mob and attacks like a regular zombie. To cure it, apply the Weakness effect to the zombie villager, then use a regular Golden Apple on it. After that, it shakes for a few minutes while it changes back, so it needs to be kept safe until the cure finishes.
| Item | What it does | Required |
|---|---|---|
| Zombie villager | The mob being cured | Yes |
| Regular Golden Apple | Starts the conversion | Yes |
| Splash, Lingering, or Arrow of Weakness | Applies Weakness, which must be active when the apple is used | Yes |
| Roofed, enclosed space | Keeps it from burning in sunlight and away from other mobs | Yes |
| Iron Bars and beds | Shorten the wait slightly | Optional |
Where to Find a Zombie Villager in Minecraft
Zombie villagers don't show up on their own very often, so you'll usually have to go looking for one. A regular zombie has a 5% chance to spawn as a zombie villager instead. A zombie that kills a regular villager can also produce a zombie villager, and that chance depends on difficulty: 0% on Easy, 50% on Normal, and 100% on Hard.
Igloo basements and zombie villages are the most dependable places to look. Every igloo basement has a villager and a zombie villager inside, and zombie villages naturally contain them. Scouting around your base at night is another way to spot one. In Bedrock Edition, zombie spawners can also release zombie villagers with a 5% chance, but Java spawners don't do this.
How to Craft a Regular Golden Apple for Curing
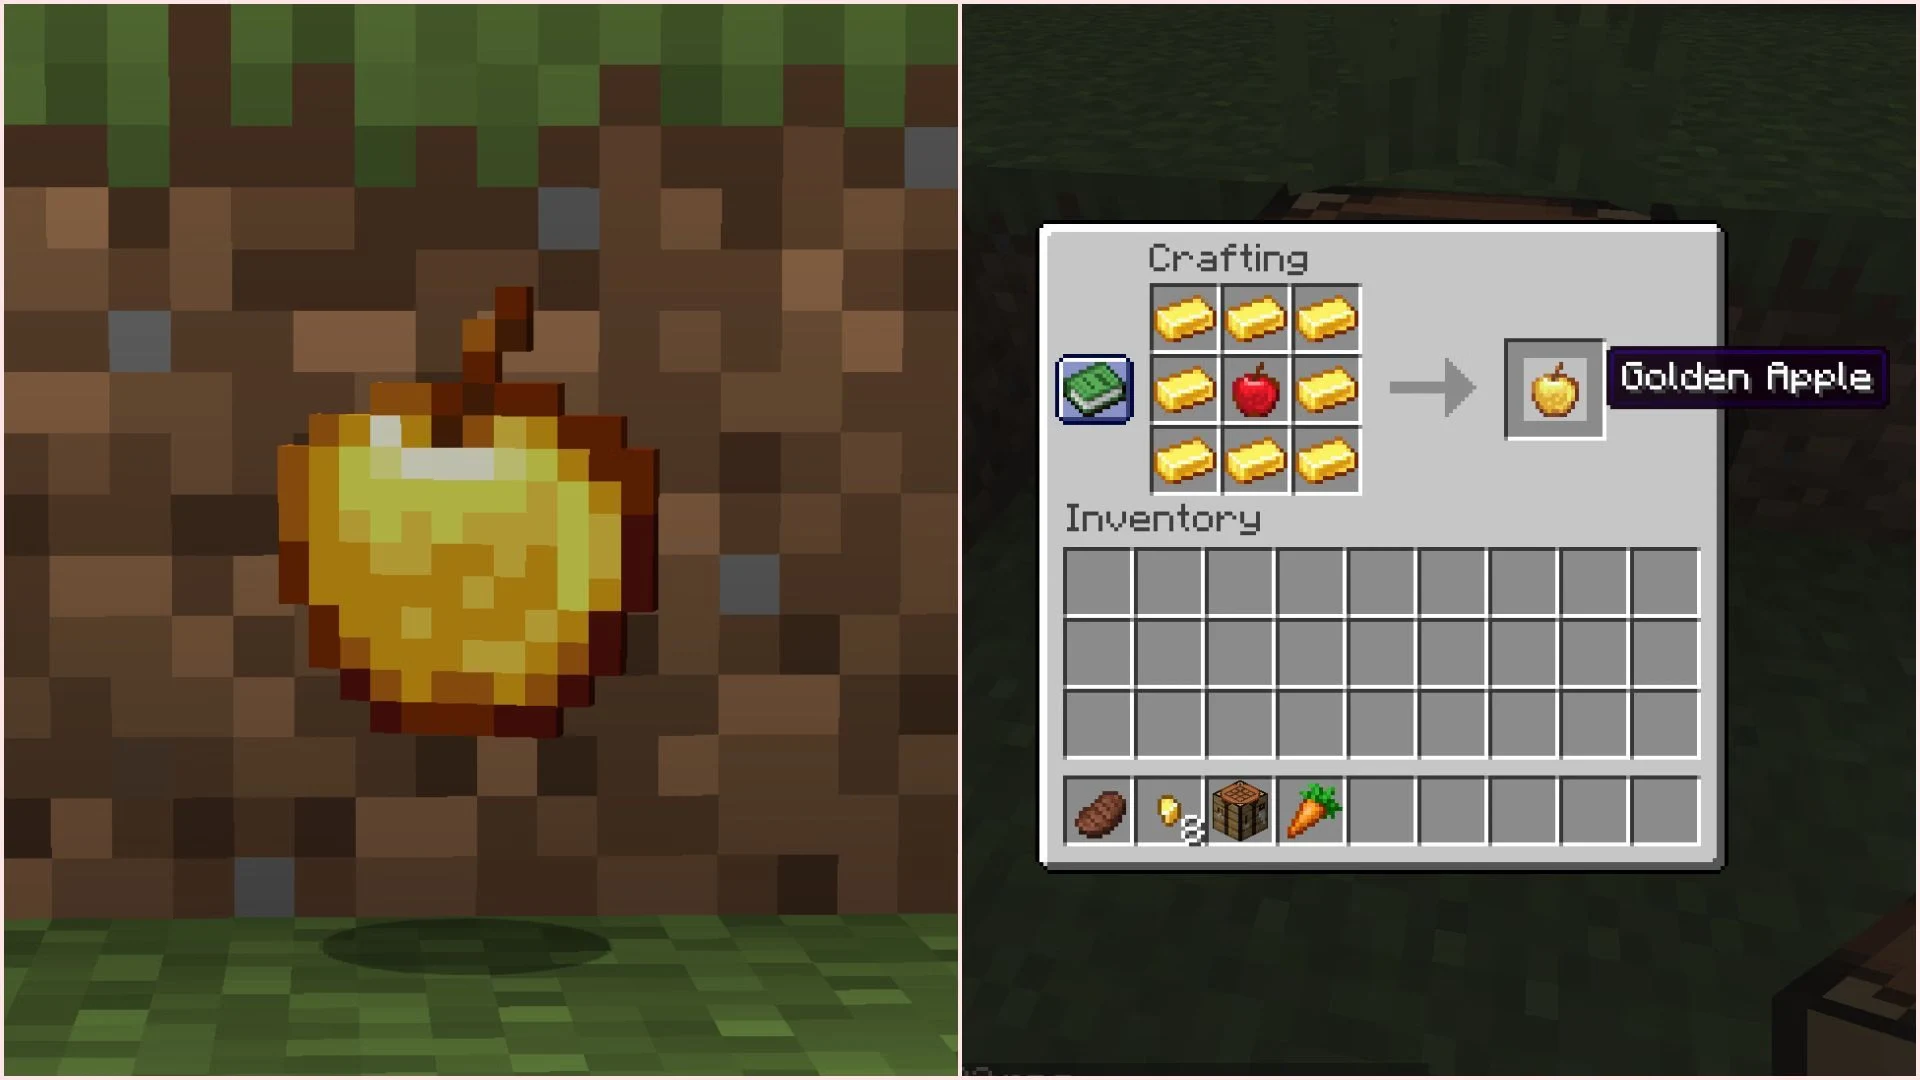
The cure needs a regular Golden Apple. An Enchanted Golden Apple will not cure a zombie villager, so check the name before you use one. To craft a regular one, place an Apple in the middle of a crafting table and surround it with eight Gold Ingots.
If you'd rather not craft one, Golden Apples also generate in several structures:
- Stronghold altars
- Large underwater ruin chests
- Dungeon chests
- Desert pyramid chests
- Mineshaft minecart chests
- Woodland mansion chests
- Igloo chests
- Ruined portal chests
- Ancient city center chests
How to Brew a Splash Potion of Weakness
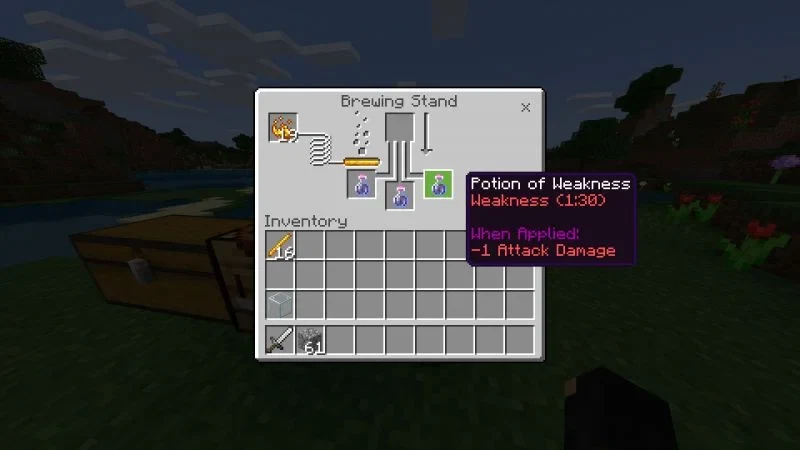
Zombie villagers can't drink potions, so the Weakness has to be thrown at them. A Splash Potion of Weakness does this, and it's the usual method. Weakness is one of every status effect in the game, and it lowers a mob's melee damage by 4 points, or two hearts. A standard splash potion keeps the effect active for about 1 minute 30 seconds.
You'll need a Brewing Stand and a Fermented Spider Eye. The Brewing Stand is crafted from Blaze Rods and Cobblestone. To make the Fermented Spider Eye, place a Spider Eye, a Sugar, and a Brown Mushroom anywhere in a crafting table. Spider Eyes drop from spiders, Sugar comes from Sugar Cane, and Brown Mushrooms grow in dim areas.
Brew the potion in this order:
- Fill glass bottles at a water source to make Water Bottles, then place up to three of them in the bottom slots of the Brewing Stand.
- Put the Fermented Spider Eye in the top slot.
- Add Blaze Powder to the fuel slot on the left. It powers the stand.
- Wait for the brew to finish. You'll have a regular Potion of Weakness. Unlike most potions, this one doesn't need Nether Wart.
- Add Gunpowder to the top slot. It turns the potions into Splash Potions of Weakness.
Lingering and Arrow Options for Applying Weakness
If you don't have a splash potion, two other items can apply Weakness. A Lingering Potion of Weakness is a Splash Potion of Weakness brewed with Dragon's Breath. Collect Dragon's Breath in an empty glass bottle from the Ender Dragon's breath attack or from dragon fireball clouds. Its Weakness effect lasts less time than a splash potion's, so the window for the apple is shorter.
An Arrow of Weakness is made by crafting eight arrows with a Lingering Potion of Weakness in a crafting table, which gives you eight tipped arrows. Shoot the zombie villager with an unenchanted bow, since Power or Flame can kill it. In Bedrock Edition, a cauldron filled with a Potion of Weakness can also tip arrows. Master-level fletcher villagers trade Arrows of Weakness if you'd rather not brew.
Witches can also throw a Splash Potion of Weakness, but that's a risky thing to plan around. For every potion type and its recipe, see every potion in the game.
How to Secure a Zombie Villager Before Curing
Before using anything, lead the zombie villager into an enclosed space with a solid roof. The roof keeps sunlight from burning it, and the walls keep out other hostile mobs. A boat or minecart can restrict its movement and make it easier to move, which helps if you found it in an igloo or village. Expendable blocks like dirt or cobblestone work well for building the walls and roof.
Then get yourself ready:
- Take off any Thorns armor, since it damages anything that hits you, including the zombie villager when it attacks.
- Put away anything that could hurt it, such as splash healing potions.
- Keep wolves sitting and move iron golems away from the area.
- Wear armor, preferably iron or better, and keep a shield ready to block hits.
- Skip the cure during a raid, because raiders can attack the new villager.
- Keep zombie villagers apart. A newly cured villager can be attacked and infected again by nearby zombie villagers.
How to Cure a Zombie Villager Step by Step
Have the Golden Apple and your Weakness item ready before you start, so there's no gap between steps.
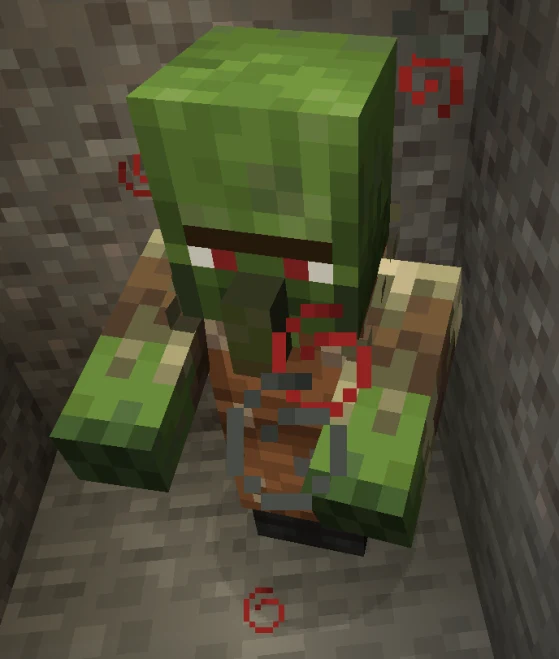
- Apply Weakness. Throw the Splash Potion of Weakness at the zombie villager, or shoot it with an Arrow of Weakness. Gray swirls show that the effect is active.
- Use the Golden Apple on it. Do this right after Weakness lands, before the effect wears off.
- Watch for red particles and shaking. These show that the conversion has started.
- Leave it alone. Don't attack it while it converts, and keep it inside the enclosure.
The order matters because the apple has to be used while Weakness is active. Once the particles and shaking start, your only job is to keep the villager safe until the change completes.
How Long a Zombie Villager Cure Takes and How to Speed It Up
Stay close enough to keep the area loaded until the cure finishes. In Java Edition, the timer is set randomly between 3,600 and 6,000 ticks, which is 180 to 300 seconds, or 3 to 5 minutes. Bedrock Edition starts with a base timer of 2,000 ticks, or about 100 seconds.
Iron Bars and beds nearby shorten the wait. Every game tick, there is a 1% chance that the game checks a 9×9×9 area centered on the zombie villager. Each Iron Bar or bed half it finds has a 30% chance to shave one extra tick off the timer, and the check stops after 14 of them. Fourteen nearby accelerants average about a 4.2% speed-up, so they help without changing the wait much. Copper Bars don't count.
In Java Edition, a zombie villager that isn't persistent can despawn like a regular zombie. Naming it with a Name Tag stops that. A villager you traded with before it was zombified stays persistent after the cure, and converted zombie villagers are persistent in Bedrock Edition.
Trade Discount and the Zombie Doctor Advancement
When the conversion finishes, the zombie villager becomes a normal villager again. If it has a profession, it gives the player who cured it a large trade discount, and the villager keeps offering that discount. The large discount is awarded only on the first cure. Since Java Edition 1.20.2, repeated reinfecting and curing no longer stacks it, and Bedrock made the same change in 1.20.30. In Bedrock, the discount can also spread through gossip to nearby villagers within a 16-block cube around the cured villager.
Exact prices depend on each trade, so treat the discount as a benefit rather than a set price. To see what a cured villager can offer, browse every villager trade in the game.
Curing also earns the Zombie Doctor advancement if you don't already have it. It's awarded when the conversion finishes, and in multiplayer, only the player who used the Golden Apple gets it. Bedrock has a Zombie Doctor achievement for the same thing. For the full list, see every advancement in the game.