Crafting turns dungeon materials into usable items. The Forge then lets you improve selected gear, change its stat affixes, protect a risky attempt, or enhance its stats.
Find the Crafting station and Forge in the hub
At the hub, use the Crafting panel when you want to make something from a recipe. Use the Forge panel when you want to work on gear. The simple map is: Crafting makes recipe items, while Forge handles Upgrade, Reforge, Protect, and Enhance.
Your dungeon runs feed both systems. If you are still learning the chest and extraction loop, the Dungeon Lootr beginner guide covers the first run. When you are weighing class builds before investing fragments, the Dungeon Lootr class tier list gives that build context.
Upgrade, reforge, protect, and enhance gear
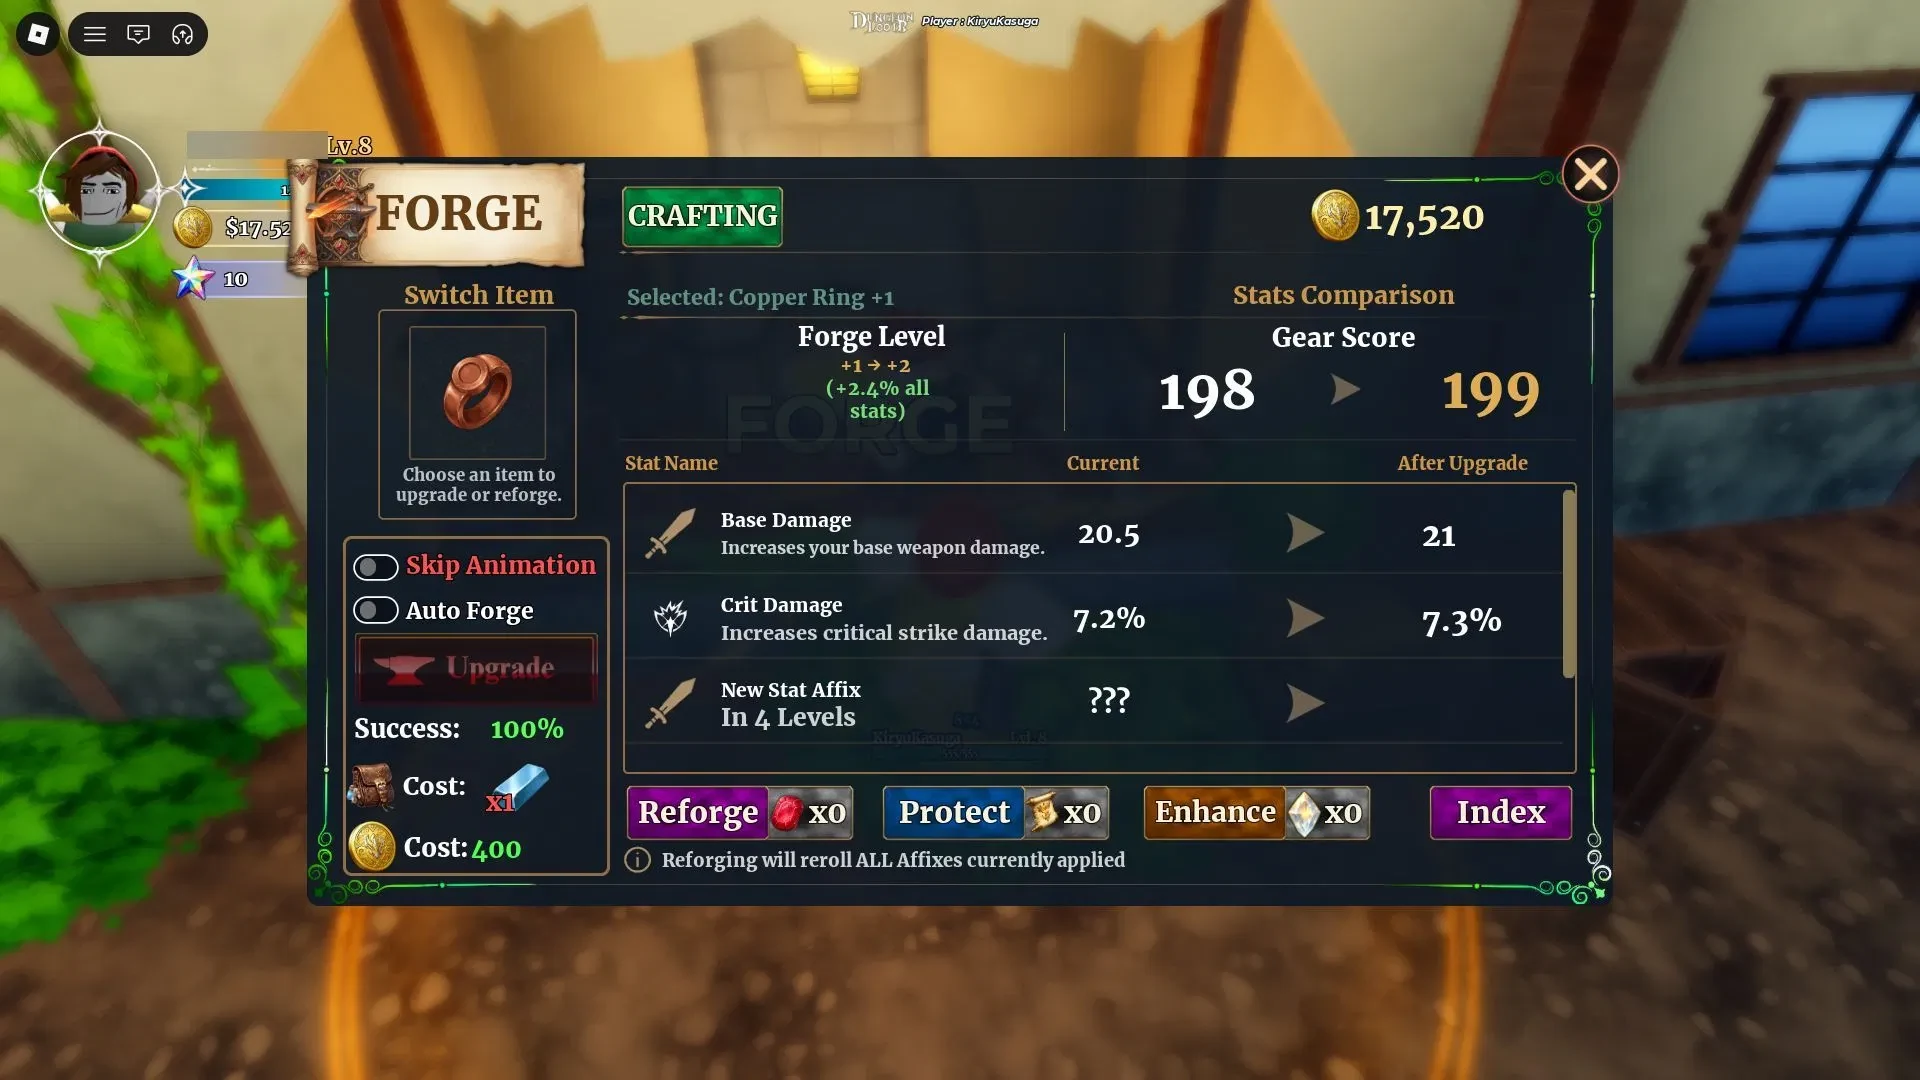
Select the gear you want to work on and read the comparison before confirming. The Forge panel can show the selected item's Forge Level and Gear Score next to the attempted result, so you can see what Upgrade is changing.
- Upgrade: Raises the item's item level and Gear Score. It uses materials and Coins, so check both before you confirm.
- Reforge: Rerolls the item's stat affixes. Use it when the gear is worth keeping but its bonus spread is not.
- Protect: Is the safeguard for a risky Forge attempt. Use it when you want to preserve the item's current progress, but let the panel define exactly what it protects.
- Enhance: Pushes the selected gear's stats further. Treat it as its own action and read the preview for the exact inputs.
Forge attempts can fail, so do not budget only the ore. Keep enough Coins for the action and hold tougher-to-replace materials for gear you plan to keep. The panel's cost and outcome warning are the final check, so do not copy a cost from a different item or action.
If a failed attempt shows a penalty, decide whether the gear is worth protecting before you confirm. Failure behavior can depend on the item's current state, so avoid assuming every Forge attempt follows the same rule.
Crafting recipes and material requirements
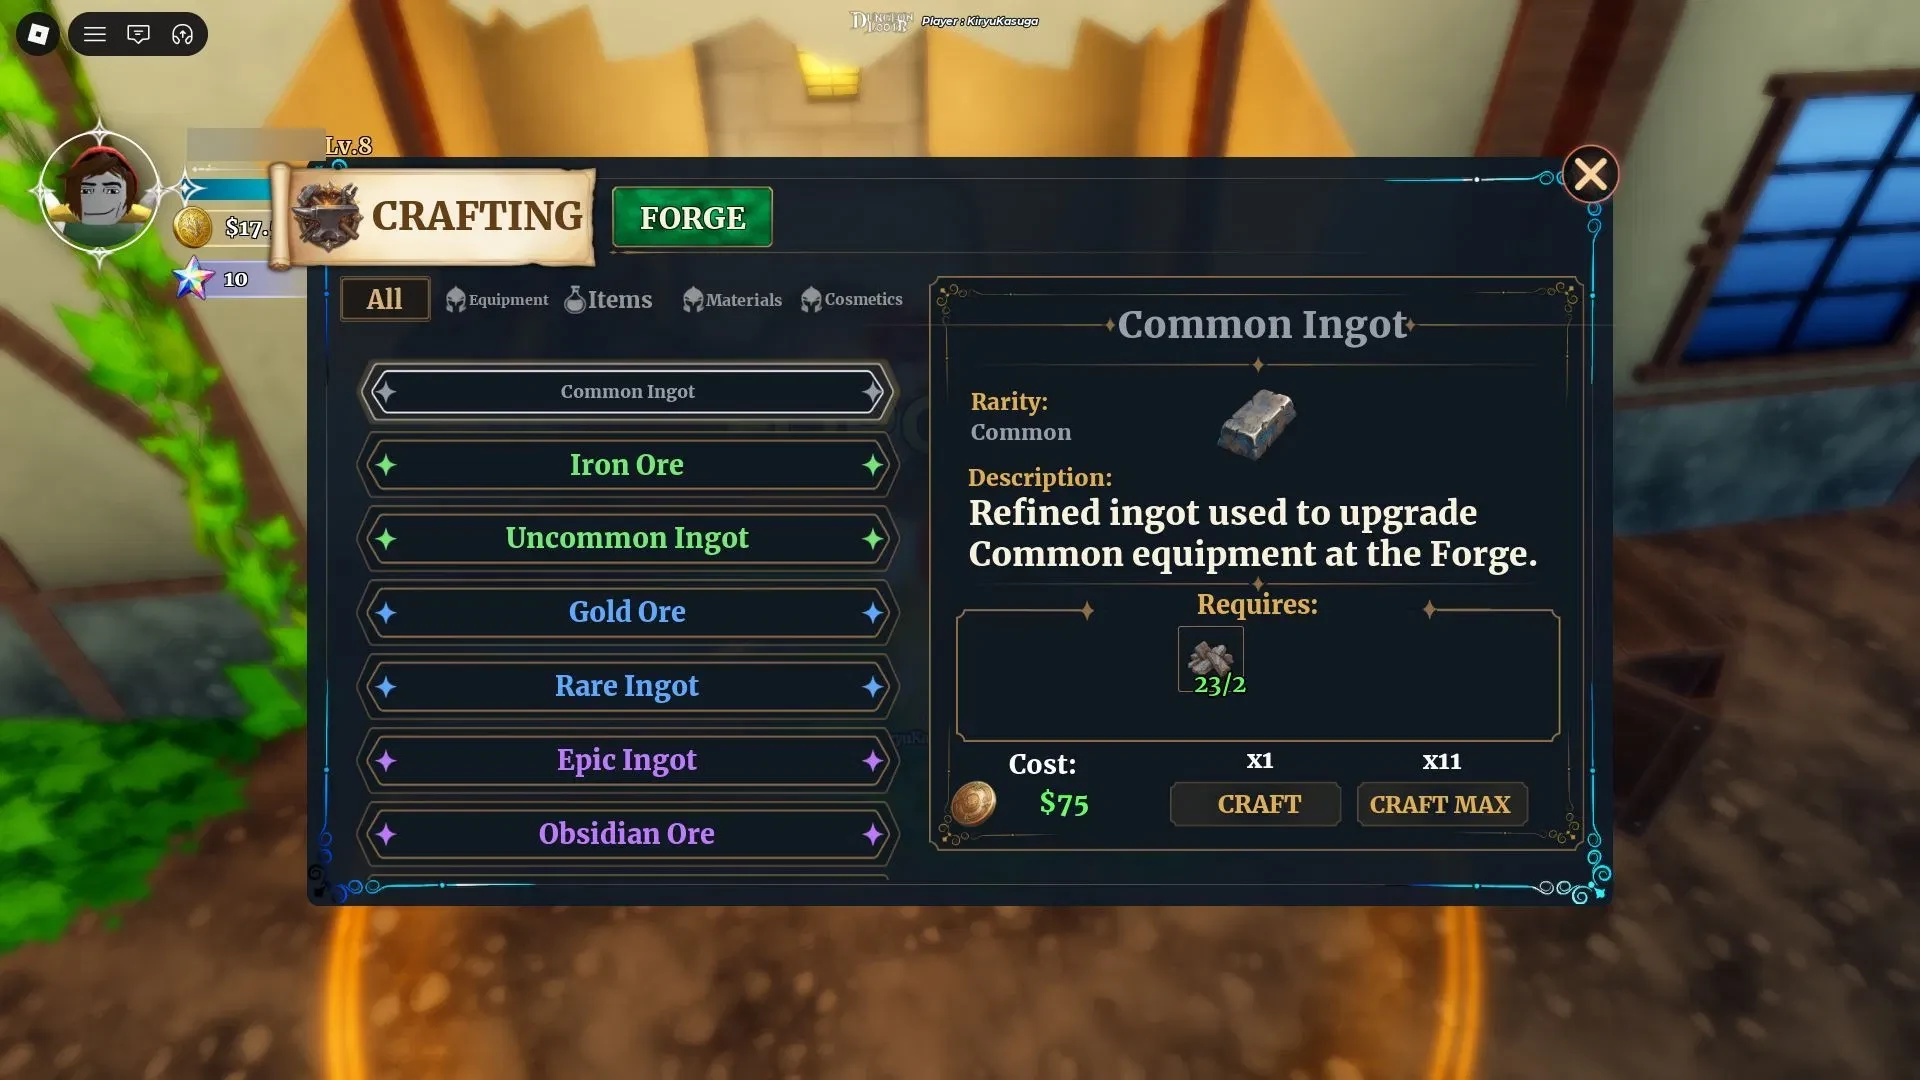
Crafting is a recipe check. Pick the item or category you need, read the material and Coin lines, then use Craft or Craft Max when the quantity looks right.
- Choose a recipe. Select the item and category you need.
- Check the full cost. Confirm the materials and Coins in the selected recipe panel.
- Craft the amount. Use
Craftfor one item orCraft Maxfor the amount the panel allows.
The displayed Common Ingot recipe is a useful example: it lists Iron Ore and a 75-Coin cost beside the crafting controls. Other recipes can ask for different inputs, so use the values shown for the recipe you selected.
The listed Purity Stone recipe is 10 Gold Ore, 5 Obsidian Ore, and 2 Celestial Ore. Treat those quantities as panel-sensitive: verify them in the current Crafting panel before farming or spending.
Where crafting materials and fragments come from
Before entering a dungeon, open Possible Rewards and look for the material or fragment you need. A listed reward helps you choose a route, but it is not a promise that every run will pay out that item.
Normal dungeon runs can return materials and Coins from chests, bosses, and cleared-zone rewards. Clear the run and extract so the loot is retained.
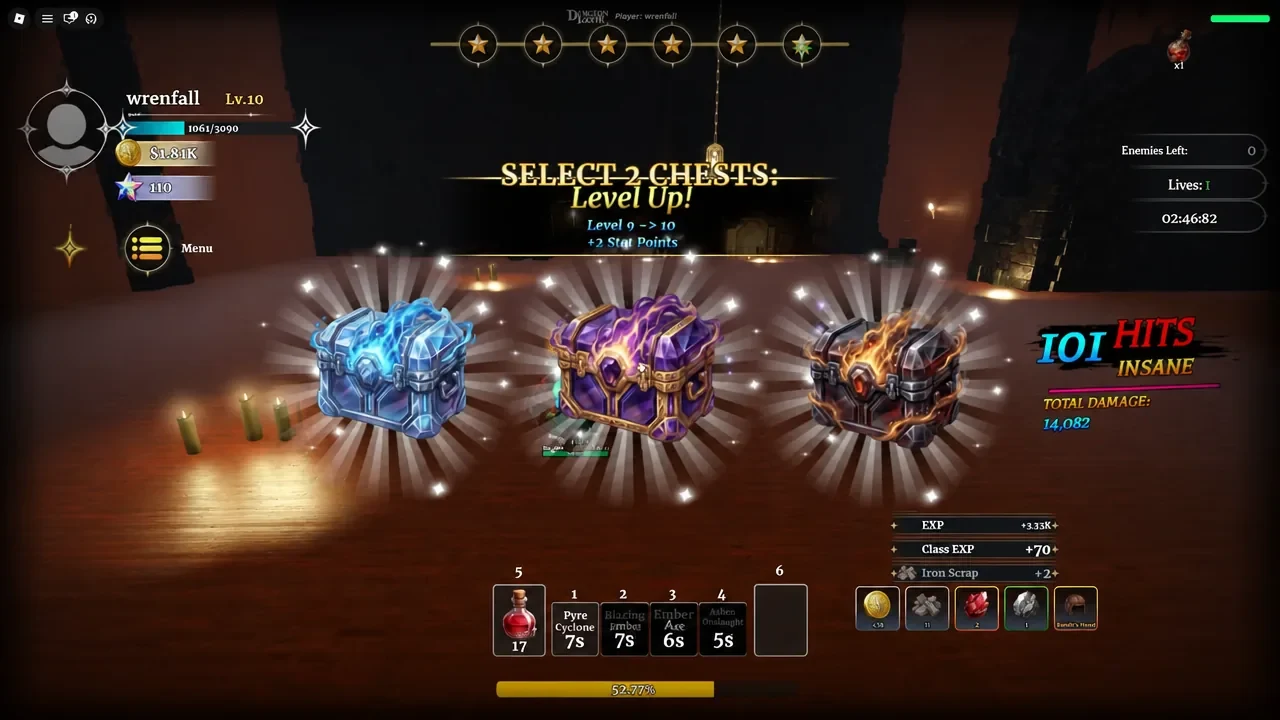
Use Underworld Gate or Boss Rush when the current reward panel points to the target you need. Boss Rush has a post-run chest choice screen with three chests and a SELECT 2 CHESTS prompt, so read the reward rows and choose the two that fit your plan.
- Check the recipe or Forge input for the item you want.
- Check
Possible Rewardsbefore choosing a dungeon or mode. - Run the activity and collect its chests or cleared-zone rewards.
- Extract from a dungeon or claim the Boss Rush chest rewards.
- Return to the hub with the materials and Coins needed for the next job.
Let the recipe tell you what to farm and let Possible Rewards tell you which activity is worth trying. That keeps your ore, Coins, and fragments working toward a real target instead of forming a very expensive pile.