

Anime Galaxies is a Roblox tower defense game where you summon characters, take a team into Story through a portal, and survive ten waves in Hidden Village Act 1. To start, make sure you're in the Champions TD version, summon a few characters at the lobby's summoning platform, enter the Act 1 portal, and place units from your bottom roster. Upgrades come after that, and they're paid for with the money in each battle rather than the gems you summon with.
| Step | Where it happens | What to do |
|---|---|---|
| 1. Confirm the game | Roblox game page | Check for Anime Galaxies by Champions TD, place ID 83869074416117 |
| 2. Summon characters | Summoning platform in the lobby | Build your roster using gems |
| 3. Start Act 1 | Portal | Read the stage name and wave counter, then select Ready |
| 4. Place units | Bottom roster and battle map | Select a unit and set it down on the map |
| 5. Upgrade units | Selected-unit panel | Check the next upgrade cost against your stage money |
| 6. Clear Act 1 | Battle screen | Survive all ten waves, including wave 10 |
Find the Right Anime Galaxies on Roblox
Several Roblox experiences have similar names, so check the creator before you do anything else. The game you want is Anime Galaxies by Champions TD, with place ID 83869074416117. You can find that number in the web address of the game page.
A similar name can send you into a different experience, and you'd lose time wondering why nothing matches what you see. Taking a few seconds to confirm the place at the start saves that trouble.
Summon Your First Characters at the Lobby Platform
You start in the lobby, and the summoning platform is where you add characters to your roster. Your first run doesn't need anything you bring in, so summoning is the first thing to do after you load in. Here's the order to follow:
- Walk to the summoning platform in the lobby.
- Summon a character, then summon a few more.
- Check your roster to confirm the new characters are there.
Each character that joins your roster can be placed in battle, and a bigger roster gives you more choices along the bottom of the battle screen.
Summon banners rotate, so the lineup changes over time. Gems are the currency you spend here. Battle money works differently, which matters once you start upgrading. You can also attach a trait to a character you plan to use in Act 1, but traits go deeper than a first run needs, so it's worth learning the battle before you spend time on them.
Enter Hidden Village Act 1 and Survive All Ten Waves
Once your roster is ready, enter the portal to start Act 1. The battle opens on the Hidden Village map, with the stage name and wave counter on screen. Nothing starts on its own, since the stage waits for you to select Ready. That gives you time to read the screen and set up before the first wave arrives.
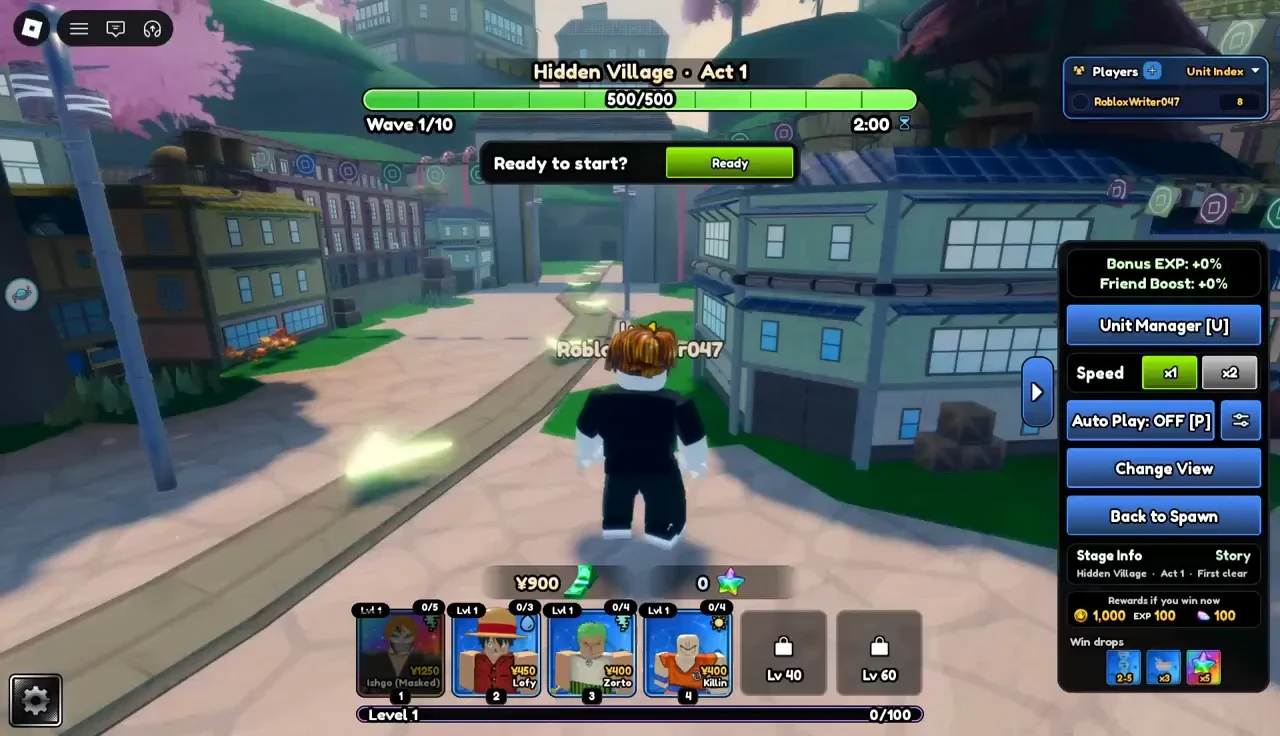
Act 1 has ten waves, and enemies come in rounds. Your placed units fight each round while the counter at the top shows how far you've progressed. The same few screen elements repeat every round, so learning them during the first wave makes the rest of the act easier to follow.
The second through fourth waves follow the same pattern. Clearing a wave brings up a wave completed message, and enemies keep arriving until your units have handled the round. The fifth wave is the halfway point and a good time to place more units from your roster before the second half starts. In the second half, your placed units do most of the defending while you watch the path.
The counter reads ten out of ten on the final wave. You can still place units during this wave, so you can add more if the last rounds look tight. Once your units survive the tenth wave, Act 1 is complete.
Place Units and Use the Battle Controls
Select a unit from the bottom roster, and a placement prompt appears. Set the unit down on the map where it can reach the route the enemies take. A unit placed out of reach won't help, however strong it is, so take a moment to check the path before you commit.
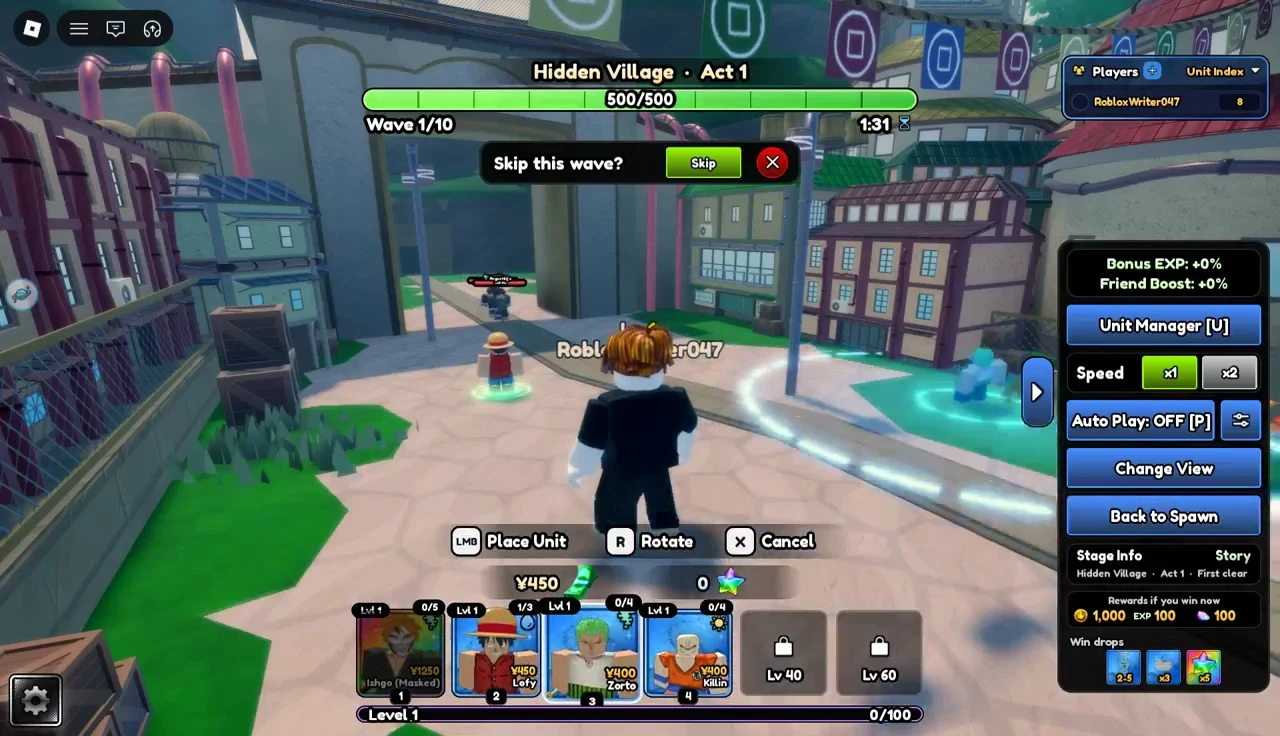
The wave-skip prompt lets you move the battle along early. You can ignore it when you want more time to place units, and leaving it open keeps that setup time for you. A control panel on the right side of the screen holds the battle speed setting and an Auto Play toggle. With Auto Play off, every placement is your call, and the speed setting can stay at its default for the whole act.
Opening the system menu won't clear the battle prompts. They wait underneath, and the act picks up where it left off when you close the menu.
Upgrade Units With Stage Money, Not Gems
Select a unit to open its panel. The panel shows upgrade progress, damage, attack interval, range and the cost of the next upgrade. Read all of those together before you buy, because a single number on its own can mislead you.
Gems pay for summons in the lobby, while battle money pays for placing and upgrading units during a stage. Because they're separate balances, a pile of gems won't cover an upgrade. Compare the next upgrade's cost with the money shown for the current stage before you try. If you can't afford it, the game displays an insufficient-money message.
Don't assume every upgrade costs the same, and read the panel for each unit. When you compare two units, keep their levels and upgrades in mind. A heavily upgraded unit can look stronger simply because you put more into it.
What to Do When Enemies Get Through
If enemies leak past your units, resist the urge to replace the whole team. Repeat the stage with the same team and difficulty, then change one thing: placement, timing, targeting or which upgrade you buy. Changing a single variable shows you what caused the difference, which a full swap hides. This takes longer than a reset, but it tells you what's actually going wrong.
Use what you see to narrow down the problem:
- Enemies pass through early: Check whether your opening placements are affordable and whether they reach the route in time.
- A group gets through together: Look at how your units cover the path. A bigger damage number may not fix a coverage problem.
- One tough enemy survives: Check how much damage your units deal over time and whether their attacks actually land.
- The same team does well sometimes and badly other times: Repeat the stage and compare placement, timing and targeting before you spend on a replacement.
What to Learn After Your First Story Clear
Once Act 1 is clear, spend your time learning the stage and your team before moving on to the bigger systems. Nightmare mode offers bigger rewards, and challenges, a Season Pass and quests add more to do. Those extras are easier to handle when you already know how your units perform, so repeat Act 1 with a team you understand before you chase them.