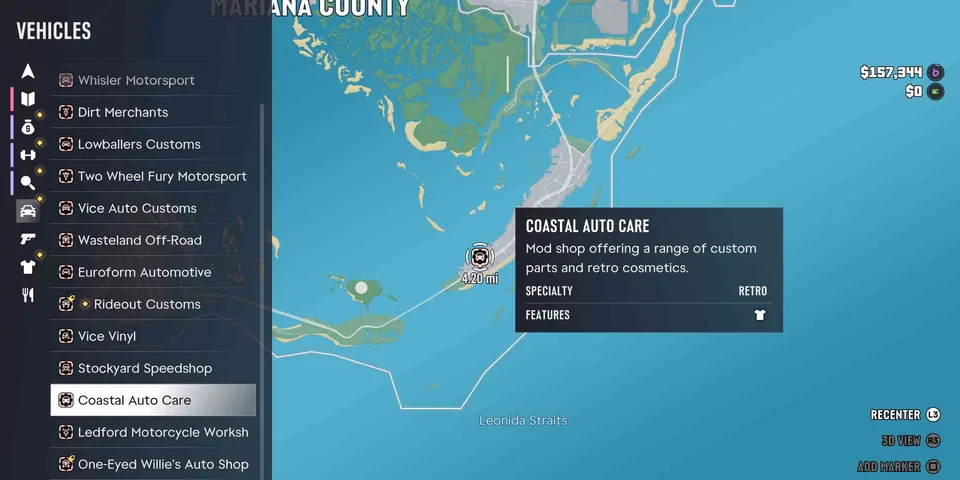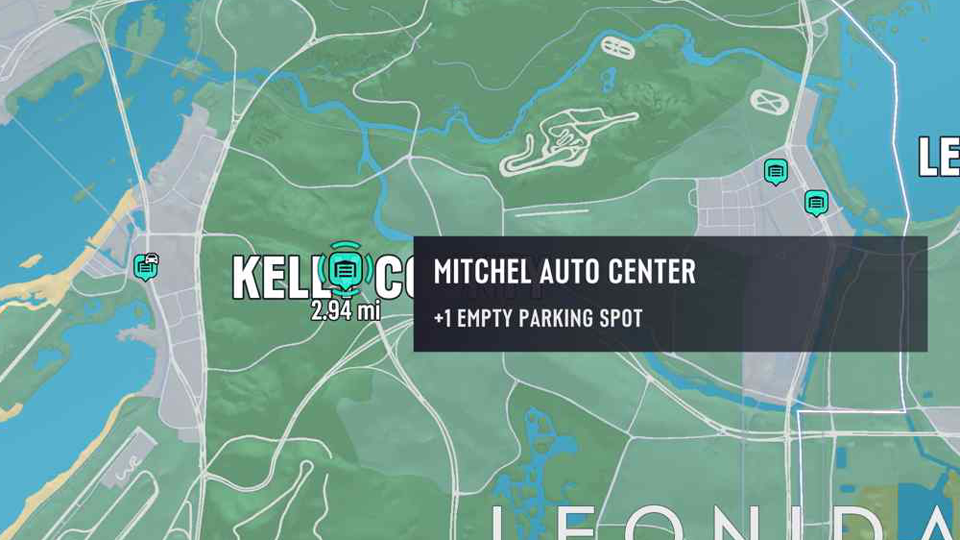
Hobbies and pastimes in GTA 6 are the activities you can take part in around the map, from street races and drone races to golf, pool, shooting ranges and video games. Each one has its own goal, such as winning a race, beating a par time or clearing a shooting range, and many of them lead to trophies. The game tracks each one in the Progress menu, so you can work through them at your own pace.
0 of 95 completed · 0% complete
Races
Hit 'n' Run VC - Salton
#1- Activity
- Street race
- Races
- 3
- Race crew
- Hit 'n' Run VC
- Cost to play
- Buy-in $300+; vehicle rental $300+
- Trophy tie
- Earn Cash, Not Kudos (counts toward 20 race wins)
Hit 'n' Run VC - La Perle
#2- Activity
- Street race
- Races
- 2
- Race crew
- Hit 'n' Run VC
- Cost to play
- Buy-in $500+; vehicle rental $300+
- Trophy tie
- Earn Cash, Not Kudos (counts toward 20 race wins)
Hit 'n' Run VC - Ocean Beach
#3- Activity
- Street race
- Races
- 2
- Race crew
- Hit 'n' Run VC
- Cost to play
- Buy-in $1,000+; vehicle rental $600+
- Trophy tie
- Earn Cash, Not Kudos (counts toward 20 race wins)
Hit 'n' Run VC - Gloriana Key
#4- Activity
- Street race
- Races
- 2
- Race crew
- Hit 'n' Run VC
- Cost to play
- Buy-in $500+; vehicle rental $300+
- Trophy tie
- Earn Cash, Not Kudos (counts toward 20 race wins)
Animal Crackers - Grayson
#5- Activity
- Off-road race
- Races
- 2
- Race crew
- Animal Crackers
- Cost to play
- Buy-in $500+; vehicle rental $200+
- Trophy tie
- Earn Cash, Not Kudos (counts toward 20 race wins)
Animal Crackers - Redshaw's
#6- Activity
- Off-road race
- Races
- 2
- Race crew
- Animal Crackers
- Cost to play
- Buy-in $800+; vehicle rental $300+
- Trophy tie
- Earn Cash, Not Kudos (counts toward 20 race wins)
Animal Crackers - Ranchers
#7- Activity
- Off-road race
- Races
- 2
- Race crew
- Animal Crackers
- Cost to play
- Buy-in $800+; vehicle rental $300+
- Trophy tie
- Earn Cash, Not Kudos (counts toward 20 race wins)
Animal Crackers - Big Pine
#8- Activity
- Off-road race
- Races
- 2
- Race crew
- Animal Crackers
- Cost to play
- Buy-in $500+; vehicle rental $200+
- Trophy tie
- Earn Cash, Not Kudos (counts toward 20 race wins)
Gellhorn Raceway
#9- Activity
- Track race
- Races
- 11
- Race crew
- -
- Cost to play
- Entry fee and vehicle rental apply
- Trophy tie
- Earn Cash, Not Kudos (counts toward 20 race wins)
Boone Speedway
#10- Activity
- Dirt speedway race
- Races
- 2
- Race crew
- -
- Cost to play
- Buy-in $300+; vehicle rental $300+
- Trophy tie
- Earn Cash, Not Kudos (counts toward 20 race wins)
Ambrosia Raceway
#11- Activity
- Demolition race
- Races
- 2
- Race crew
- -
- Cost to play
- Buy-in $380+; vehicle rental $300+
- Trophy tie
- Earn Cash, Not Kudos (counts toward 20 race wins)
Thrillbilly Mud Club - Dirt Track
#12- Activity
- Off-road dirt track race
- Races
- 6
- Race crew
- Thrillbilly Mud Club
- Cost to play
- Buy-in $300+; vehicle rental $200+
- Trophy tie
- Earn Cash, Not Kudos (counts toward 20 race wins)
Thrillbilly Mud Club - Oval Track
#13- Activity
- Dirt oval race
- Races
- 2
- Race crew
- Thrillbilly Mud Club
- Cost to play
- Buy-in $380+; vehicle rental $200+
- Trophy tie
- Earn Cash, Not Kudos (counts toward 20 race wins)
Race Challenges
Ambrosia Raceway – Raceway Trial
#14- Activity
- Time trial
- Trophy tie
- Master of None (any one race challenge counts)
Hamlet – BMX Stunt Run
#15- Activity
- Stunt run (scored)
- Trophy tie
- Master of None (any one race challenge counts)
Boone Speedway – Speedway Trial
#16- Activity
- Time trial
- Trophy tie
- Master of None (any one race challenge counts)
Gellhorn Raceway – Raceway Trial
#17- Activity
- Time trial (laps)
- Trophy tie
- Master of None (any one race challenge counts)
Gellhorn Raceway – Dragway Trial
#18- Activity
- Drag race
- Trophy tie
- Master of None (any one race challenge counts)
Mount Kalaga – Cycling Trial
#19- Activity
- Cycling time trial
- Trophy tie
- Master of None (any one race challenge counts)
Thrillbilly Mud Club – Air Time Stunt Run
#20- Activity
- Stunt run (scored)
- Trophy tie
- Master of None (any one race challenge counts)
Thrillbilly Mud Club – Drag Trial
#21- Activity
- Drag race
- Trophy tie
- Master of None (any one race challenge counts)
Thrillbilly Mud Club – Hill Climb Trial
#22- Activity
- Hill climb
- Trophy tie
- Master of None (any one race challenge counts)
Thrillbilly Mud Club – Dirt Track Trial
#23- Activity
- Time trial (laps)
- Trophy tie
- Master of None (any one race challenge counts)
Thrillbilly Mud Club – Oval Trial
#24- Activity
- Time trial (laps)
- Trophy tie
- Master of None (any one race challenge counts)
Thrillbilly Mud Club – Swamp Run Trial
#25- Activity
- Run against the clock
- Trophy tie
- Master of None (any one race challenge counts)
Waning Sands – Motocross Stunt Run
#26- Activity
- Stunt run (scored)
- Trophy tie
- Master of None (any one race challenge counts)
Golf
King Gator Adventure Golf
#27- Activity
- Mini golf
- Par or target
- Par 42
- Trophy tie
- Master of None (any one golf course counts)
Frontier Adventure Golf
#28- Activity
- Mini golf
- Par or target
- Par 43
- Trophy tie
- Master of None (any one golf course counts)
Dino Golf Challenge
#29- Activity
- Mini golf
- Par or target
- -
- Trophy tie
- Master of None (any one golf course counts)
Leaf Links Golf Challenge
#30- Activity
- Golf course
- Trophy tie
- Master of None (any one golf course counts)
Mount Hailes Golf Challenge
#31- Activity
- Golf course
- Trophy tie
- Master of None (any one golf course counts)
Pool
Skeeter's
#32- Activity
- Pool opponent
- Cost to play
- $100 to play
- Trophy tie
- Master of None (any one pool game counts)
Zotico's
#33- Activity
- Pool opponent
- Cost to play
- $25 to play
- Trophy tie
- Master of None (any one pool game counts)
The Thirsty Wolf
#34- Activity
- Pool opponent
- Cost to play
- $50 to play
- Trophy tie
- Master of None (any one pool game counts)
Jacob's Tavern
#35- Activity
- Pool opponent
- Cost to play
- $35 to play
- Trophy tie
- Master of None (any one pool game counts)
Delights Cabaret Bar
#36- Activity
- Pool opponent
- Cost to play
- $10 to play
- Trophy tie
- Master of None (any one pool game counts)
Kowaachobee Cafe & Bar
#37- Activity
- Pool opponent
- Cost to play
- $20 to play
- Trophy tie
- Master of None (any one pool game counts)
Shooting Range
3-Point Range
#38- Activity
- Shooting challenge
- Cost to play
- $10 to rent a weapon if you don't own the type
- Trophy tie
- The Shootist (gold in every challenge)
Hook Range
#39- Activity
- Shooting challenge
- Cost to play
- $10 to rent a weapon if you don't own the type
- Trophy tie
- The Shootist (gold in every challenge)
Loop Range
#40- Activity
- Shooting challenge
- Cost to play
- $10 to rent a weapon if you don't own the type
- Trophy tie
- The Shootist (gold in every challenge)
Maze Range
#41- Activity
- Shooting challenge
- Cost to play
- $10 to rent a weapon if you don't own the type
- Trophy tie
- The Shootist (gold in every challenge)
Compound Range
#42- Activity
- Shooting challenge
- Cost to play
- $10 to rent a weapon if you don't own the type
- Trophy tie
- The Shootist (gold in every challenge)
Villa Range
#43- Activity
- Shooting challenge
- Cost to play
- $10 to rent a weapon if you don't own the type
- Trophy tie
- The Shootist (gold in every challenge)
Market Range
#44- Activity
- Shooting challenge
- Cost to play
- $10 to rent a weapon if you don't own the type
- Trophy tie
- The Shootist (gold in every challenge)
Zombie Range
#45- Activity
- Shooting challenge
- Cost to play
- $10 to rent a weapon if you don't own the type
- Trophy tie
- The Shootist (gold in every challenge)
Hunting Range
#46- Activity
- Shooting challenge
- Cost to play
- $10 to rent a weapon if you don't own the type
- Trophy tie
- The Shootist (gold in every challenge)
Saloon Range
#47- Activity
- Shooting challenge
- Cost to play
- $10 to rent a weapon if you don't own the type
- Trophy tie
- The Shootist (gold in every challenge)
Cops & Robbers Range
#48- Activity
- Shooting challenge
- Cost to play
- $10 to rent a weapon if you don't own the type
- Trophy tie
- The Shootist (gold in every challenge)
Alien Range
#49- Activity
- Shooting challenge
- Cost to play
- $10 to rent a weapon if you don't own the type
- Trophy tie
- The Shootist (gold in every challenge)
Video Games
Tenebrae Lux
#50- Activity
- Console game at home
- Trophy tie
- Stick Fiddler (reach the end of any one of the four)
Street Trash 3: Dezombifier
#51- Activity
- Console game at home
- Trophy tie
- Stick Fiddler (reach the end of any one of the four)
Time Jackers Rewind
#52- Activity
- Console game at home
- Trophy tie
- Stick Fiddler (reach the end of any one of the four)
Bang! For Your Buck
#53- Activity
- Arcade game
- Trophy tie
- Stick Fiddler (reach the end of any one of the four)
Drone Races
Deep Roots
#54- Activity
- Drone time trial
- Par or target
- Par 1:31
- Trophy tie
- Top Fun (win one race at this location)
Power Station South
#55- Activity
- Drone time trial
- Par or target
- Par 1:26
- Trophy tie
- Top Fun (win one race at this location)
Power Station North
#56- Activity
- Drone time trial
- Par or target
- Par 2:04
- Trophy tie
- Top Fun (win one race at this location)
Leonida RC Raceway
#57- Activity
- Drone time trial
- Par or target
- Par 1:27
- Trophy tie
- Top Fun (win one race at this location)
Watson Bay
#58- Activity
- Drone time trial
- Par or target
- Par 1:34
- Trophy tie
- Top Fun (win one race at this location)
Marshland Animal Park
#59- Activity
- Drone time trial
- Par or target
- Par 1:17
- Trophy tie
- Top Fun (win one race at this location)
Capri Train Station
#60- Activity
- Drone time trial
- Par or target
- Par 1:50
- Trophy tie
- Top Fun (win one race at this location)
Ravella Drive
#61- Activity
- Drone time trial
- Par or target
- Par 1:51
- Trophy tie
- Top Fun (win one race at this location)
Capri Lake
#62- Activity
- Drone time trial
- Par or target
- Par 2:01
- Trophy tie
- Top Fun (win one race at this location)
Kowaachobee Village
#63- Activity
- Drone time trial
- Par or target
- Par 1:24
- Trophy tie
- Top Fun (win one race at this location)
Swampy Sal's Safari Park
#64- Activity
- Drone time trial
- Par or target
- Par 1:40
- Trophy tie
- Top Fun (win one race at this location)
Camp Moonflower
#65- Activity
- Drone time trial
- Par or target
- Par 1:48
- Trophy tie
- Top Fun (win one race at this location)
Navitrak
#66- Activity
- Drone time trial
- Par or target
- Par 1:29
- Trophy tie
- Top Fun (win one race at this location)
Apollo Aggregates
#67- Activity
- Drone time trial
- Par or target
- Par 1:27
- Trophy tie
- Top Fun (win one race at this location)
Tisha-Wocka Flea Market
#68- Activity
- Drone time trial
- Par or target
- Par 1:08
- Trophy tie
- Top Fun (win one race at this location)
Future Leonida Art Museum
#69- Activity
- Drone time trial
- Par or target
- Par 1:47
- Trophy tie
- Top Fun (win one race at this location)
Shoreline Market
#70- Activity
- Drone time trial
- Par or target
- Par 2:01
- Trophy tie
- Top Fun (win one race at this location)
Wildland Zoo
#71- Activity
- Drone time trial
- Par or target
- Par 1:30
- Trophy tie
- Top Fun (win one race at this location)
Avarice Petroleum
#72- Activity
- Drone time trial
- Par or target
- Par 1:53
- Trophy tie
- Top Fun (win one race at this location)
The Jamaica
#73- Activity
- Drone time trial
- Par or target
- Par 1:16
- Trophy tie
- Top Fun (win one race at this location)
Ivory Towers
#74- Activity
- Drone time trial
- Par or target
- Par 1:42
- Trophy tie
- Top Fun (win one race at this location)
Leaf Links
#75- Activity
- Drone time trial
- Par or target
- Par 1:30
- Trophy tie
- Top Fun (win one race at this location)
Vice Regal Hotel
#76- Activity
- Drone time trial
- Par or target
- Par 1:41
- Trophy tie
- Top Fun (win one race at this location)
St. Vitus Medical Center
#77- Activity
- Drone time trial
- Par or target
- Par 2:00
- Trophy tie
- Top Fun (win one race at this location)
Hot Skidz
#78- Activity
- Drone time trial
- Par or target
- Par 1:39
- Trophy tie
- Top Fun (win one race at this location)
Thundergolf
#79- Activity
- Drone time trial
- Par or target
- Par 1:57
- Trophy tie
- Top Fun (win one race at this location)
Evergreen Mall
#80- Activity
- Drone time trial
- Par or target
- Par 1:52
- Trophy tie
- Top Fun (win one race at this location)
Captain O'Malley Marina
#81- Activity
- Drone time trial
- Par or target
- Par 2:03
- Trophy tie
- Top Fun (win one race at this location)
Allied Crystal
#82- Activity
- Drone time trial
- Par or target
- Par 2:02
- Trophy tie
- Top Fun (win one race at this location)
Waste Transfer Services
#83- Activity
- Drone time trial
- Par or target
- Par 1:55
- Trophy tie
- Top Fun (win one race at this location)
Manifest Canyon
#84- Activity
- Drone time trial
- Par or target
- Par 1:28
- Trophy tie
- Top Fun (win one race at this location)
Red Apple Orchard
#85- Activity
- Drone time trial
- Par or target
- Par 1:12
- Trophy tie
- Top Fun (win one race at this location)
Port Gellhorn
#86- Activity
- Drone time trial
- Par or target
- Par 1:39
- Trophy tie
- Top Fun (win one race at this location)
Draper Island Terminal
#87- Activity
- Drone time trial
- Par or target
- Par 1:49
- Trophy tie
- Top Fun (win one race at this location)
Draper Refinery East
#88- Activity
- Drone time trial
- Par or target
- Par 1:44
- Trophy tie
- Top Fun (win one race at this location)
Draper Refinery West
#89- Activity
- Drone time trial
- Par or target
- Par 1:51
- Trophy tie
- Top Fun (win one race at this location)
Abandoned Mining Pit
#90- Activity
- Drone time trial
- Par or target
- Par 1:03
- Trophy tie
- Top Fun (win one race at this location)
Adler Creek
#91- Activity
- Drone time trial
- Par or target
- Par 1:21
- Trophy tie
- Top Fun (win one race at this location)
Macalister Gold Mine
#92- Activity
- Drone time trial
- Par or target
- Par 0:59
- Trophy tie
- Top Fun (win one race at this location)
Millport
#93- Activity
- Drone time trial
- Par or target
- Par 1:31
- Trophy tie
- Top Fun (win one race at this location)
Rushwood Logging
#94- Activity
- Drone time trial
- Par or target
- Par 2:08
- Trophy tie
- Top Fun (win one race at this location)
Tallaloko Lakeside Resort
#95- Activity
- Drone time trial
- Par or target
- Par 2:05
- Trophy tie
- Top Fun (win one race at this location)
How hobbies and pastimes work in GTA 6
Racing, race challenges, golf and drone races show up on the map with a blue icon once you get within 100 metres of them, so you always know where to head next. Some of them are opened by a story mission or an optional mission first, while others are simply there to find as you explore the map.
Many of them cost money to play. Races and pool charge a fee each time you take part, and the shooting ranges need a pass and sometimes a weapon rental, so it helps to have some cash on hand before you set off.
In races, playing one unlocks the next at the same location, so you work your way through a spot in order. The other activities are open to you as soon as you find them, so you can choose the ones you enjoy most.
Races in GTA 6: street, off-road, track and demolition races
Races are grouped by location, so one spot on the map can hold several races. The Hit 'n' Run VC races in Vice City are street races, the Animal Crackers races are off-road and cross-country, and Gellhorn Raceway is a track. Ambrosia Raceway runs demolition races, Boone Speedway has dirt speedway races, and Thrillbilly Mud Club has dirt track and oval races.
Each race costs a buy-in, and you also pay a fee to rent the vehicle you race in. Buy-ins start at $300 and can go past $1,000, while vehicle rentals start at $200. Winning pays cash prizes, which can leave you in profit after the fees.
Each race group opens in its own way. Hit 'n' Run VC comes from a story mission in Vice City, and an optional mission called Join a Street Race marks its locations on the map. Thrillbilly Mud Club comes from Billy's optional questline, Thrillbillies, while the Animal Crackers, Boone Speedway and Ambrosia races are found on the map.
The Gellhorn races start with the Gellhorn Raceway – Introduction mission. Placing in the amateur Keep It PG races then unlocks more of them.
Race challenges in GTA 6: timed trials and stunt runs
Race challenges are a separate category from races. They are timed trials, drag races, hill climbs, cycling runs and stunt runs, and the stunt runs are scored on points and air time rather than speed.
You'll find them at Ambrosia Raceway, Boone Speedway, Gellhorn Raceway, Hamlet, Mount Kalaga, Thrillbilly Mud Club and Waning Sands. Each one has Bronze, Silver and Gold levels, so you always have a reason to go back and beat your last run. Some need a specific bike, so check the requirement on the card before you set off.
Golf in GTA 6: mini golf and full courses
Golf comes in two styles. The mini golf courses are themed adventure courses, and the full golf courses are at a private club and a country club.
King Gator Adventure Golf is a swamp-themed course in Buckskin Swamp, and Frontier Adventure Golf is a Wild West course in Waning Sands. You play 9 or 18 holes at either one, solo or with a partner. Both give you a par to aim for, which is the target score for the course, so you can measure how well you did.
Dino Golf Challenge is an abandoned, dinosaur-themed course where you play all 18 holes in any order, and it has a driving range too. The full courses play differently. Leaf Links Golf Challenge is an exclusive club in Vice Beach where you play all the holes in any order, while Mount Hailes Golf Challenge is an expansive country club course in Waning Sands with a driving range.
Pool in GTA 6: how to play and what it costs
Pool tables are found in bars, a restaurant and a food kiosk around the map. To play, walk up to a table and choose the Play Pool prompt, and you'll face an opponent at that table. Each game has its own set price.
Prices vary a lot, from $10 to $100 a game, so where you choose to play makes a real difference to your wallet. The tables are spread across different towns, from Hamlet and Port Gellhorn to Milport and Belville, so you'll need to travel to visit them.
Shooting ranges in GTA 6: Griffin and Rodgers Ranch challenges
There are two shooting ranges. Griffin Shooting Range sits north-west of Vice City, and its challenges have you moving through courses while you shoot. Rodgers Ranch & Shooting Range sits north-east of Port Gellhorn, and its challenges are about scoring points while you stay still.
Before any challenges appear on the map, you need a Waiver Pass. Talk to the clerk in the store at each range and buy one for $5, and the challenges will then be marked on the map.
You don't need to bring your own weapon. If you don't own the type a challenge calls for, you can pay $10 to rent one for that challenge. The rented weapons are good enough for gold on every challenge, so renting is a perfectly fine way to go.
At Griffin, play as Lucia, since she runs faster and handles better than Jason. Speed usually beats perfect aim there, because a bullseye only saves about a second. At Rodgers Ranch, hit targets in the body once or twice before going for the head to build a score multiplier, and try not to miss, because a miss lowers it.
How to raise your Focus with hobbies and pastimes in GTA 6
Focus is the purple bar that slows down time when you use it, so a bigger bar gives you more slow time to work with. The shooting ranges are one of the best ways to build it up. Every time you finish or quit a challenge, you gain a permanent Focus increase.
Focus also refills when you eat or drink something at home, or when you shower or wash your face there. Golf, pool and the shooting ranges can top it up too, so you can keep the bar full while you play other hobbies.
Video games in GTA 6: home console and arcade cabinet
The home console games are played on the JoySystem at Jason's House, and they are Tenebrae Lux, Street Trash 3: Dezombifier and Time Jackers Rewind. Tenebrae Lux is set on a dark, frigid isle with a lighthouse beacon, Street Trash 3: Dezombifier is a zombie shooter, and Time Jackers Rewind is a shooter where you use time-manipulation powers.
Bang! For Your Buck is a different kind of game. It's an arcade cabinet you find around the map, such as the one outside a store in Port Gellhorn, and you shoot to start it. It is not on the home console.
Starting a game and quitting it counts toward these hobbies, so you don't need to see one through to the end.
Drone races in GTA 6: time trials and par times
Drone races are time trials you fly through the map's towns, industrial areas and landmarks. They are grouped by location, and each trial has a par time, which is the target you need to beat.
The rule is about order. At each location, you have to beat par on the first two races to unlock the last one, and the last one only needs a finish. That makes the first two the ones that matter most for unlocking the rest.
To beat par, hold the left stick forward the whole time so you go at full speed, and try not to crash into anything. You can call a taxi to fast travel to any drone location except Dalton Island, which you can only reach by boat or aircraft.
Which hobbies and pastimes matter most for trophies and the 100% completion checklist
Every type of hobby and pastime counts toward the 100% completion checklist. You need to win most of the races, finish every drone race, and earn gold on every shooting range challenge. You also need gold in most race challenges, most of the mini golf courses, and most of the pool opponents.
The shooting ranges and drone races leave the least room to skip, since every shooting medal and every drone race is needed. The video games are the easiest to tick off, since each one only needs to be played once.
The Earn Cash, Not Kudos trophy comes from winning a good spread of different races. There are more races than you need for it, so you can pick the ones you enjoy most. Master of None is for trying each kind of activity at least once, including golf, pool, shooting, a video game and a car race.
The Shootist comes with that shooting gold, Stick Fiddler is for reaching the end of one of the video games, and Top Fun is for winning a race at every drone location.
FAQ
How much does pool cost in GTA 6?
Each table sets its own price. Delights Cabaret Bar in Port Gellhorn is the cheapest at $10 a game, and Skeeter's in Hamlet is the most expensive at $100. In between, Kowaachobee Cafe & Bar charges $20, Zotico's at the Tisha-Wocka Flea Market charges $25, Jacob's Tavern charges $35 and The Thirsty Wolf charges $50.
Which GTA 6 shooting range challenges need a specific weapon?
Several do. The Market Range uses pistols in every tier, and the Cops & Robbers Range uses only a sniper rifle. The Zombie Range changes weapon at each tier, moving through an SMG, shotguns and an assault rifle, while the Hunting Range and Saloon Range switch between pistols, shotguns, revolvers and tactical rifles.
Which GTA 6 race challenges need a special bike?
Only the Hamlet BMX stunt run and the Mount Kalaga cycling trial ask for one. The BMX run needs a BMX bike and is scored on the stunts and air time you pull off. The cycling trial needs a regular bicycle and is a race down the slopes to the finish line.
Where do I track my hobbies and pastimes in GTA 6?
Open the Progress menu and go to Activities. Racing, Race Challenges and Top Fun Drones each have their own list, and pool and golf sit under Sports, with pool in its own section there. On the map, you can use the filter under Map > Activities (the dumbbell icon) to see which racing and drone locations you have found.
What are the par times for drone races in GTA 6?
The par times you have to beat range from 1:03 at Abandoned Mining Pit in Moreau up to 2:08 at Rushwood Logging in Millport. The last race at each drone location has no par to beat, so you only need to finish it.