
To summon the Wall of Flesh, throw a Guide Voodoo Doll into lava while standing in the Underworld, the hot, lava-filled bottom layer of the world, as long as your Guide, the helper who lives in your town, is alive. Then run along a long bridge while you attack the Wall and dodge its lasers, the Hungry creatures attached to it, and its contact damage, since it sweeps across the Underworld and has to die before it reaches the far edge. Beating it for the first time permanently switches your world to Hardmode, the harder second stage of the game, and always drops the Pwnhammer, a hammer you'll use to unlock new ores.
| Difficulty | Max health | Mouth contact damage | Mouth defense | Hungry Heart drop chance |
|---|---|---|---|---|
| Classic | 8,000 | 50 | 12 | Always |
| Expert | 11,200 | 150 | 18 | 1 in 5 |
| Master | 14,280 | 225 | 18 | 1 in 5 |
The jump is steepest in Expert and Master. Contact damage from the Mouth climbs from 50 to 150 or 225, and the Hungry drop Hearts far less often, so healing potions matter more.
Build a Long Underworld Bridge for the Fight
The fight is mostly running, so the bridge matters as much as your weapon. Build a single-layer path across a large part of the Underworld, then clear everything from it first: lava pools, houses, and any terrain sticking up into the route. Leave open space above the path so you can jump over obstacles.
As a starting point, aim for roughly 750 to 1,000 blocks. Expert and Master, or a larger world, call for more room, so build longer if you can. Walk the whole route before you summon, because one lava gap or one uncleared house can break your run.
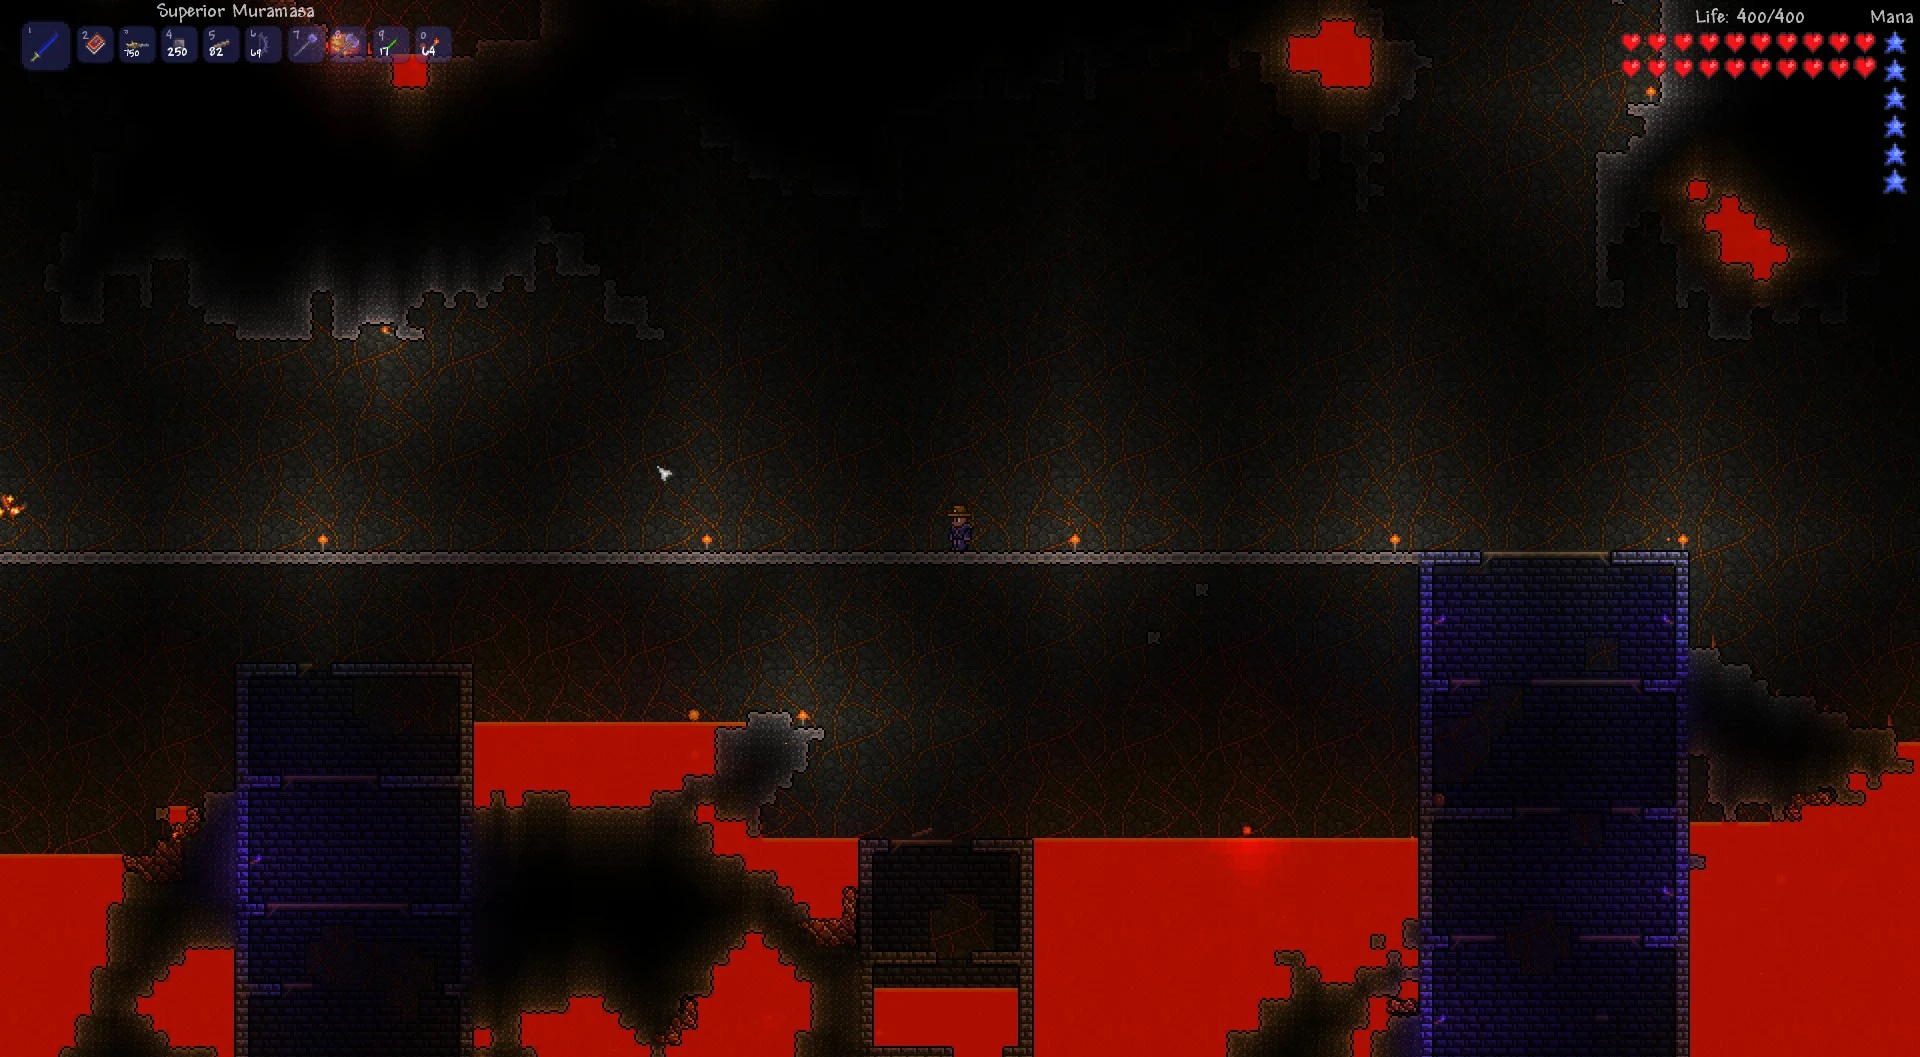
Ash Blocks make a solid runway. Lava Slimes can leave small lava puddles when they die, and lava breaks many platforms, so use Ash Blocks or Obsidian Platforms that hold up to it. Along the path, place:
- Campfires about every 50 blocks, for passive life regeneration while you run.
- Heart Lanterns beside the Campfires, so the regeneration stacks.
- Sunflowers at intervals, for a movement speed bonus.
If you'd rather not sprint, a Mechanical Minecart on a rail gives you steady speed. A track offers less freedom to jump, so you'll need to dodge with more care.
Choose a Class Setup That Can Handle the Wall
Every class can beat the Wall of Flesh, so start with the class you already enjoy. The table lists armor and weapons that work for each one, and the paragraphs after it explain the trade-offs.
| Class | Armor | Weapon options |
|---|---|---|
| Melee | Molten Armor | Night's Edge; Cascade |
| Ranged | Necro Armor | Hellwing Bow with Wooden Arrows; Molten Fury with Jester's Arrows; Phoenix Blaster; Minishark with Meteor Shot |
| Mage | Meteor Armor or Jungle Armor | Space Gun; Demon Scythe; Water Bolt; Book of Skulls; Bee Gun |
| Summoner | Bee Armor or Obsidian Armor | Imp Staff; Vampire Frog Staff; Snapthorn or Spinal Tap whip |
Melee means standing close to the Wall. Night's Edge helps because its extended reach and multi-hit swings can land on the Wall and the Hungry, but close range also puts you next to the Mouth, whose contact damage is heavy. One bad step can cost you a lot of health.
Ranged keeps you farther from the Mouth, which makes it the calmer choice for many players. Minishark with Meteor Shot is a steady option for firing while you run, and the Hellwing Bow fires piercing shots that can hit more than one part of the Wall.
Mage setups rely on Meteor Armor, which makes the Space Gun cost no mana, so you can keep firing without managing mana. Demon Scythe pierces every part of the Wall, and Water Bolt's shots can bounce off the Underworld ceiling for extra hits.
Summoners need their minions and whips working while they run. Bee Armor adds a minion slot, and the Imp Staff shoots through blocks, so it keeps firing even when terrain is in the way.
Beenades work for every class. Each one bursts into homing bees that go after the Wall and the Hungry without you having to aim. You craft them from a Grenade and a Bee Wax at an Anvil, and bees vanish on lava contact, so throw them from the bridge rather than over open lava. If you haven't picked a class yet, which class suits new players is a good place to start.
Potions and Accessories for Speed and Healing
Speed and healing are what keep you on the bridge, so bring both. Most of these items either help you keep pace with the Wall or help you survive the hits you can't dodge.
- Hermes Boots: the basic speed accessory for keeping up with the Wall, and you can find them underground.
- Swiftness Potion: a speed boost that stacks with your boots.
- Ironskin Potion: extra defense, so you take less damage from everything.
- Regeneration Potion: steady healing after every hit.
- Healing Potions: quick healing when a hit leaves you low.
- Obsidian Shield: blocks knockback, so you can't be shoved into lava.
- Shield of Cthulhu: in Expert and Master, a dash that gives a quick burst of movement to dodge lasers and the Hungry.
- Obsidian Skin: protects you from lava, but treat it as a backup, since the bridge should keep you out of it.
How to Summon the Wall of Flesh in Terraria
Summoning takes one doll and some timing. Get your bridge, gear, and potions ready first, since the Wall starts moving as soon as it appears.
- Get a Guide Voodoo Doll. Voodoo Demons in the Underworld always drop one. Defeat them away from lava if you can, because if a Voodoo Demon dies over lava while your Guide is alive, its doll can fall in and summon the Wall before you're ready.
- Check that your Guide is alive. He's one of the town NPCs living in your houses. If he's dead, the doll only burns, so wait for him to respawn.
- Throw one doll into Underworld lava. Stand in the Underworld and throw the doll into the lava. The doll kills your Guide and summons the Wall.
- Run toward the opposite edge. The Wall spawns on one side of the world's center and sweeps toward the far edge. If it spawns left of center, it moves left to right, and if it spawns right of center, it moves right to left. Run toward the edge on the opposite side from the Wall, so it chases you from behind.
Throw one doll at a time. Dolls stack, so you can carry spares, but if several are destroyed by lava together, other town NPCs can die along with the Guide. Only one Wall can be active at once, so a second doll won't start another fight.

The Guide can also summon the Wall by dying in Underworld lava.
What the Wall's Attacks Do and How to Handle Them
Each part of the Wall works differently, so it helps to know what each one does before you start running.
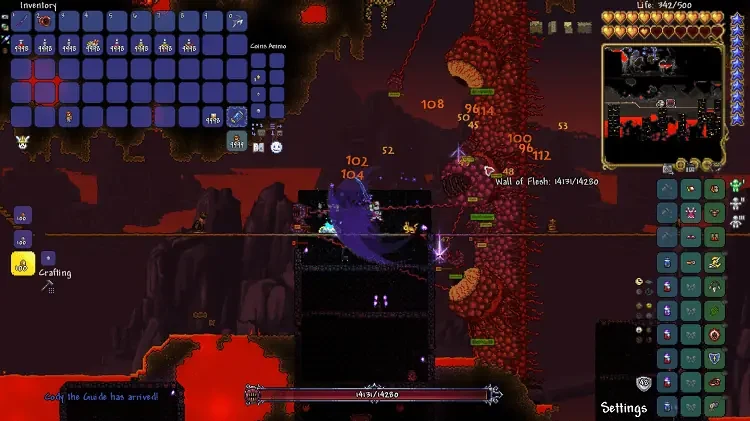
The eyes. Two eyes fire lasers, and the lasers come faster and hit harder as the Wall loses health. The eyes have less defense than the Mouth, so they're your main target. Both eyes share the Wall's health pool, so damage to them counts toward the boss.
The Mouth. The Mouth sits in the center, has the highest defense of any part of the Wall, and deals heavy contact damage. Keep away from it at all times. It also sends out the Hungry and launches Leeches at you.
The Hungry and Leeches. The Hungry are leech creatures attached to the Wall by tendrils, and some break loose to chase you on their own. Their defense climbs as the Wall's health drops, so clear them early. Leeches are small worms that burrow toward you and show up more often as the Wall weakens. Both drop Hearts, your main healing during the fight, so weapons that pierce through to the Hungry while you aim at the Wall are worth having.
The Tongue. If you run behind the Wall or try to leave the Underworld, The Tongue grabs you and drags you back. In Expert and Master, the pull keeps pace with the Wall, so you can't break free, and the Tongue deals 50 damage per second while it holds you. Obsidian Shield doesn't stop it, so the rule is simple: stay ahead of the Wall and never try to leave.
How the Fight Changes in Three Phases
The Wall speeds up as its health drops. It's faster in Expert and Master than in Classic, and late in the fight in those harder modes, it can outrun even Hermes Boots. The fight changes at two health marks, and each stage asks more of you.
Phase 1: full health. The Wall moves at its slowest, so this is your easiest window to pull ahead. Settle into a steady run, keep firing backward, and focus the eyes. Clear the first Hungry while you have room, so you have Hearts banked for later.
Phase 2: 50% health or less. The Wall speeds up, its lasers come more often, and more Hungry and Leeches spawn. Drink a Swiftness Potion if one isn't already running. Switch to clearing the Hungry if they start piling up, and use Shield of Cthulhu dashes when you need distance.
Phase 3: 25% health or less. The Wall reaches top speed, and the lasers come in a dense barrage. This is the damage check, so use every potion and cooldown you have. If Hungry are still alive, ignore them, since at this point they soak up damage that should go to the Wall.
Keep attacking the whole time, because stopping to aim is how the Wall catches you. If your weapon can't finish the Wall before you run out of bridge, switch to one with more damage. In Expert and Master, most runs end in the final phase, so leave as much bridge as you can for it.
Wall of Flesh Drops and Rewards
Every kill gives you the Pwnhammer, plus one weapon and one class emblem from set pools. Expert and Master add a Demon Heart, and Master adds a Relic.
- Pwnhammer: always drops.
- One weapon: Breaker Blade, Clockwork Assault Rifle, Laser Rifle, or Firecracker, 25% each.
- One class emblem: Warrior, Ranger, Sorcerer, or Summoner, 25% each. Each adds 15% damage for its class.
- Wall of Flesh Mask: 14.29% chance.
- Wall of Flesh Trophy: 10% chance.
- Demon Heart (Expert and Master): the Treasure Bag includes one if you haven't used one yet. Use it right away, since it permanently gives your character an extra accessory slot in Expert and Master worlds.
- Wall of Flesh Relic (Master): always drops in Master.
What Hardmode Changes After the Wall Falls
Hardmode starts the moment the Wall dies, and it can't be undone. Enemies become much stronger, and new ores, bosses, and biomes open up.
The world changes in a V-shape. Two diagonal bands cut through it, with one turning into Hallow and the other turning into whichever evil biome your world has, Corruption or Crimson. Both evil biomes spread aggressively in Hardmode, so dig narrow tunnels about three blocks wide to hold them back, and do it before the fight.
The Pwnhammer unlocks the new ores. Smash Demon or Crimson Altars with it to unlock the Hardmode ore tiers: Cobalt, Mythril, and Adamantite, or Palladium, Orichalcum, and Titanium. Smashing altars won't spread evil blocks elsewhere in the world. For the bosses you'll face next, see the full boss list, and all 29 biomes covers the areas, enemies, and resources you'll meet in Hardmode.