

To get The World [AU] in Stand Out, equip The World and use an Opal Roka on it. Each use has a 10% base chance to swap your Stand into the AU version, higher-grade fruit improves the odds, and a failed roll leaves The World unchanged. The AU is Diego Brando's Stand from another universe, and it trades some of The World's reach for traps and ranged shots.
| The World | The World [AU] | |
|---|---|---|
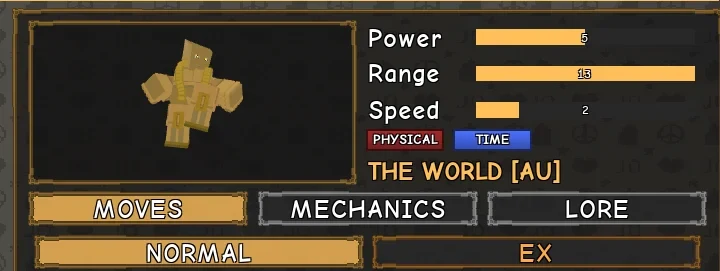
| Range | 18 | 13 |
| Power | 5 | 5 |
| Speed | 2 | 2 |
| Persistence | A (0.9x) | A (0.9x) |
| Fourth basic move | Head Slam | Arsenal |
| Unique move | Road Roller | Deadly Shots |
The AU's Range of 13 is shorter than The World's 18, so Arsenal and Deadly Shots do more of the work at a distance. The two forms share Barrage, Knife Throw, Hole Puncher and Time Stop, though their details differ.
How to Get an Opal Roka in Stand Out
Big Chop doesn't stock or buy Opal Roka, so growing one is your route to the fruit. There are two ways to do it.
The first is to grow Rokaka fruit and wait for a mutation. A grown Rokaka fruit has a 3% chance to mutate, and that figure covers any mutation, while the odds for Opal Roka specifically aren't listed. Each fruit rolls on its own, so every harvest gives you another try. To see what else can come out of the plant, check every Rokaka mutation in the game.
The second is to plant an Opal Roka Seed, if you already have one:
- Fill a pot with dirt. Seeds only go into a dirt-filled pot.
- Select the Opal Roka Seed and interact with the pot to plant it. The fruit's grade starts from the seed's quality, so plant your best seed first if you have more than one.
- Wait for the plant to mature, then harvest it. A finished plant gives you 1 to 3 Opal Roka.
Harvested fruit can also return a seed. Each fruit has a 35% chance to give back a seed that matches its type and grade, so you can keep planting. For the full list of gardening items and where to get them, see every gardening item in the game.
How to Swap The World Into The World [AU] With an Opal Roka
Once you have the fruit, the swap takes three steps:
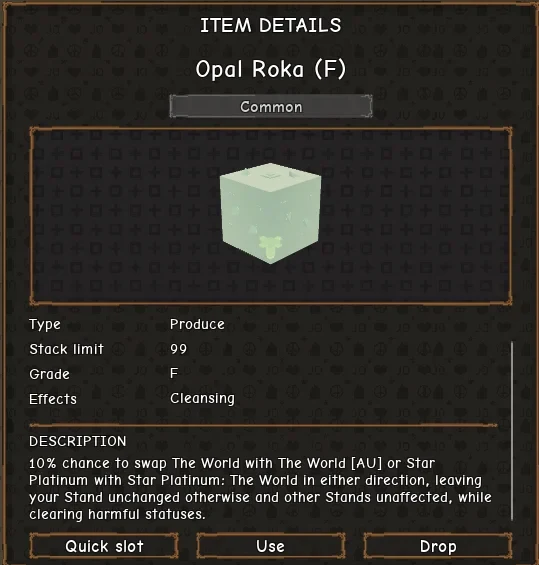
- Equip The World. The fruit only swaps this pair, so your other Stands aren't affected.
- Eat the Opal Roka. A packaged serving in a Jar or as a splash potion works the same way.
- Check the result. The roll has a 10% base chance to turn The World into The World [AU], and higher grades raise that chance. If it misses, your Stand stays as The World, but harmful statuses are cleared either way.
The swap works both ways, so another successful Opal Roka roll can turn The World [AU] back into The World. Since a successful roll changes your Stand, only use the fruit when you're ready to play the AU's kit.
The AU isn't in the Arrow roll table, so pulling Arrows won't get it. If you still need the regular Stand, the Arrow and boss routes for The World cover it.
The Basic Moves of The World [AU] and Their Cooldowns
Three of the AU's four basic moves carry over from The World, and each has its own cooldown:
- Barrage (23-second base cooldown): A rapid flurry of punches for close range. If you get stunned, you can use it as an evasive move for 1 EX bar.
- Knife Throw (25-second base cooldown): Two volleys of knives toward your cursor. The aim follows through the wind-up and between volleys, even when your Stand isn't out. Hold it during Time Stop to trigger its variant.
- Hole Puncher (30-second base cooldown): A time-skip punch that breaks through an opponent's guard. It works best as part of a block string, when you need to smash through a block.
Barrage and Hole Puncher are your melee tools, and Knife Throw covers the middle distance. Knife Throw's damage is strong enough to make it a reliable option when enemies stay a few steps away.
How to Use Arsenal and Deadly Shots at a Distance
Arsenal replaces Head Slam, and it works two ways. Tap it to step back and throw firecrackers. They burst into a blinding flash, burn enemies caught in range, and can set off gasoline. Hold it with your Stand out and The World [AU] throws barbed wire instead, which binds an enemy in front of it or lies on the ground as a tripwire for anyone who walks into it.
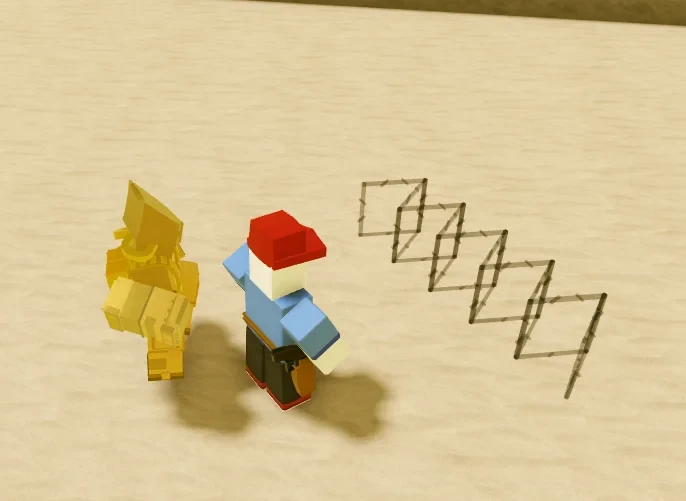
Use the tap version to open up an opponent, and the barbed wire in neutral to pin down someone trying to close in. If holding a button for a move is new to you, the Stand Out beginner controls cover the basics.
Deadly Shots replaces Road Roller and is the AU's ranged option. Tap it to draw your revolver for 1 EX bar and fire one heavy round at your cursor, which has a 7-second base cooldown. It works well against an opponent walking toward you, since the shot can send them flying. After the round lands, tap the move again with your Stand out and The World smacks the target down, at the cost of another EX bar and a 26-second cooldown.
Deadly Shots' damage scales 40% with Strength and 60% with Ability, so it rewards putting some points into Ability.
How to Use Time Stop and the Rest of the EX Kit
Time Stop is the AU's burst tool. The held version costs 4 EX bars and has a 22-second base cooldown. It freezes time so you can unleash damage on the frozen opponent, and its duration rises with Ability. At 100 Ability, the base duration doubles.
Save your EX bars for the frozen window, since that's where the AU does most of its burst damage. If you need the freeze to start right away, Quick Time Stop has no startup, but it cuts the duration in half.
The rest of the EX kit is Tandem Flank, which costs 2 EX bars for a combined barrage from both sides and has a 45-second cooldown. Stand Jump costs 1 EX bar, launches you high into the air, and has a 2-second cooldown.