How to get Speed fast in Break and Steal an Egg
Speed matters twice in Break and Steal an Egg. It helps you reach an egg at the zone gate, then gives you a better chance of getting the animal back to your base before the guardian catches you. The practical farming loop is to check for a live Free Rewards claim, train in the Safe Zone, complete a delivery you can repeat safely, collect any reward shown in the Index, and spend the Cash on the upgrade that fixes your current bottleneck.
Breaking an egg is only the middle of the run. You need to take the animal, escape with it, and place it in the Pen for the run to create Cash and collection progress. Use that result to fund a Trail or more training, then test the next zone instead of pushing into a gate you can barely reach.
Claim the free Speed reward before you start grinding
If your server shows a Free Rewards claim, take it before spending Cash on training. Like and favorite the experience, return to the Safe Zone, and look for the Free Rewards area to the right of the Trails Shop. Press Claim only when the live prompt is visible, then check that your Speed value changed by the amount shown in the client.
The reward has been reported as +10K Speed, but the amount can change or the prompt may be absent. Use the value your server displays. If you do not see the prompt, skip this step and start the repeatable route below.
Complete a safe egg run in Break and Steal an Egg
Read the Speed value at the nearest zone entrance before you spend Cash or leave the base. Choose the safest zone whose live gate you can clear and whose return route you can finish. Then complete the run in this order:
- Equip your Pickaxe and break an egg in the chosen zone.
- Take the animal that hatches instead of leaving it behind.
- Follow your return route while avoiding the guardian. Speed helps, but a route you cannot repeat safely is still a problem.
- Bring the animal back to the base and place it in the Pen.
A run is complete when the animal reaches the base and is placed in the Pen. Breaking an egg alone does not create the Cash or Index progress that pays for the next part of the loop.
Start with Forest, then move only after reliable deliveries
Early guides report these Speed checkpoints:
| Zone | Reported Speed checkpoint |
|---|---|
| Forest | 5 |
| Desert | 1,000 |
| Snowy | 50,000 |
Treat the table as early in-game guidance, not a permanent full zone list. Check the live gate at the entrance before you commit to a run, and leave yourself a buffer above the listed value when the return path is difficult. Move to the next checkpoint only after you can bring animals back reliably.
Use the Index to turn egg runs into Speed progress
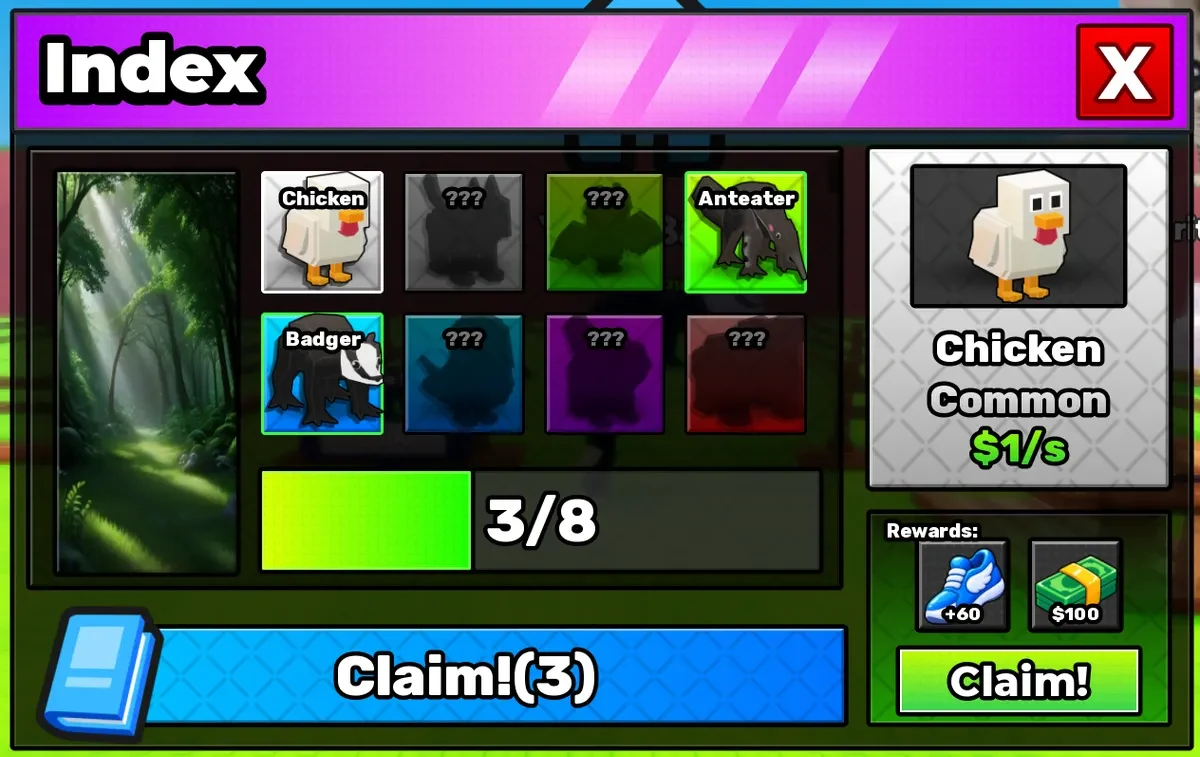
After you deliver an animal, reopen the Index and check the entry you just added. If the live interface shows a Speed or Cash reward, claim it. A new collection entry can also tell you that the run produced progress even when the Index does not show a reward button.
Do not budget around a fixed reward amount. Index reward controls can vary, so count the reward only when the live entry displays it. If you see collection progress without a claimable reward, keep the animal and return to the next safe egg run instead of assuming a Speed payout is guaranteed.
Buy and equip a Trail before longer training sessions
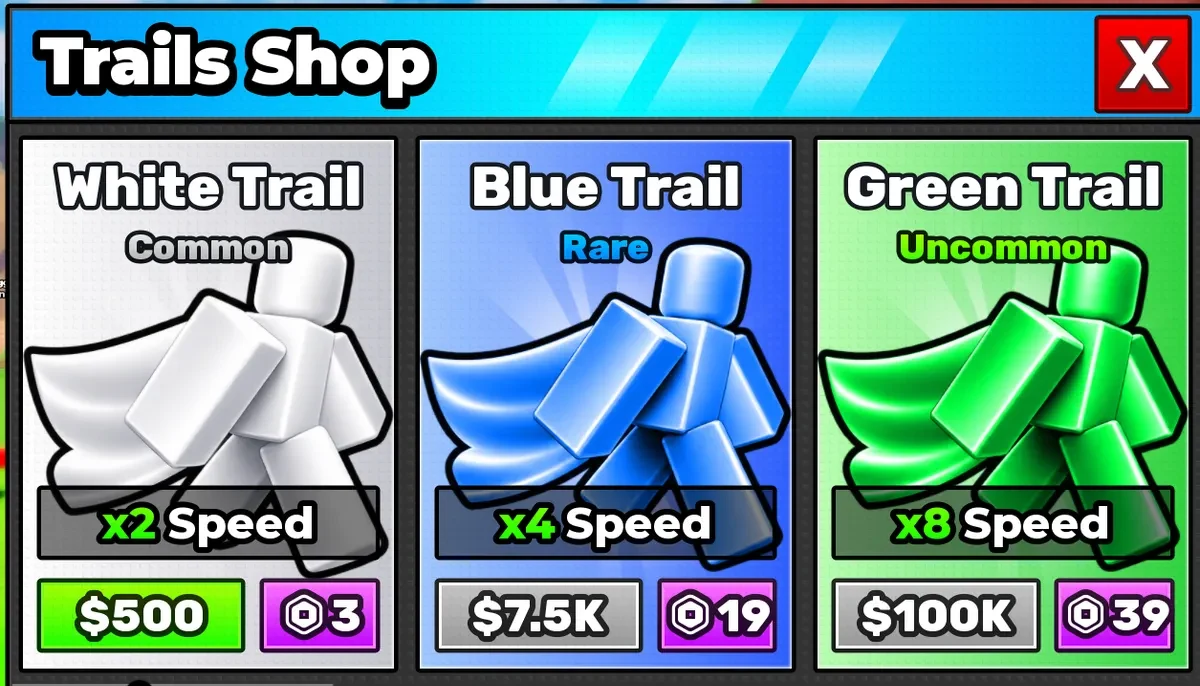
Delivered animals give you the Cash used for upgrades. In the Safe Zone, open the Trails Shop and compare the live cards. Buy the highest affordable tier that fits your current Cash, but do not treat one Trail as the right choice for every run. You can use the Break and Steal an Egg Trails reference when you want to compare the full set.
One reported shop example lists White Trail at $500 with a 2x boost. Treat both values as live values and compare the card in your server before paying. After buying any Trail, open the Trail interface and equip it manually. Buying it alone does not activate the multiplier for your next training session. Confirm that it is equipped, then return to the Treadmill.
Train on the Treadmill and aim for the next zone gate
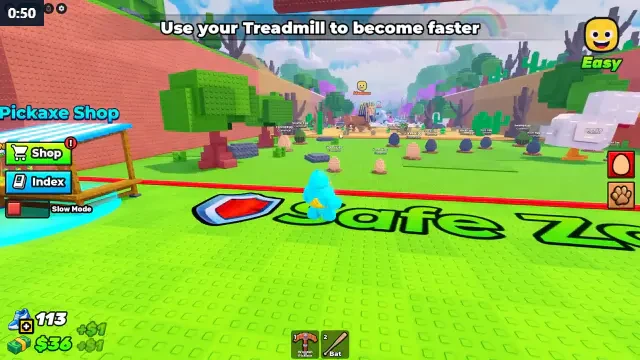
The Treadmill is in front of your base inside the Safe Zone. Stand on it with the Trail equipped and train until your live Speed value is ready for the next zone checkpoint. Use a Treadmill upgrade only when the price shown in your game fits the Cash you have left.
There is no useful fixed training time to plan around. Compare your counter with the live zone gate, then test a full delivery. If you can reach the egg but lose the animal on the way back, the higher counter has not solved the real bottleneck. Repeat the safer zone, train more, or change your route before pushing deeper.
Should you buy Speed, a Trail, or a Pickaxe next?
Use the symptom that stops the run to choose your next purchase:
| What is slowing the run? | Prioritize | Why it helps |
|---|---|---|
| You cannot enter the target zone or reach its egg reliably | Speed or Treadmill training | A higher Speed value helps you meet the gate and cover the trip faster. |
| Breaking the egg takes too long | Pickaxe | Pickaxe power addresses the time spent opening the egg, so the escape starts sooner. |
| You reach the egg but lose the animal on the return | A safer zone or a practiced return route; add Speed if movement is the problem | A route change can fix a bad escape path when more Speed alone will not. |
| You have Cash, but training gains are too low | Trail, then manual equipping | A Trail multiplier is useful for later Treadmill training only after the Trail is equipped. |
For the item-by-item option, see the Break and Steal an Egg Pickaxes reference. The right order depends on what fails first, so a Trail is a training upgrade, not an automatic replacement for Pickaxe power or route practice.
Repeat the last zone that gives you safe deliveries, bank the Cash from the Pen, check the Index for any live reward, and train toward one checkpoint at a time. That loop keeps Speed, Cash, and collection progress moving together while showing you when a Pickaxe or safer route matters more than another Speed upgrade.