
You get D4C in [D4C] A Bizarre Run with a Stand Arrow. Select an empty Stand slot, use the Arrow, and it gives you a random Stand, so D4C is a chance rather than a guaranteed result. The game is a Roblox title where players fight and race using Stands, which are powers equipped in slots.
| Move | What It Does | Key Detail |
|---|---|---|
| Clone | Creates clones you use to control a fight | Clones disappear after two M1 combos, where M1 is your basic attack |
| Counter | Sets up a counter | You must stay still during the counter |
| Dimension Warp | Creates a warped dimension | Grants hyperarmor while it's active |
| Flag Slam | Ends with a finishing impact | Ragdolls the target for 1 second, or 1.5 seconds when enhanced |
Each of these moves has a limit or a timer. Knowing those limits is what makes D4C effective in player-versus-player fights.
How to Get D4C With a Stand Arrow
Stand Arrows come from race finishes, race pickups, and crafting. Crafting is the route you control most, because five fragments always make one Arrow. To craft and use one:
- Collect five Stand Arrow Fragments.
- Open the Stands menu and switch to Crafting.
- Craft one Stand Arrow. It goes into your inventory.
- Select an empty Stand slot.
- Use the Stand Arrow from your inventory. It's used up, and a random Stand appears in the slot you selected.
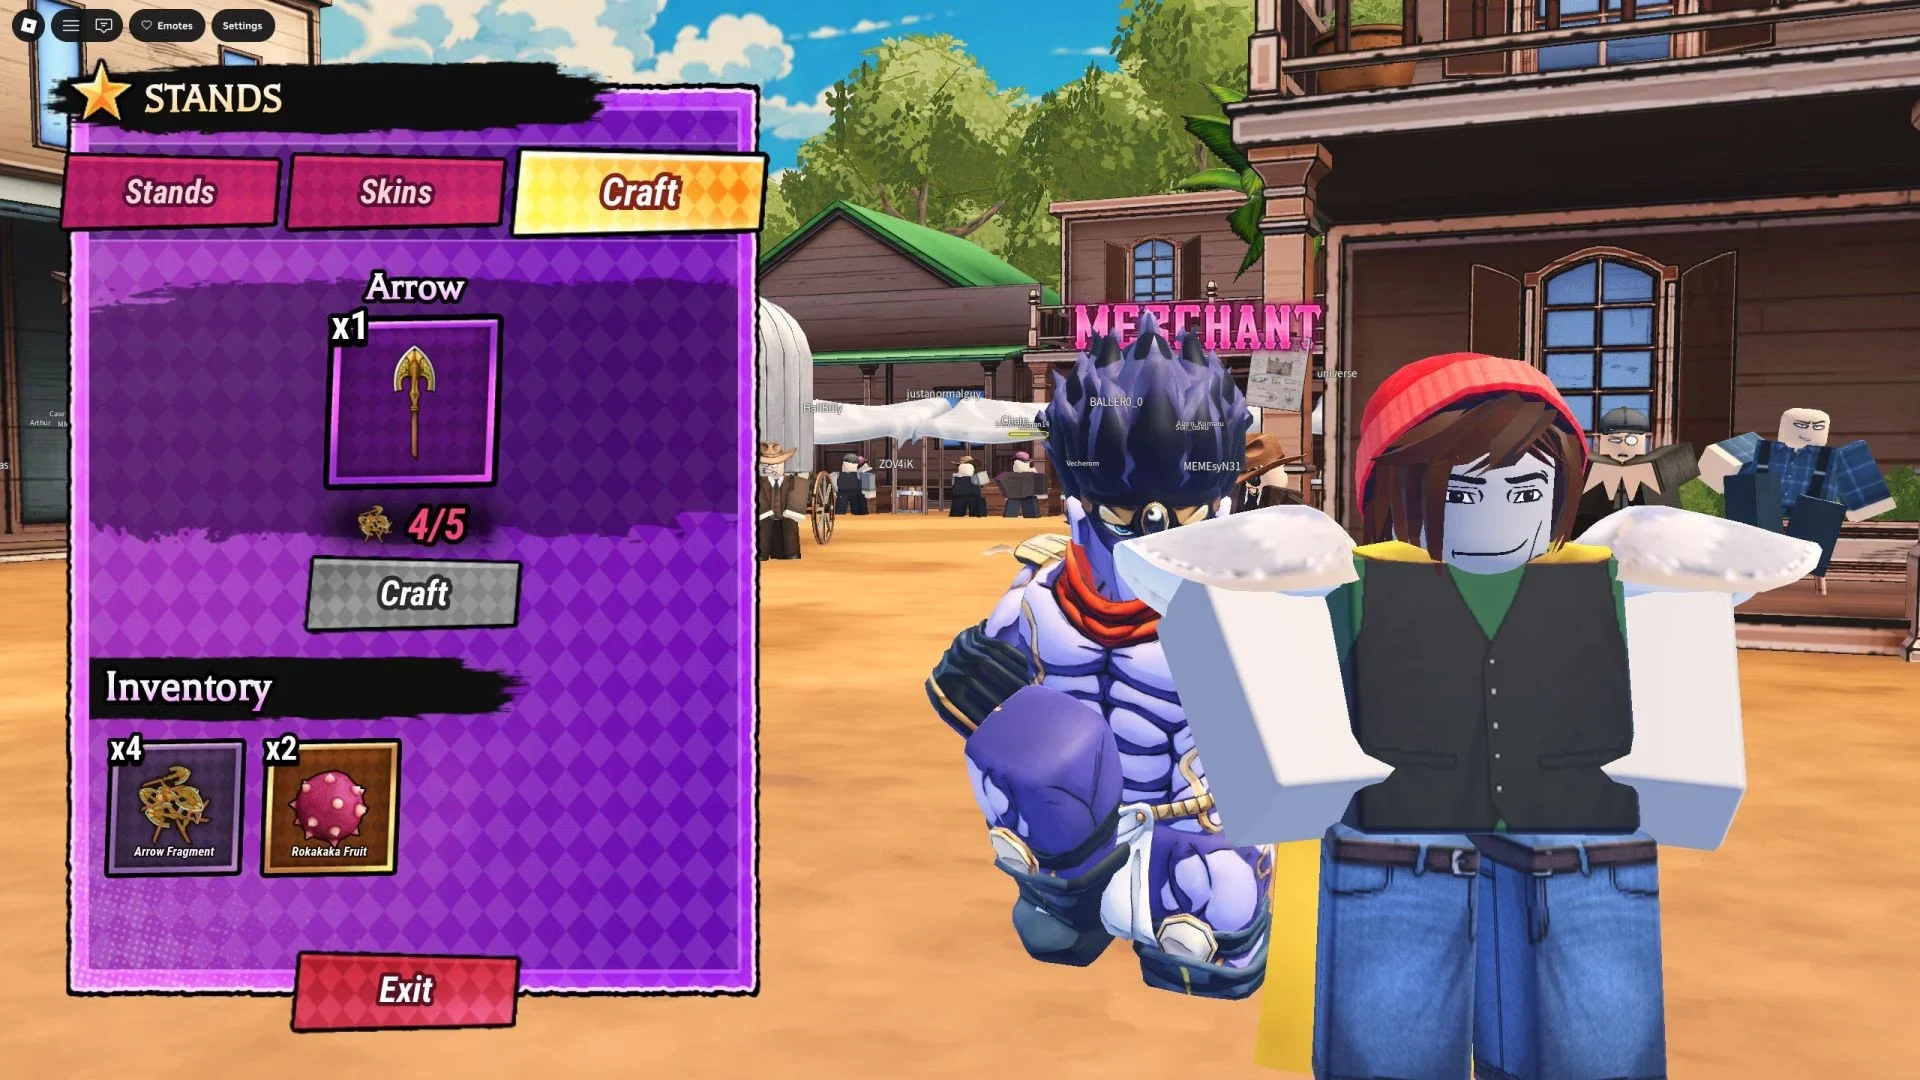
The empty slot matters most in this process. The Arrow's result lands in whichever slot you select, so an empty one keeps your existing Stands where they are. Because the result is random, D4C is one possible outcome rather than a set one, so treat each Arrow as its own roll.
Fighting With D4C in PvP Matches
D4C is one of the strongest Stands for player-versus-player fights, and its kit is built around control. Clones, the counter, and Dimension Warp each change how an exchange plays out, so the key is knowing each move's limit.
Clones are short-lived. They disappear after two M1 combos. Don't plan a fight around clones that stay out for the whole exchange.
The counter has one firm requirement: you must stay still during it. Save it for moments when standing still is safe, and don't move while you're waiting on it.
Dimension Warp is the move to use when you need your sequence to keep going. It grants hyperarmor, which means hits don't interrupt you while the warp is active. That's resistance to interruption, not protection from damage, so expect to take hits while it's up. The dimension also turns purple and outlines the characters inside it, which makes it easy to see who's caught.
Flag Slam ends with an impact that ragdolls the target for 1 second, or 1.5 seconds when enhanced. That window is short, so plan your follow-up before the slam lands. The two moves fit together well: Dimension Warp keeps you from being interrupted while you set up, and the slam gives you a brief opening to act.
Dimension Warp Limits and the Ultimate Refund
Casting another move inside the dimension doesn't chain an extra warp, so you can't string warps together back to back. Treat each warp as its own window and choose the move you want inside it.
The ultimate is a gamble when it misses. A missed ultimate returns 50% of the Awakening bar, so half of the bar is lost. Save the ultimate for a clear opening rather than throwing it into a crowded fight.