
The GTA 6 HUD is the set of on-screen readouts that sit over the game, showing your health and stamina, your wanted level, the map, your weapon and your money. Each part belongs to its own settings group, so you can keep a meter on screen, set the minimap to appear only when you need it, or hide one row without touching the rest. All of it is changed from Pause > Settings > UI.
| HUD element | What it shows | How it's set |
|---|---|---|
| Health, stamina and Focus | Your three vitals. Focus appears as an eye icon | Player Vitals |
| Wanted stars | How wanted you are, with six stars in the top right | Separate setting |
| Heat Indicators | What police have recognized about you | Separate setting |
| Minimap and compass | Your surroundings and direction | Navigation: On, Dynamic or Off |
| GPS route and turn indicators | Where to go next | Navigation: GPS Route and GPS Turn Indicators |
| Weapon and ammo | Your equipped weapon and its ammo | Weapon Preview and Ammo, separate settings |
| Money | Your cash | Player & Vehicle Status |
| Vehicle name and status | The vehicle you're in | Player & Vehicle Status |
Where to Change GTA 6 HUD Settings
Every HUD element has its own switch, and they all sit in one menu. To reach them:
- Open the Pause Menu and select Settings.
- Open the UI category.
- Choose the group that matches the element you want to change.
The UI category is split into Scaling & Readability, Subtitles & Captions, Navigation, Reticle, Combat, HUD Notifications, Progress Notifications, Player & Vehicle Status, Prompt, Activities and Units of Measurement. The group names show what each one controls. For the HUD, Navigation and Player & Vehicle Status hold most of the settings, so those are the two to learn first.
Health, Stamina and Focus: The Player Vitals
The Player Vitals setting controls the three meters that show your condition: health, stamina and Focus. Focus is the third meter, and it appears as an eye icon beside the other two. Clicking both sticks (L3 + R3) activates it, and while it's on, it highlights targets such as mission packages and fish.
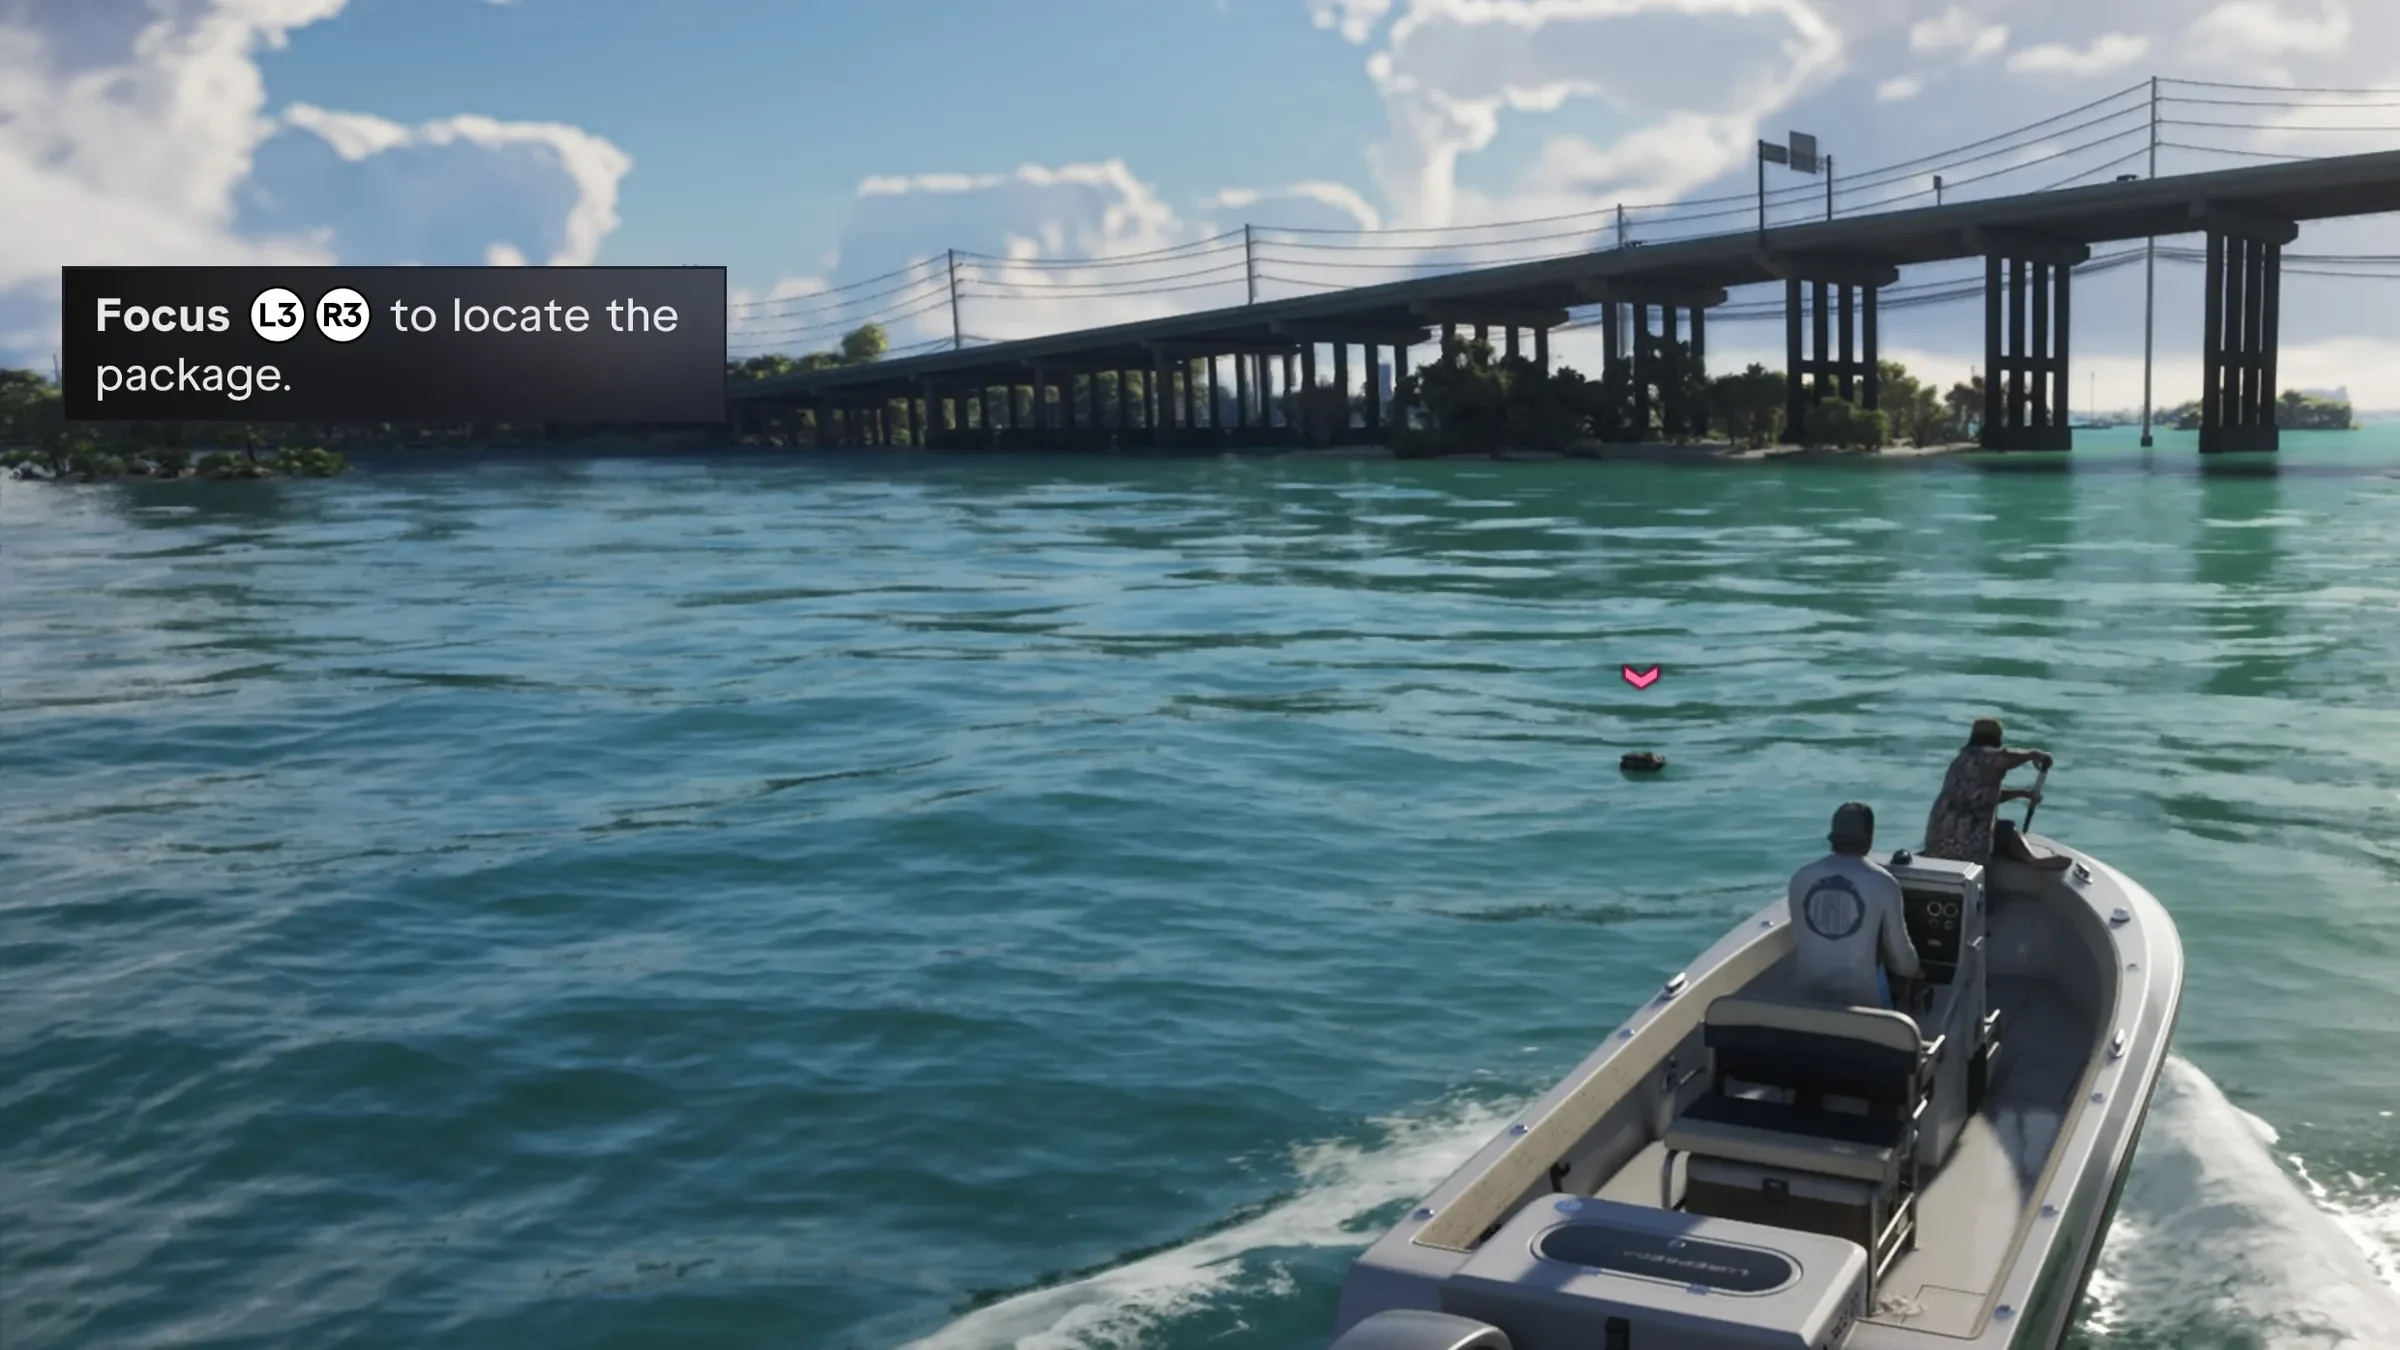
For what Focus does in a fight, see how Focus works. You can hide the vitals to keep the screen clear during quiet moments. Hold D-pad Down to bring them back when you need them.
The GTA 6 Wanted Stars and Heat Indicators
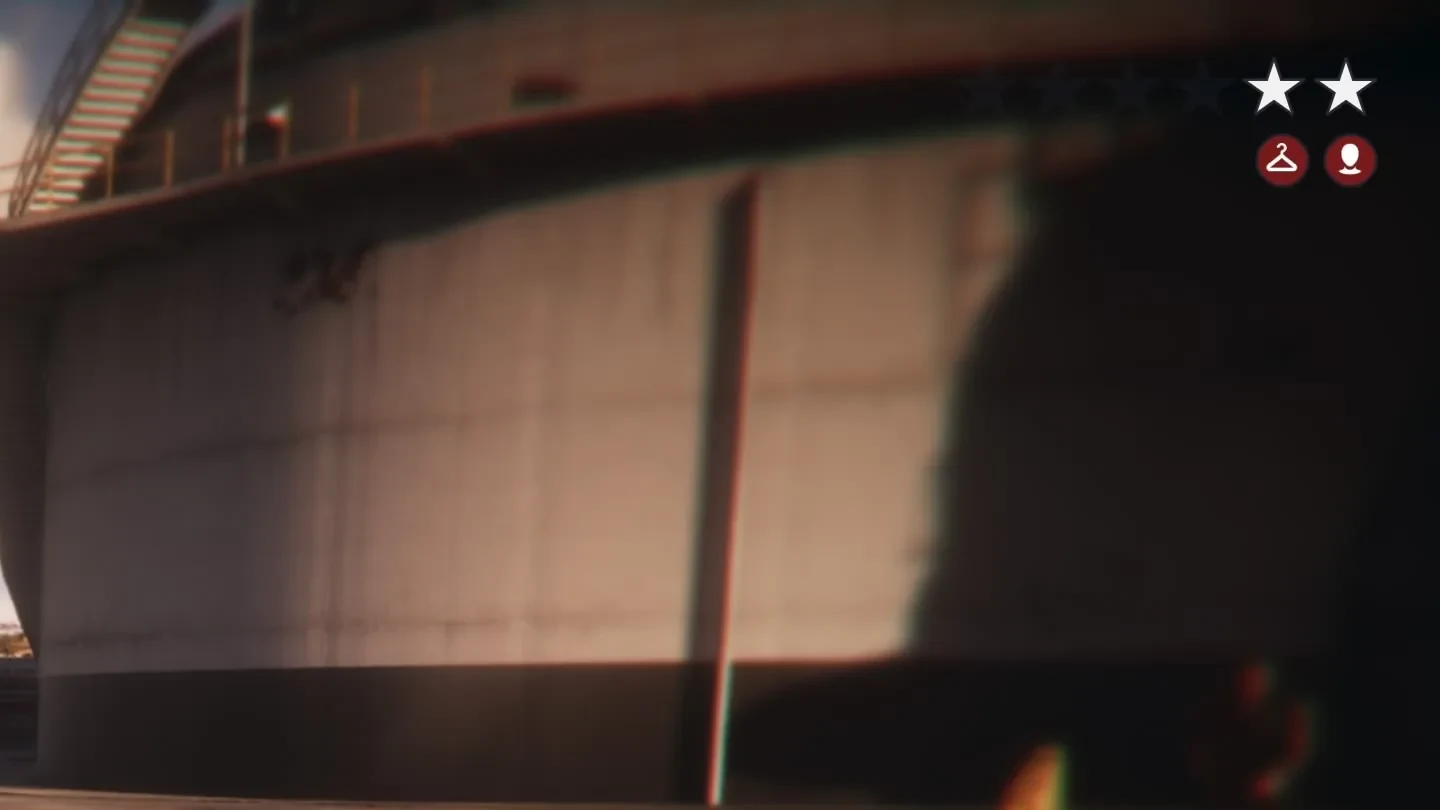
The wanted display sits in the top right and has six stars, which show how wanted you are. Its look changes to match the police state you're in, and the in-game Help section names six of these states:
- Cops Responding
- Suspect Unknown
- In Pursuit
- Visual Lost
- Heat
- Heat & Suspect Unknown
The Help section explains each one, so read it before you rely on any single icon.
Under the stars, red icons show what police have recognized. A clothes hanger means they know your outfit, and a head means they know your face. The Heat Indicators are a wider set of the same kind of information, covering your vehicle, a visible weapon, your partner, CCTV, and your appearance and outfit. Each one is a clue you can clear, and losing the cops and your wanted level covers how. The stars and Heat Indicators have separate settings, so you can hide them if you prefer a cleaner screen.
Minimap, Compass, GPS and Marker Settings
Navigation controls how the map and route appear. The Minimap and Compass each take On, Dynamic or Off. Dynamic shows the minimap when it's useful or when you ask for it, which keeps the screen clear during quiet stretches. On PS5, the touchpad opens the full map, and D-pad Down brings up the objective and minimap.
When you first start the game, setup offers three layouts: a dynamic minimap, a dynamic minimap with a compass, or an always-on minimap. You can change these later in the Navigation group. The rest of the group controls the route and the markers in the world:
- GPS Route: On or Off
- GPS Turn Indicators: On, Highways or Off
- In-World Markers: On, Off or Objectives
- Door Markers: On, Dynamic or Off
- Interaction Markers: On or Off
Weapon Preview, Ammo and the Loadout
Weapon Preview and Ammo are separate settings. Weapon Preview shows your equipped weapon on the HUD, and Ammo shows the ammunition for the weapon you're holding. Because they're split, you can keep one on screen and hide the other.
Weapons and items are picked from the loadout, which is a menu rather than a wheel. To use it:
- Hold L1 (LB on Xbox Series X|S) to open the loadout.
- Press R1 (RB) to switch between the Weapons and Items tabs.
Money, Vehicle Status and the iFruit Phone
Money and vehicle status sit in the Player & Vehicle Status group. Money has its own setting, and as with the vitals, holding D-pad Down brings it back if you've hidden it.
The phone works differently. It's an in-world device you open, not a permanent icon on the HUD. Press D-pad Up to open the iFruit phone. Its BuckMe app handles banking, and the home screen shows the time, the temperature and a Reminders widget. For more on the phone and Snapmatic, see how social media works in GTA 6.
What the GTA 6 Map Index Icons Mean
The map shows the activities, stores, missions and opportunities you've discovered. The Index on the side sorts them into categories, each with its own icon:
- Arrow, Personal: personal vehicles, residences, owned garages and ATMs
- Diary, Story: main and optional missions
- Cash sack, Robberies: discovered banks, vehicle drop-offs, stick-up opportunities and gang hideouts
- Weights, Activities: races, shooting ranges, golf courses, hunting and fishing spots, gyms and clubs
- Magnifying glass, Exploration: points of interest, optional quests, stunt and base jumps, and pawn-shop collectors
- Car, Vehicles: mod shops, Pay 'n' Sprays, gas stations, transport hubs, ferry terminals and garages
- Gun, Weapons: discovered Ammu-Nation locations
- Shirt, Style: clothing, tattoos, and hair and makeup locations
- Fork and knife, Food & Drink: bars, cafes, convenience stores, fast-food spots and liquor stores
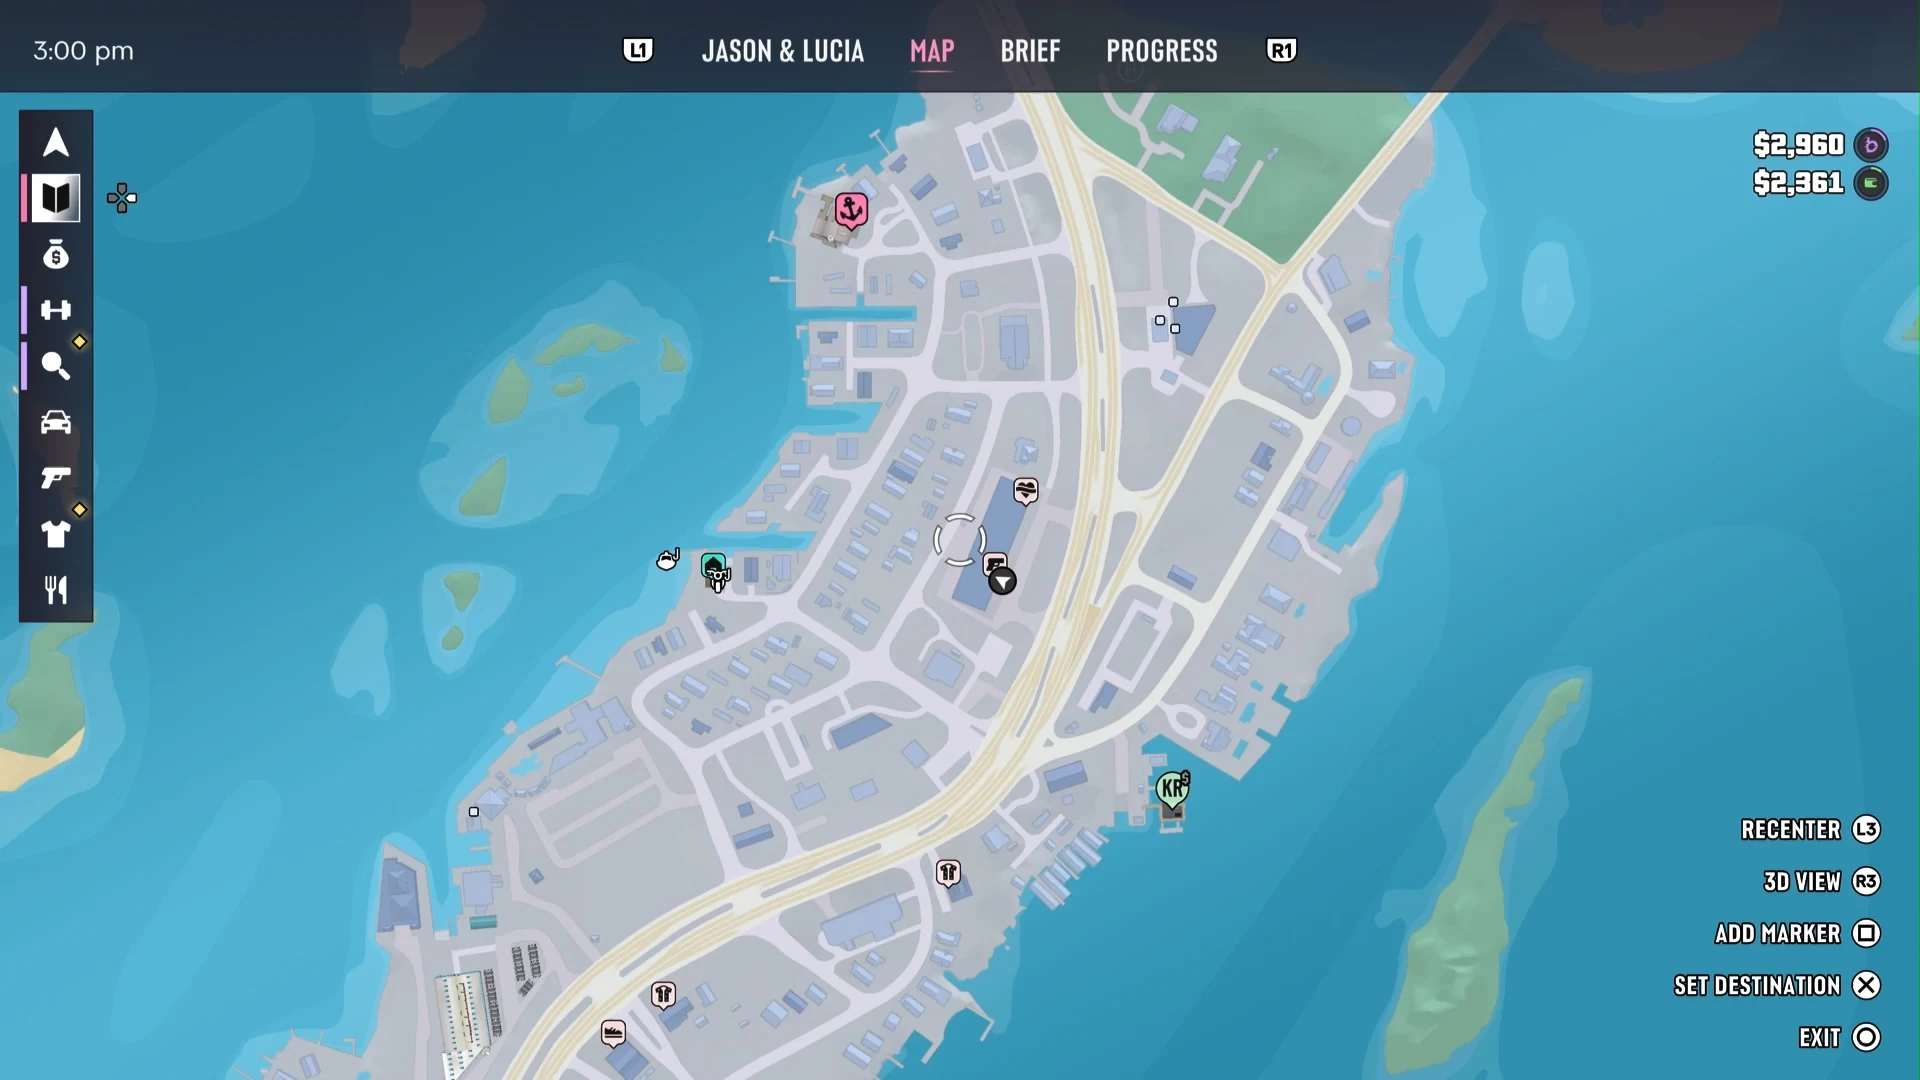
A new discovery is marked with an orange diamond in the Index, so you can spot what you've just found. For the full set of entries in the Diary category, see the full list of story missions. For the cash sack places, every robbery and how to unlock it covers the details.
The Index tells you which category a place belongs to, but it isn't a key for every symbol on the minimap. Individual mission givers, character markers and specific shop icons aren't covered by these categories, so don't assume a symbol means something the Index doesn't list.
Customizing Blips, Text and HUD Rows
The UI settings let you resize map and minimap blips and in-world markers, and adjust text size. You can also toggle individual HUD rows, and each notification type has its own switch, including phone notifications, street and area names, and threat indicators. There isn't one switch that hides the whole HUD, so a clean screen means turning off rows one at a time. For a clean screenshot, Photo Studio can hide the interface.
Keep Help Text on, especially early on. The game warns that turning off help text or objectives can make some parts harder to play.